This activity is used to type the input data into field or textbox in the webpage. It can be directly a string or a variable in string format.
Technical Reference
|
|
INPUT |
BrowserType: Gets auto filled, once the element is indicated on the web page using Robility Spy. Here the browser type will be displayed. |
|
BrowserVersion: Gets auto filled, once the element is indicated on the web page using Robility Spy. Indicates the version of the browser in use. |
||
|
ClearAndType: By default, the value is True. |
||
|
DelayAfter: It helps the user to add a delay to start the execution of the further activity. The format of the delay here is milliseconds. By default, it will be set to 300. When the option is left blank, no delay is considered. |
||
|
DelayBefore:It helps the user to add a delay to before the execution of the activities. The format of the delay here is milliseconds. By default, it will be set to 200. When the option is left blank, no delay is considered. |
||
|
DelayBetweenChar: It helps the user to add a delay between the characters. The format of the delay here is milliseconds. By default, it will be set to 100. When the option is left blank, no delay is considered. |
||
|
ExecuteBy: Gets auto filled, once the element is indicated on the web page using Robility Spy. This contains the set of attributes for the specific spied element. |
||
|
FramePath: Gets auto filled, once the element is indicated on the web page using Robility Spy. The frame path is auto filled only if the selected element has a frame ID in the webpage. |
||
|
InputString: Indicate the text to be entered in any field or textbox in a webpage. Here we can pass the values in two different ways. Text - We can enter the text directly within strings. |
||
|
SendType: We can choose the dropdown value based on what pattern the text must be entered in the field or textbox. Character: Choosing this will enter the content character by character. Paste: Choosing this will enter the content in copy paste pattern.
|
||
|
URL: Gets auto filled, once the element is indicated on the web page using Robility Spy. Indicates the URL in which this activity is performed. |
||
|
WaitForReady: Runs the activity once the webpage loading matches the wait for ready state. None – It will perform the activity functionality without checking the state of the browser. Interactive - The activity will be performed once the web element is found even if the webpage is still in loading state. Complete- The activity will proceed to the next step only if the web page is completely loaded. |
||
|
WaitTime: It helps the user to add a delay to start the execution of the further activity. The format of the delay here is milliseconds. By default, it will be set to 30000. When the option is left blank, no delay is considered. |
||
|
MISC |
Display Name: Displays the name of the activity. The activity name can be customized which will help in troubleshooting. |
|
|
SkipOnError: Specify the Boolean value as “True or False.” |
||
|
Version: It specifies the version of the web automation feature in use |
||
|
OUTPUT |
Result: It helps to view the execution state of the activity. It returns the values in Boolean format. |
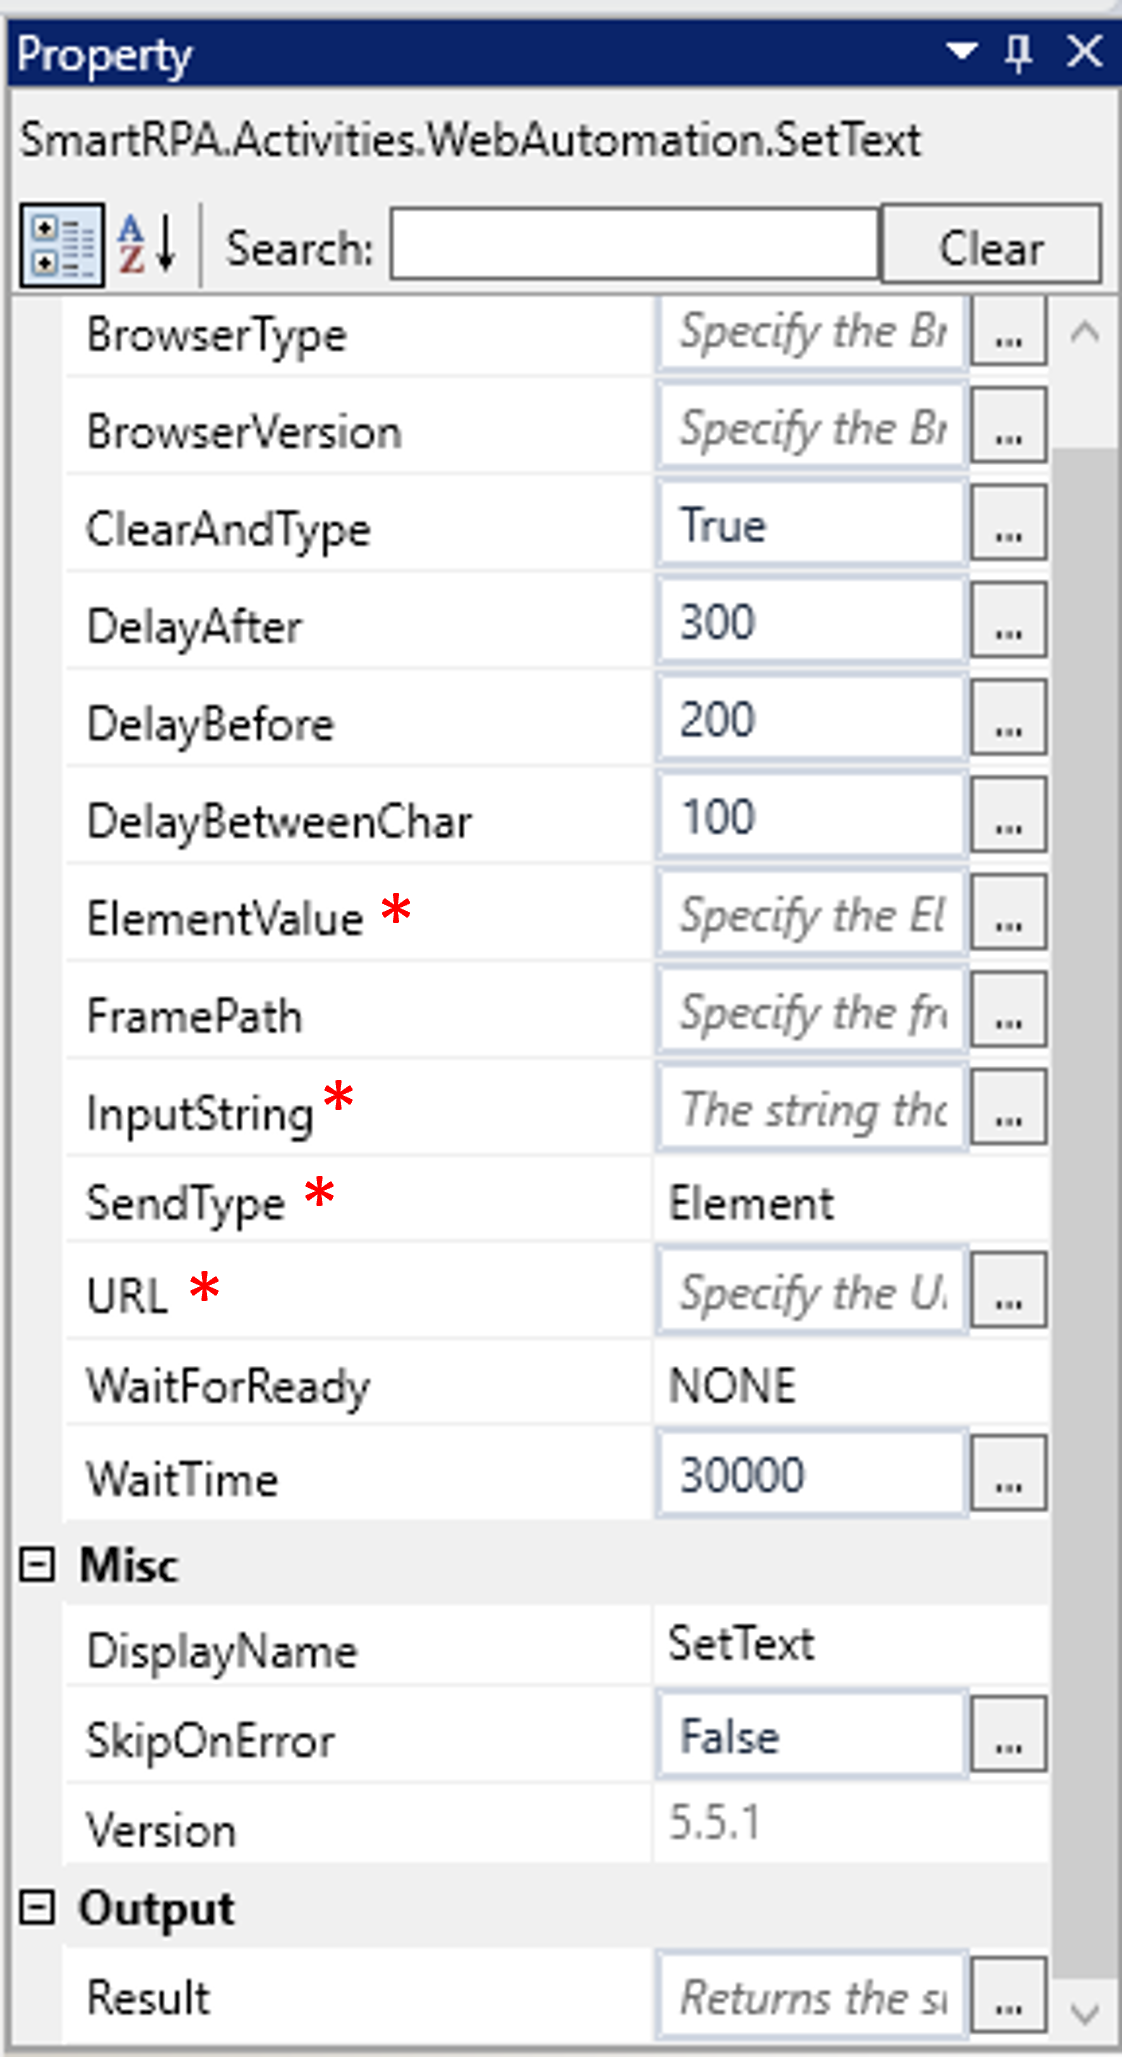
* Represents mandatory fields to execute the workflow.
Use Case
The following use case demonstrates how the WebAutomation feature works. The
Excel file contains a list of cities that will serve as an input to find the distance between
each pair of cities in kilometers and miles using the https://www.distancecalculator.net/
website. The resulting values for kilometers and miles will be updated in the same input
file under their respective columns.
Here, we have utilized the following activities to construct the workflow. Now, let's dive
into the steps.
Steps to build a workflow
1. Create a new solution named "DC."2. Drag and drop an "Open Browser" activity, and then double-click on the activity
to enter the URL as "https://www.distancecalculator.net/."
3. Place a "GetExcelObject" activity next to the "Open Browser" activity and select
the input file path containing the list of inputs.
a) Now, add a "ReadRanges" activity within the scope to read the data within
specific cell ranges.
b) Specify the Range. I have designated the range as "A2:B5," as the input
data begins from column "A2" and extends to row "B5." Mention the sheet name
as “Sheet1” where the data is available.
c) Create a DataTable variable to store the read data. In this case, the DataTable
property variable is named "RR."
Click here to know how to declare a variable.
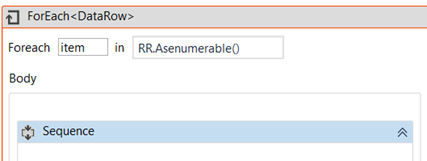
4. Next to the excel object drag and drop the “ForEach” activity to iterate and write
each value which has been extracted from the website as we need to update the
two values against each pair which is “Km” and “Miles”.
5. Enter the value as “RR.AsEnumerable()” as the input here will be “RR” in which
we stored the read variable over there and “. Asenumerable()” is used to convert
the datatable into sequence of rows for the input in For Each activity.
a) The RR.AsEnumerable() values has been assigned to the “Item.”
b) Select the “TypeArgument” as “System.Data.Datarow” as we are going to
read & write the values from row wise.
6. Drag and drop the “SetText” activity to the workflow where we need to set the
values that will be read and assigned to the “Item.”
a. Double-click on the SetText activity and then click on “Select Element.”
b. It will navigate to the page where we want to inspect the element. Here,
I have detected the “City distance from” text box, where we need to enter the
“From City.”
c. Once we have detected the element, the spy window will be automatically
populated. You can proceed with the default selected attribute value, or you
can adjust the attributes based on your preference. In this case, the attribute
value has not been changed and used the default value of “Tag.” Afterwards,
click on the “Save” button. Now, the identified element will be stored in the
activity.
d. Enter the “InputString” parameter as “Item(0).ToString()”, as I am reading the
input from “A2.” Therefore, the value starts from index “0”.
e. Place the "Delay 1S" activity right after the SetText activity. Alternatively, you
can manage the "WaitTime" within the SetText activity itself by adjusting the
values in the "DelayAfter" and "DelayBefore" fields. The default value will be
set in milliseconds.
g. Drag and drop the SetText activity after the Delay activity.
i. Double-click on the SetText activity and then click on “Select Element.”
ii. It will navigate to the page where we want to inspect the element. Here, I have
located the “City distance to” text box, where we need to enter the “ToCity.”
iii. Once we have located the element, the spy window will be automatically
populated.You can proceed with the default selected attribute value, or you can
adjust the attributes based on your preference. In this case, I have not changed the
attributes and using the default value of “Tag.” Afterward, click on the “Save” button.
Now, the identified element will be stored in the activity.
iv. Enter the “InputString” parameter as “Item(1).ToString()”, as I am reading
the input from “B2.” Therefore, the value starts from index “1.”
7. Drag and drop the "Delay 1S" activity next to the SetText activity.
8. Place the "Click" activity after the Delay activity. This activity is used to click on
the "Find" button in order to retrieve the distance between the cities.
a. Double click on the activity and click on “SelectElement.”
b. Go to the browser where you need to click on the element. Perform a spy
on the "Find" button. In this case,we have not made any changes to the attribute
values and proceeding with the default selected value.
9. Drag and drop the "Delay 1S" activity next to the “Click” activity.
10. Place the "GetText" activity after the "Delay" activity. Then, double-click on the
activity and select "SelectElement." Navigate to the browser where you need to
retrieve the value.
a. During this process, I have spied the Kilometer value and stored it in the
"GetText" activity as "Km" by declaring the variable under the "Text" property.
Click here to know how to declare a variable.
b. Include a "WriteLine" activity to view the stored value from the "GetText"
activity. Double-click on the activity and pass the value as "Km."
c. Drag and drop an additional "GetText" activity and position it next to the
"WriteLine" activity. Spy on the miles value and store it in the "GetText" activity as
"Miles" by declaring the variable under the "Text" property.
d. Add a "WriteLine" activity to display the stored value from the "GetText" activity.
Double-click on the activity and pass the value as "Miles."
11. Add “Delay1S” next to the “GetText” activity.
12. Position the "GetExcelObject" next to the "GetText" activity and select the input file
path that contains the list of inputs.
a. Drag and drop the "WriteCell" activity into the scope. Specify the cell value as
"C" +Counter.ToString, as the Kilometer header is located in the "C" column.
b. Transfer the stored value from "GetText" to the "WriteCell" activity and enter the
"InputString" value as "Km."
c. Indicate the sheet name as "Sheet1," where the data is available.
d. The purpose of utilizing a counter is to increment the values for the "WriteCell"
activity. To achieve this, include an "Assign" activity. Before that, declare a variable
named "Counter" and select the data type as "Int32." The reason for choosing the
integer data type is that we are incrementing the value, and specify the default value
as "2," considering the header as 1. Refer 13th point how to assign the counter increment
value in the assign activity.
e. Drag and drop the "WriteCell" activity into the scope. Specify the cell value as "D" +
Counter.ToString,as the miles header is located in the "D" column.
f. Transfer the stored value from "GetText" to the "WriteCell" activity and enter the
"InputString" value as "Miles"
13. Place the Assign activity next to the GetExcelObject scope and input the declared
variable, in this case,"Counter." Specify the "To" value as "Counter," and set the "Value"
as "Counter + 1".
14. Finally, drag and drop a close tab activity below this complete sequence. Double click on
it and enter the URL of the distance calculator webpage to be closed.