Error Handling
The Error Handling package comprises a set of activities to handle exceptions that occur in the workflow during execution.
TryCatch
The Try-Catch activity is a natural error handler, where you can handle the possible exceptions in a workflow with a different set of activities accommodating the Catch and block activity, ensuring that the process is not interrupted.
|
Activity Name |
Picture |
|
TryCatch |
|
TryCatch activity has three sections:
Try:
This is the section of the activity that holds the executional sequence. This comprises a series of tasks which are likely to throw up errors.
Catches:
- It can be used to handle the exceptions
- Exception type is required to be defined
- You are required to provide the sequence of actions to be performed to handle the occurred error.
Finally:
The activities listed in this section will be executed once the Try and Catch block activities have been executed regardless of whether an error has occurred. In this block we can also reset the values.
|
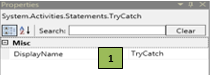
Figure 1.0
|
S.no |
Description |
|
1 |
Displays the action that the activity performs |
![]() Select the exception type as System.exception.
Select the exception type as System.exception.
Assume you want to view/save an image from the web browser.
![]() Activity: The activity can be used as an error handler with three separate blocks (Try, Catch and Finally)
Activity: The activity can be used as an error handler with three separate blocks (Try, Catch and Finally)
This activity is used when a process is likely to throw any system exception that is to be dealt with, in order to complete the workflow without interruptions.
Step 1 Open the SmartDesigner tool
Step 2 Open a new workflow
Step 3 Find the Error Handling grouping in the Toolbox, drag a TryCatch activity into the workflow
Step 4 Drag a Flowchart/ sequence activity and place it under the Try section.

Figure 1.1
Step 5 Drag an Open browser activity and connect it to the workflow.
- Go to the property section and fill in the details, enter the BrowserUniqueName as Google , the unique name is required to be the same for all correlated activities
- Select the Openbrowserbit activity based on your system configuration as 32 bit/64 bit
- Select the Openbrowserennum activity based on your requirement, in the following example, Internet Explorer is selected
- Enter the URL link under the URL field.
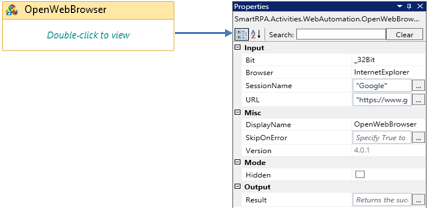
Figure 1.2
Step 6 Drag a SendTextData activity and connect the activity under the Openbrowser activity. The SendText activity is used to populate a field where the cursor is currently located with a value that has been assigned or hard-coded in a variable.
- The ClearBeforeType activity option clears the existing characters that are already present in the field
- The ClickBeforeType activity option enables the user to make the bot click in the indicated field before feeding the text
- The DelayBeforeActivity enables you to delay the trigger of the activity
- The DelayBetweenChar activity field controls the speed at which the characters are fed into the field.
- Select the SendType from the dropdown to enter the hardcoded value.
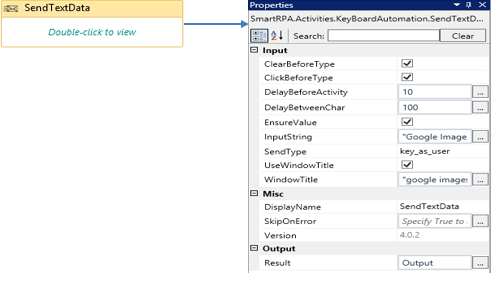
Figure 1.3
Step 7 Drag a ShortcutKeys activity and connect the activity under the SendText activity.
- Select Enter from otherkeys drop-down
- Select otherkeys checkbox.
Step 8 Drag a ClickEvent activity and connect under the Shortcutkeys activity.
- Double click the activity and click on the spy symbol to indicate the element on the screen
- Spy/indicate the element that is required to be clicked, select the XPath and click export to auto-fill the property details
- Enter the browseruniquename as Google.
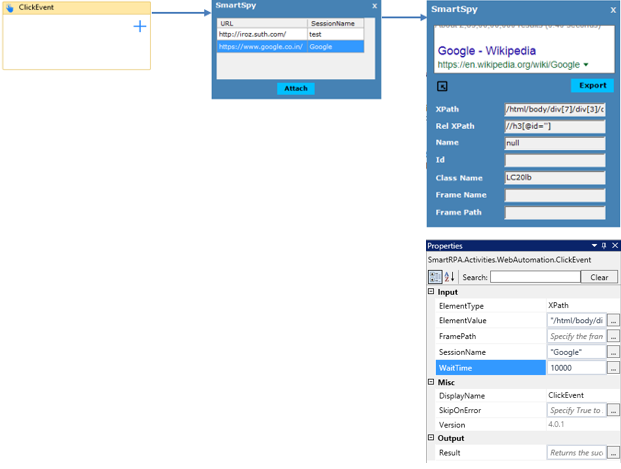
Figure 1.4
Step 9 Drag a Sequence activity and place it under the catch field.
Step 10 In the Catch block, select the exception message as System.IO.IO.Exception to handle the system exception that occurs in the Try block of the workflow.
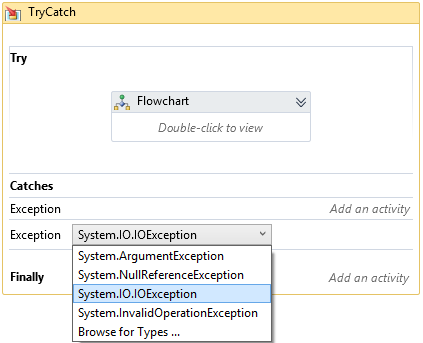
Figure 1.5
- Here, you can handle the exception by using an alternate solution or throw an Error message by using the Throw/Rethrow activities. For this scenario, Rethrow activity is used to throw the error messages.
Step 11 Drag a Rethrow activity and place it under the Catch field.
Step 12 In Finally section, you can add Close Window/Close Application based on your requirement.