When to use the Add Complete Transaction activity
When you want to create transaction during the run time this activity can be used. A wizard guides you to complete the activity designing.
Figure 1
|
Activity Name |
Picture |
|
AddCompleteTransaction |
|

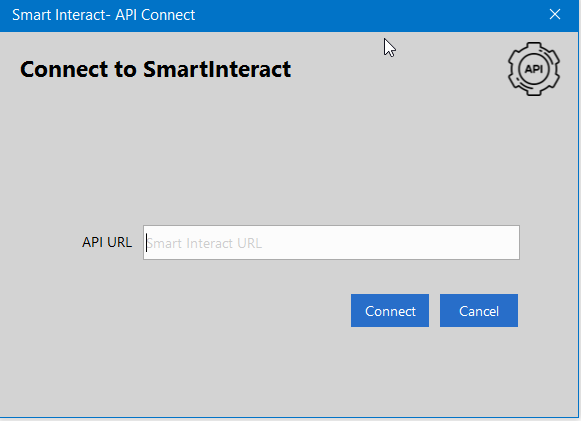
Drag and drop the add complete transaction into the flowchart, a wizard screen pops up as shown below,
Figure 2
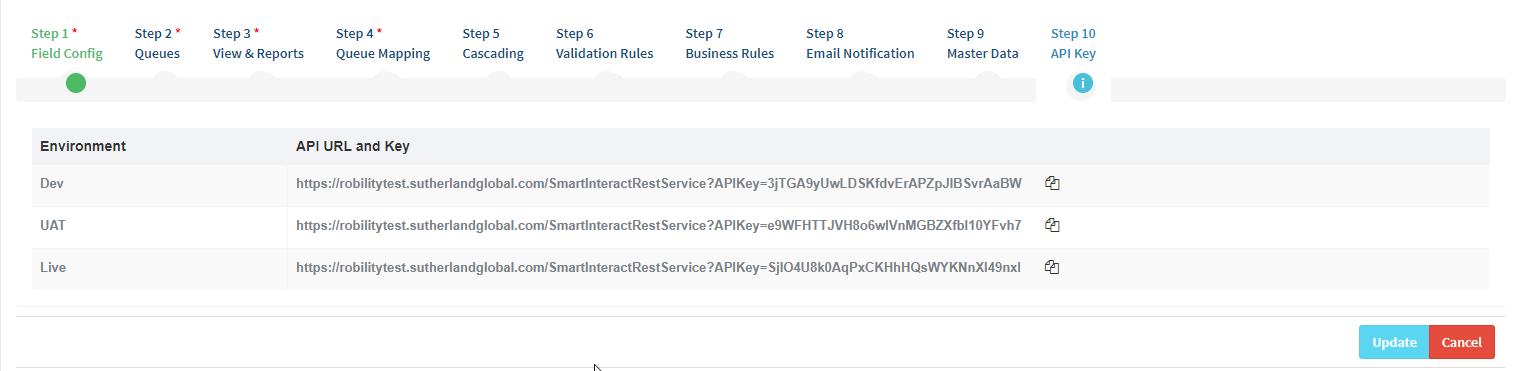
The unique API URL input shall be available in the project setup menu,
SmartInteractà ConfigurationàProject SetupàChoose the project from the dropdownàStep 10 API Key
Figure 3
URL key are environment specific, copy the appropriate key and paste it to the API URL field in the wizard.
Figure 4
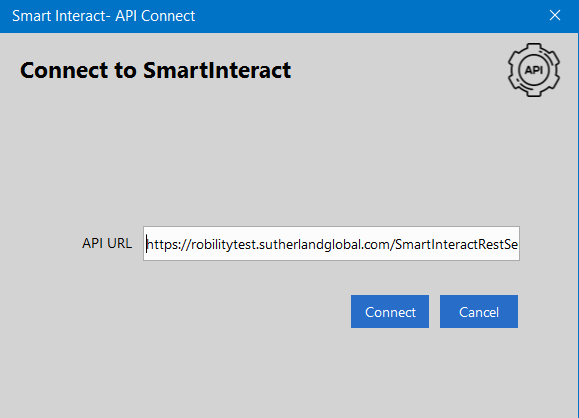
Click on the connect option.
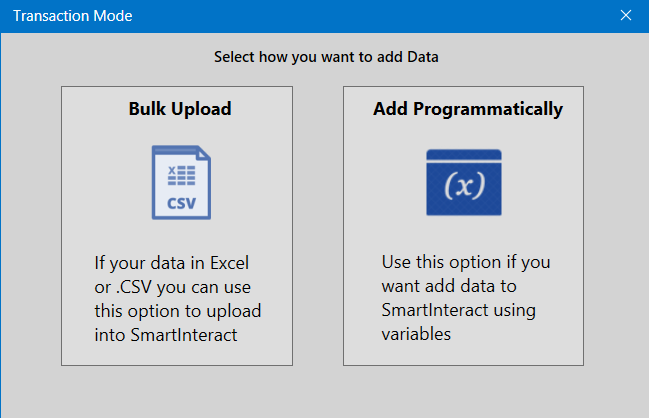
The activity holds the provision for the user to choose the transaction mode,
- Bulk upload
- Add Programmatically
Figure 5

Bulk Upload
Click on the bulk upload option to insert multiple transactions, which will re-direct you to choose the from and the target queue to which the transaction needs to be uploaded.
Figure 6
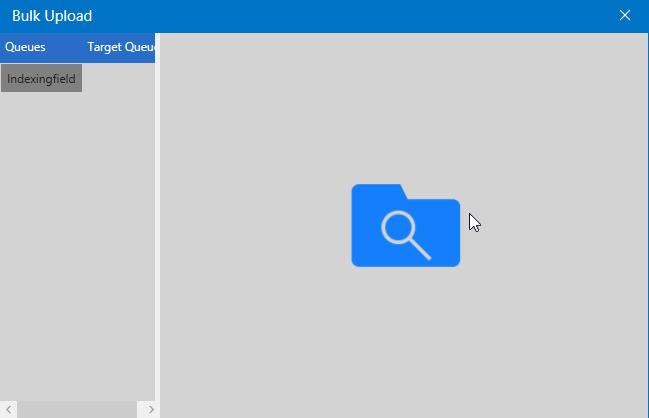
Figure 7
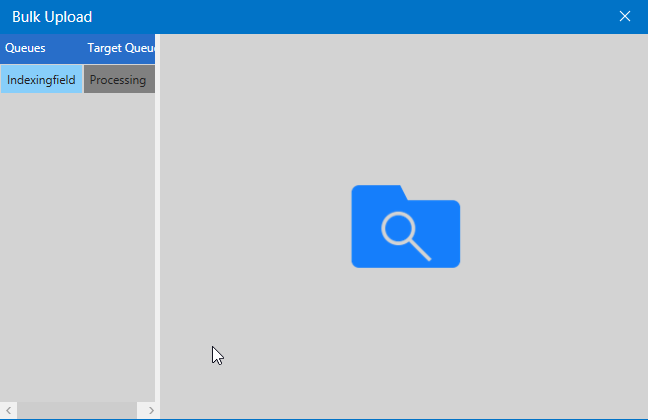
On selecting the from and target queue, click on the search option.
Figure 8

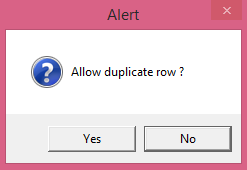
Browse and choose the template file that contains the transaction details.
A pop up appears for the user to allow or remove duplicate from the template.
Figure 9
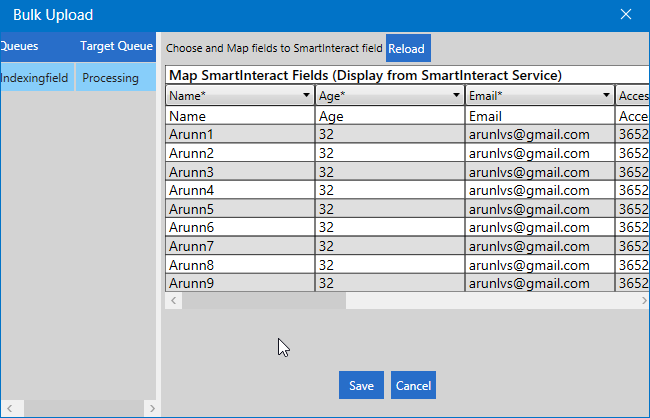
A grid is displayed with the template details to map fields configured for the project.
Figure 10
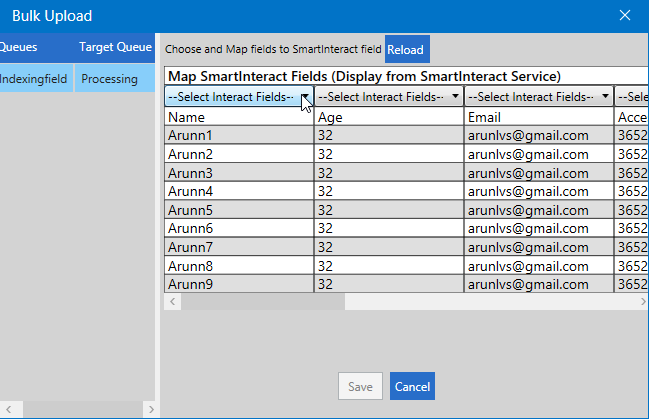
Map the fields against the column available in the template.
Figure 11
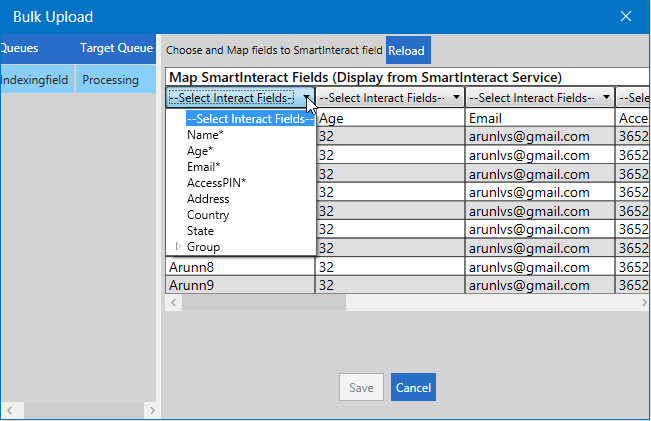
After mapping the fields click on the save option.
Figure 12
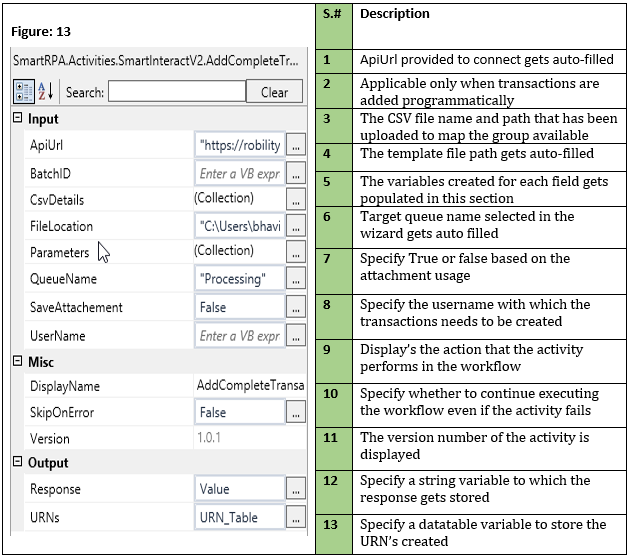
Technical Reference
Add Programmatically
1. Click on the add programmatically option to insert transaction.
Figure 14
2. Choose the from and target queue
Figure 15

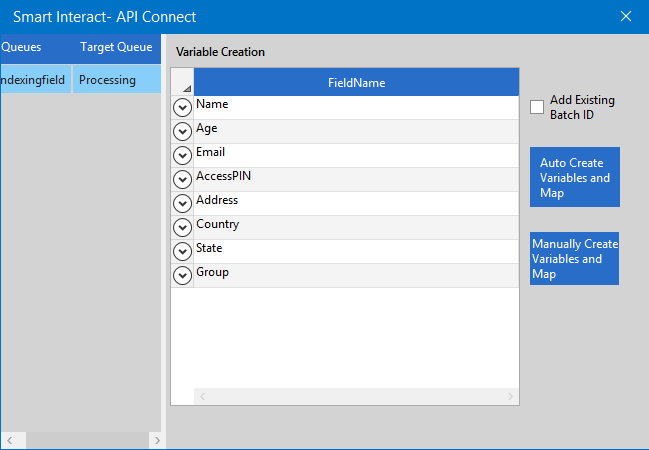
The next screen populates the fields configured for the project,
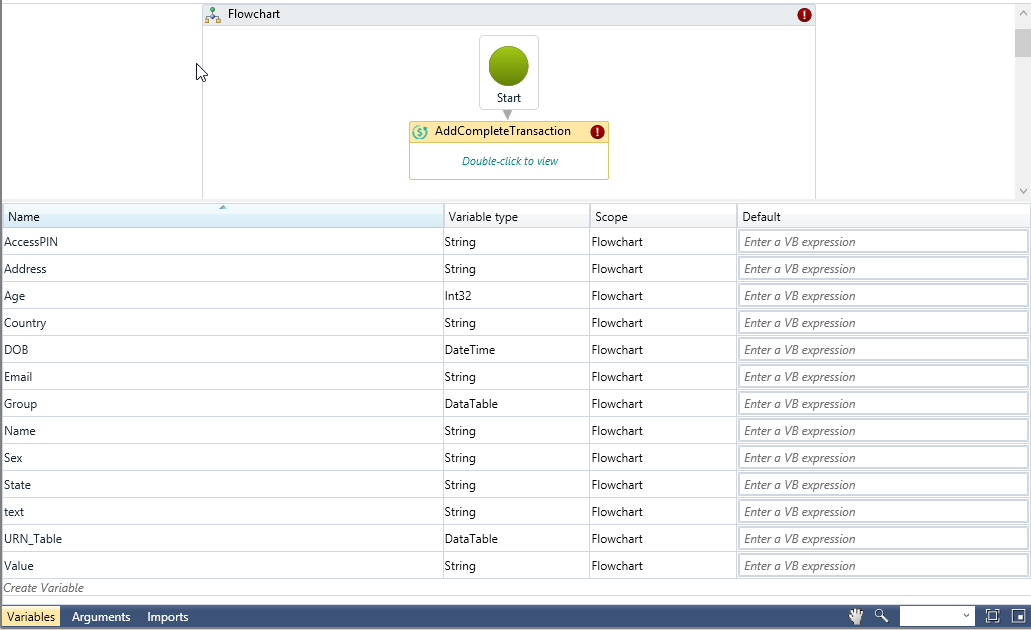
Figure 16
Scenario 1:
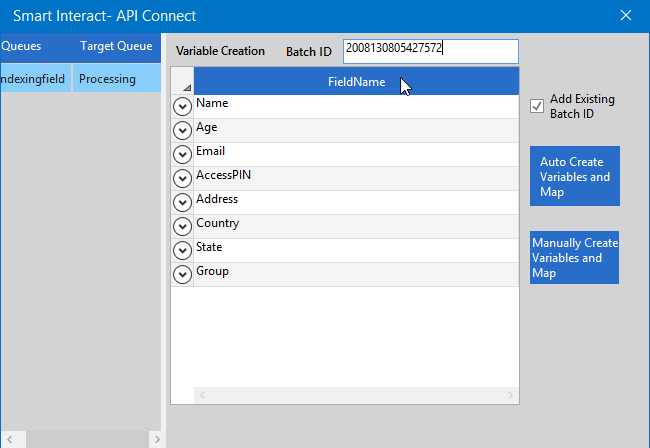
a) If you prefer to create a transaction within an existing batch ID, check the Add existing Batch ID option.
b) A new field Batch ID gets displayed in the wizard, enter the Batch id to which the URN needs to be mapped.
Figure 17
c) In case of the user preferring to give customized variable names for each field choose Manually, create variables and map.
Figure 18
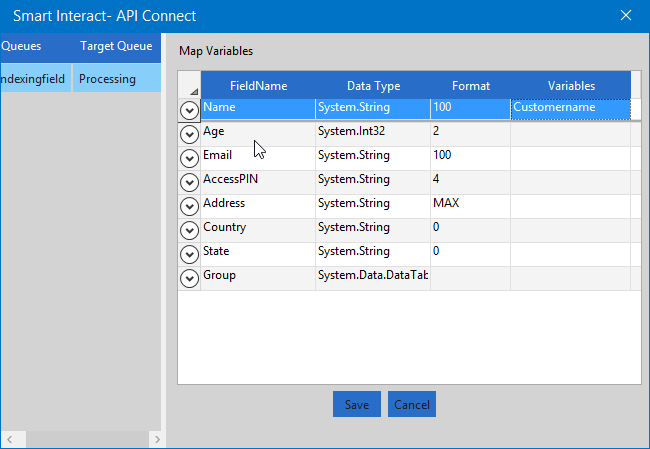
d) Click save option post entering the variables names to create the same.
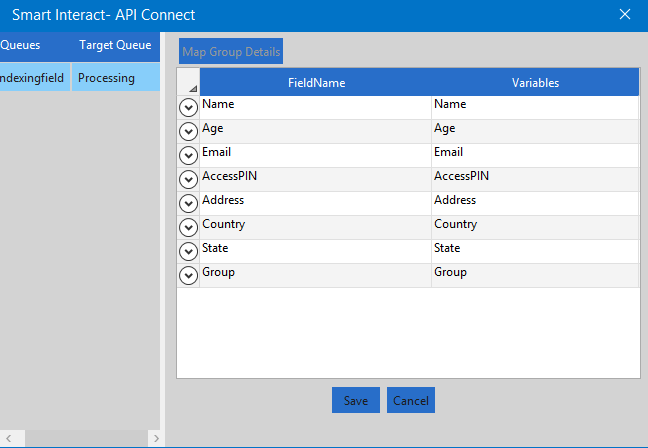
In case of the user preferring to auto create variables choose Auto create variables and map where the variables get automatically created with the configured field names.
Figure 19
Click save option to complete action.
Figure 20
Scenario 2:
If the user does not prefer to create the transaction within an existing batch id, please follow steps C and D from scenario 1.
Technical Reference
Note: The Map fields option available in the Auto create variables gets enabled only when the fields within a group are chosen to be repeated while configuring.
The CSV details parameter is applicable only for the above mentioned scenario.