This activity helps the user to sort the column’s value in the table either in ascending
or descending order.
Technical Reference
|
|
INPUT |
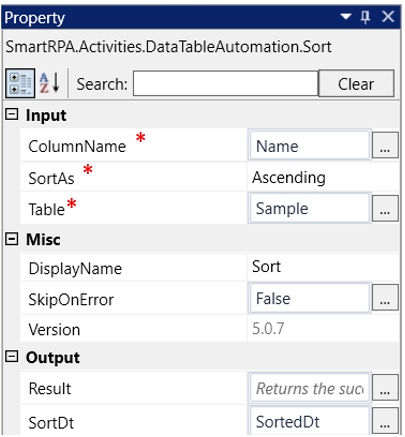
Column Name: Enter the "Column name" to sort from the "Input datatable." Provide the column name within double quotes or input the variable in "string" datatype where the column name is stored. This field only accepts data in "String" datatype. |
|
SortAs: This option determines the sorting order for the "Columns." Choose the order from the dropdown: Ascending: Sorts in ascending order from smallest to largest or A to Z based on values. Descending: Sorts in descending order from largest to smallest or Z to A based on values. |
||
|
Table: Enter the "Input datatable" variable where the input data is stored. This parameter helps you to sort the “Column” from the “datatable”. This field only accepts the "datatable" data type. |
||
|
MISC |
DisplayName: Displays the name of the activity. The activity name can also be customized to help in troubleshooting. |
|
|
SkipOnError: It specifies whether to continue executing the workflow even if it throws an error. This supports only Boolean value “True or False”. By default, it is set to “False.” True: Continues the workflow to the next step None: If the option is specified as blank, by default the activity will perform as “False” action. |
||
|
Version: It specifies the version of the Datatable automation feature in use |
||
|
OUTPUT |
Result: It helps to view the execution state of the activity. It returns the values in Boolean format. True: It indicates the activity has been executed successfully without any error. False: It indicates that the activity has been faulted due to some unexceptional error thrown. |
|
|
SortDt: It helps to view the output of the activity as the “Sorted” columns in a “Datatable” datatype. (Refer the steps below to create a variable). |
* Represents mandatory fields to execute the workflow
Here's an example of how the Sort activity works –
In the following example, I am using the input values from the “Excel Sheet” utilized
to demonstrate in the Use case. To get a better understanding, click here.
(Refer the attached sample excel sheet in the use case).
1. Drag and drop the "Sort" activity onto the designer pane.
a. This activity can only be utilized after the other “Datatable” activities.
b. It helps to sort the column in either “Ascending” or “Descending” order from the
existing “datatable.”
c. Here I am extracting the output as “Datatable” from the “Excel sheet” using the
“ReadRanges” activity from the “Excel Automation.” (Refer the Use case to
get detailed information).
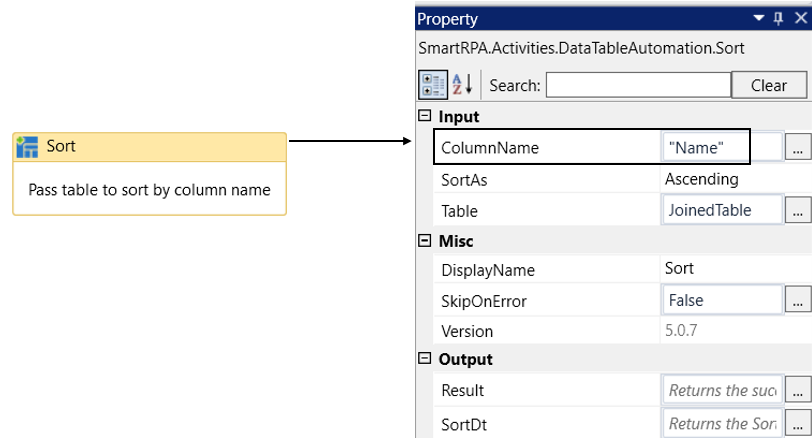
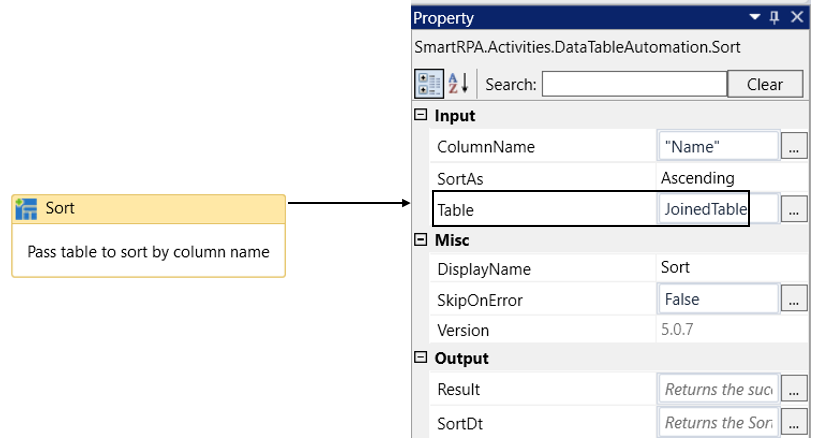
i. “JoinedTable” is the output for the “datatable” which is declared here.
d. Navigating to “ColumnName” in the properties of “Sort” to provide the
“ColumnName” from the datatable.
i. Here I am specifying the “ColumnName” as “Name” from the “Datatable”.
(Refer the attached excel sheet in the use case)
e. Moving to the “SortAs” option to choose the order from the drop-down.
i. In this case, I am going to sort the “Name” column in “Ascending” order.
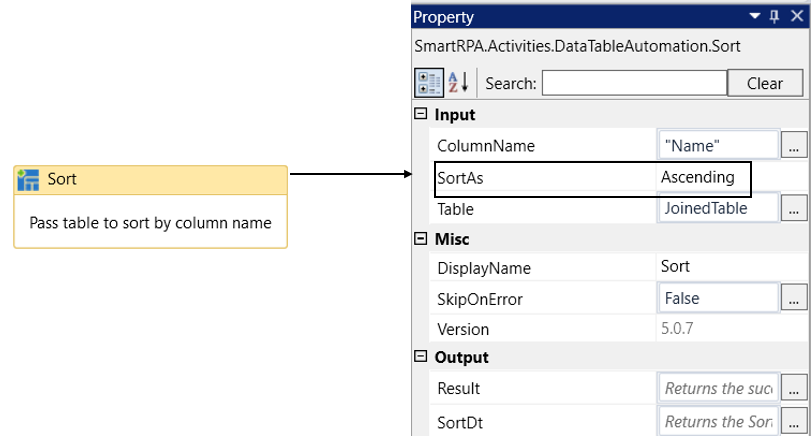
f. Then moving to the “Table” in the properties to provide the input datatable to
sort the columns.
i. Here I am using the datatable “JoinedTable” extracted as output from
the “Excel sheet”.
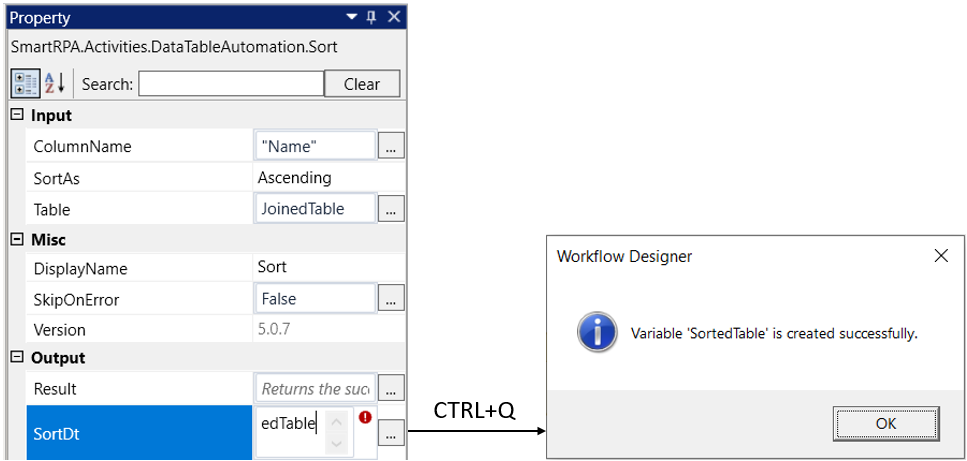
g. Finally, moving to the “SortDt” in the output properties section to declare a
variable to view the output of the activity.
i. There are two ways to create a variable-
ii. Method 1 – Click on the "SortDt" property within the "Sort" activity and
enter the variable name. In this case, we are using " SortedTable." Then,
press "Ctrl+Q," which is a shortcut key to create a variable.
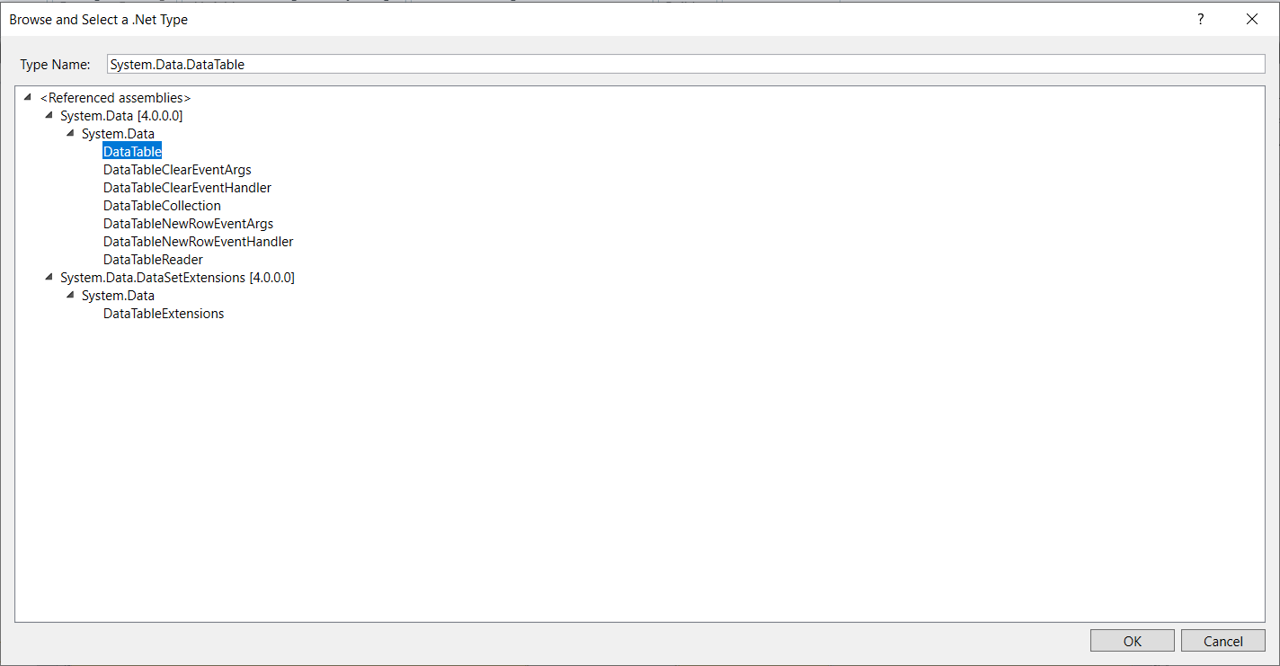
iii. Method 2 - Click on the Variables pane and enter the name "SortedTable"
Then, in the "Variable Types" column, select "Browse for Types" from the
dropdown menu.
iv. The .Net window for data types will appear on the screen, enter the type
name as “System.Data.Datatable” and then click on “OK” button.
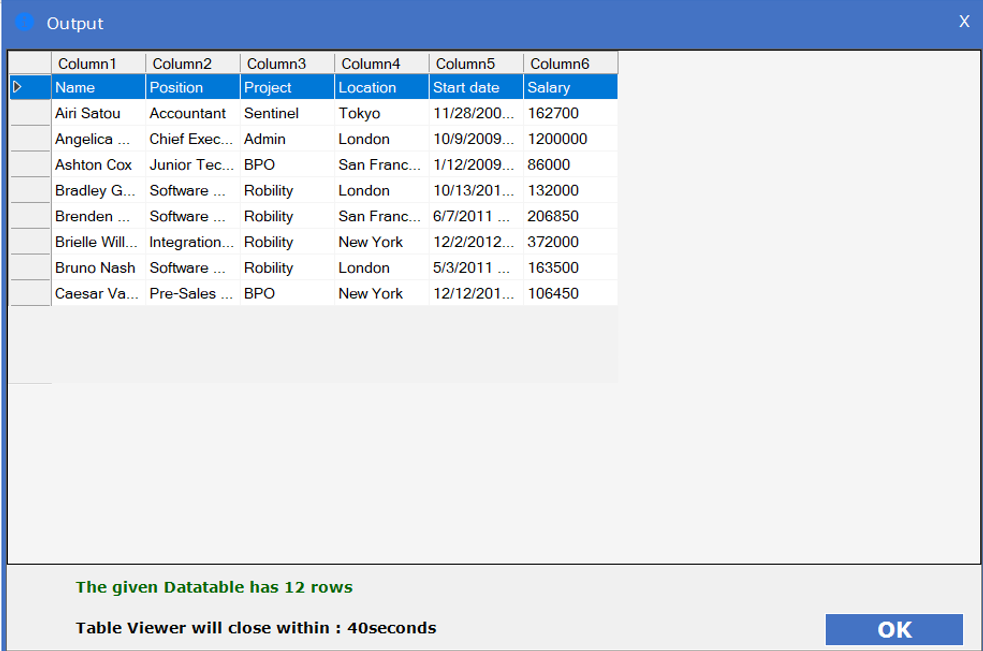
h. You can add the “TableViewer” activity to view the sorted data from the table.
i. Here I am using the Table viewer activity to view the “Sorted Table” output.
(Below is the sample of the “Sorted Table” output, the “Name” column has
been sorted in ascending order)