My Worklist
My Worklist is where submitted incoming cases will move as per configuration.
Only those queues for which My Worklist is enabled will be available in My Worklist for users to choose from this page. The rest of the queues will be treated for robot process and such queues will not be available in in the My Worklist sub-menu. To enable My Worklist, go to :
SmartInteract-->Configuration-->Project Setup-->Step 2 Queues

Figure 1
In the following example, the next queue is Processing. Fill in all details in the mandatory fields and Submit. Upon submission of the indexed case, it will be moved to the assigned queue as configured. Note that the next queue is Fetch Data (Processing Queue) as per configuration.
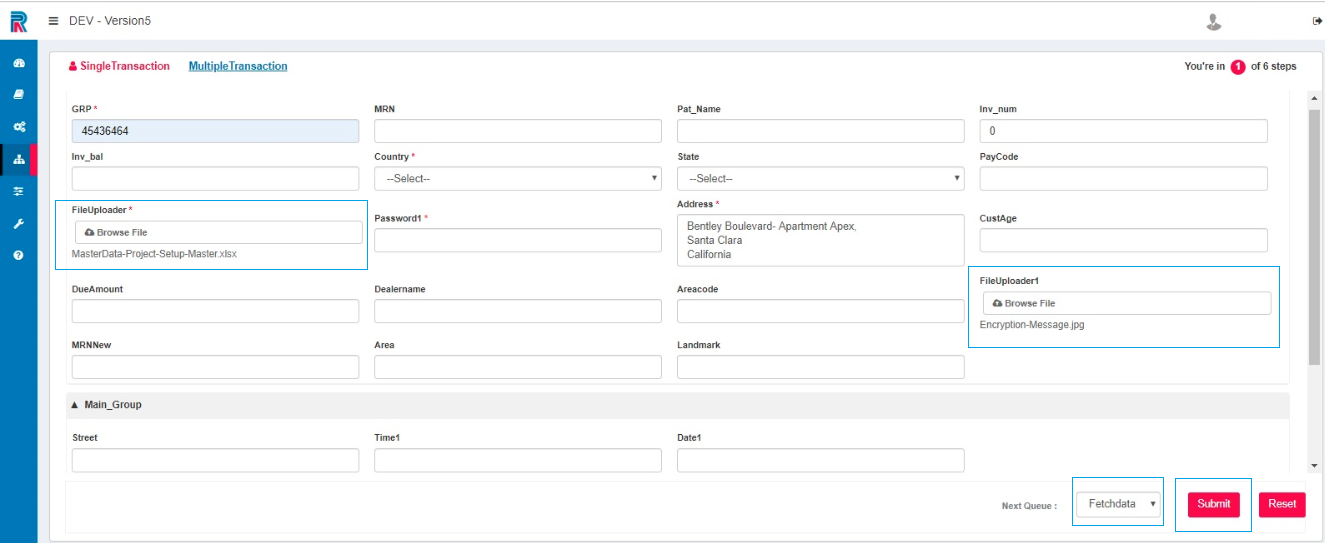
Figure 3
After reaching the Fetch Data queue, until the robot starts processing, the case’s Status will display as New and the case will be in the Unlocked position.

Figure 4
The next step is that the robot will call the case and its data from the incoming/indexed queue and process it using the SmartInteract services in the SmartDesigner module. Once the Get Transaction activity (in the SmartDesigner) is used for processing, the case will be locked. Now for the case, the Process Name is Fetch Data and the Status is Locked. The Locked By and the Locked Date are also displayed.

Figure 5
The robot will process the case based on the workflow and move the case to the next queue-in this case the configured next queue is Review. This will be done using the Complete Transaction Activity from the SmartInteract services in the SmartDesigner module. Once the case is moved to another queue, it will display as Unlocked and status will be New.

Figure 6
The same robot processing is followed for all other queues. Once task in each queue is accomplished, Complete Transaction activity (in the SmartDesigner) is used to move the case to the next queue. Also, after completion in each queue, the status will be locked.
For instance, let's consider finishing the review. Review and Submit. Back to My Worklist tab is used navigate to the grid that holds the transactions to be reviewed and keeps the transactions in the unlock status in a particular queue if the transaction is not submitted.
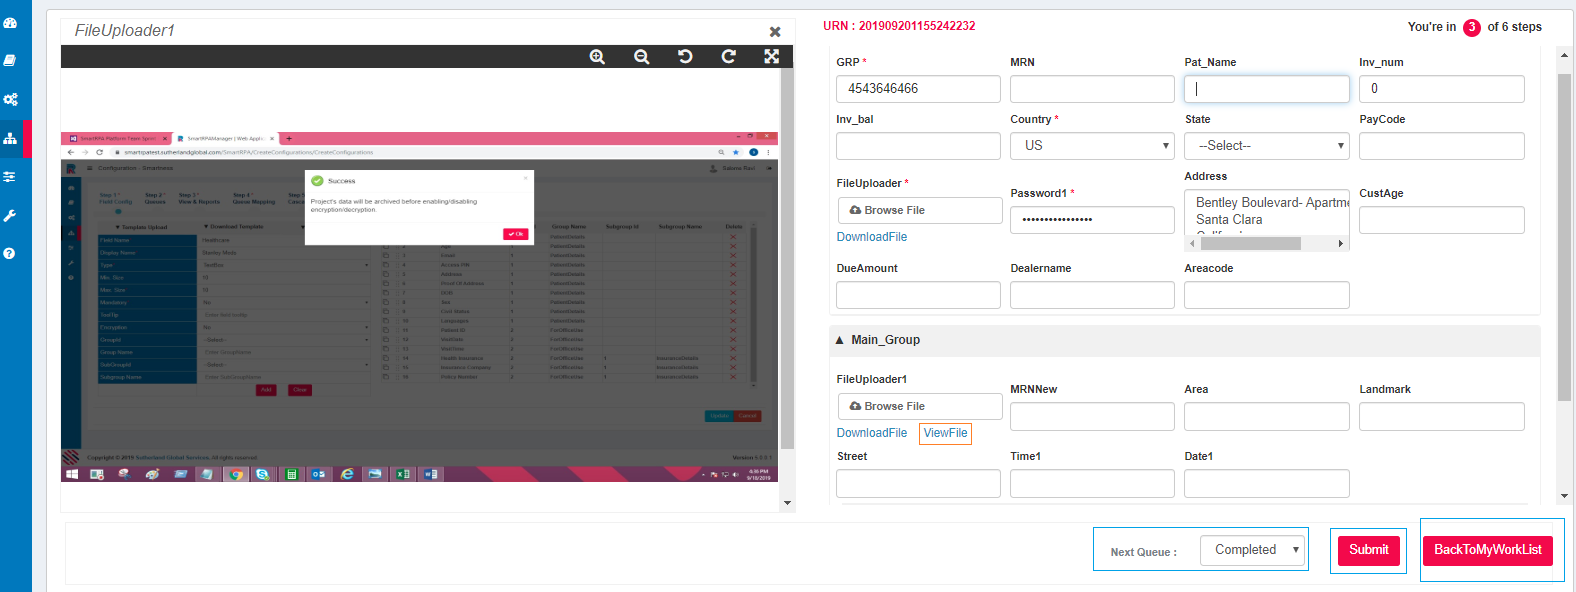
Figure 7
Once the review is finished, the Status will go back to Locked. One will no longer find the case in the Review queue, but it will reflect in the next configured queue.

Figure 8
In the above instance, the case will be found in the completed queue as seen in the following image.
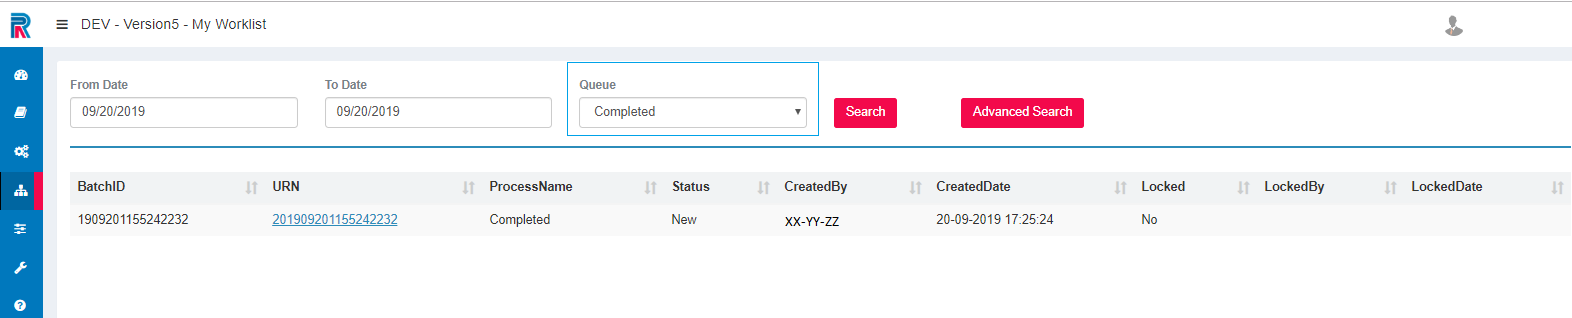
Figure 9
Note. Reviewing can be done manually as well in the SmartInteract and a case can be closed. However, every case is handled based on queue configurations and other requirements. Exceptions will be moved to exception queue, if such a queue is configured. So, everything is based on user’s requirements, the fields they configure and customize, the queues they configure and map, etc.
Queues will be editable if edit is checked while configuring forms. If Show is checked, editing is not possible here and it will be in read only mode. The same applies for all other queues. Valid exceptions will be handled by the robot. Invalid exceptions by the humans.