Robot is a sub-menu that is used to add a robot, give it a name, and specify whether it is a main or copy Workflow. Start and End date of development is mentioned here. It is saved. A detailed explanation follows.
To access the module use the left-hand menu bar.
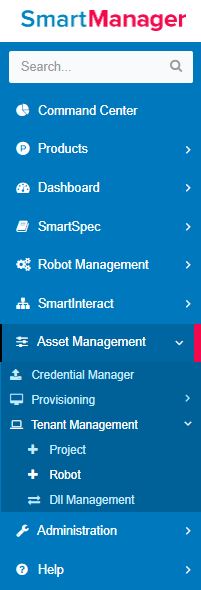
Figure 1
Asset Management --> Tenant Management -->Robot
Click on the Add button.
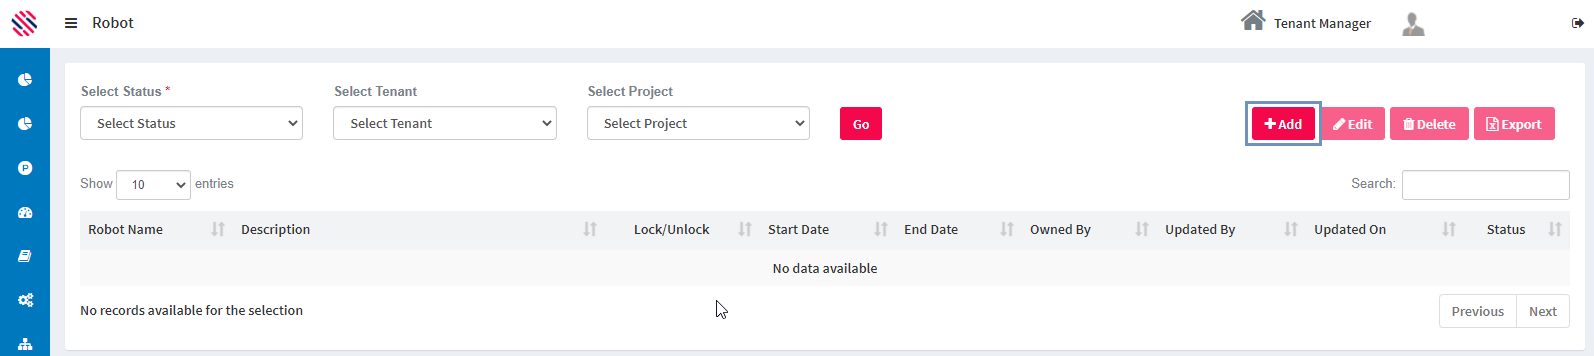
Figure 2
There are two options given at the bottom of the screen, namely, Main and Copy Workflow.
If the user wants to build a new workflow, then the Main Robot check box is to be selected. Main workflow signifies a new workflow that is to be started from scratch.
Copy Workflow is used for repurposing an existing workflow from another project.
In the following example, every step needs to be created, so Main is checked.
Select the Tenant and Project from the respective dropdowns. Provide a name for the Robot. Provide a brief description and enter the Start and End Date (development deadline.) Key in the Developer’s Username. The Developer’s Name is auto populated by clicking on the box. Check the Main Robot. Save.
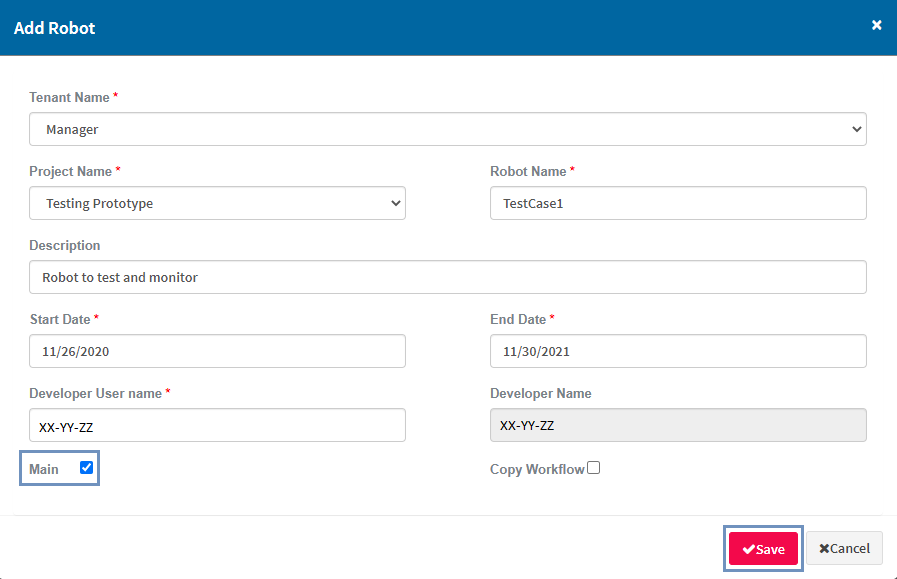
Figure 3
It gets saved, as displayed in the following image with all appropriate details. The added robot is in the unlock position, once development starts on this, it will get locked. From here on, the respective developer will proceed to create the robot in the Designer within the stipulated period. While working, the robot will stay in the locked status. Edit, Delete and Export can be done by selecting the row.
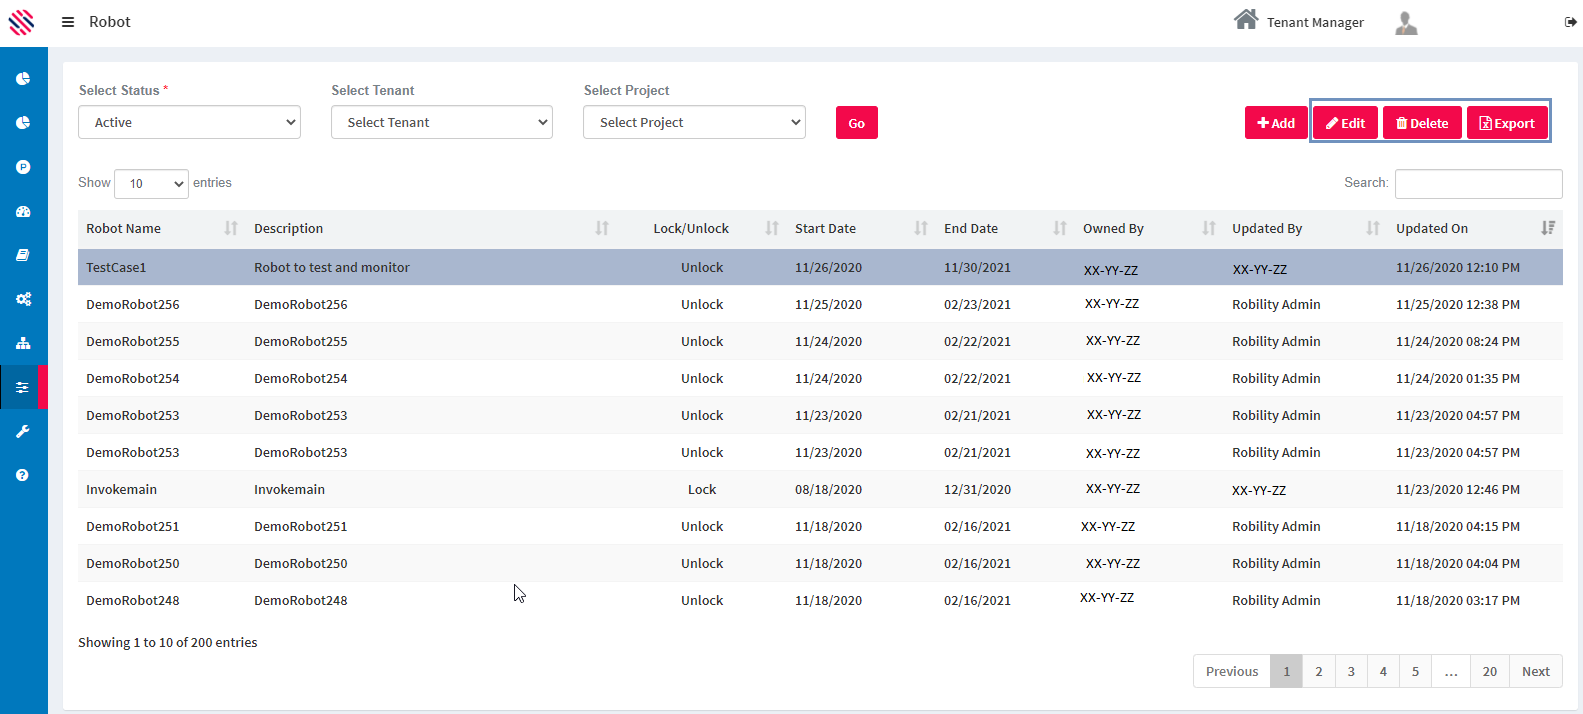
Figure 4
Copy Robot
If an existing workflow can be used completely or partially for a project, one can utilize the same, to save man hours and achieve faster time to deliver. Choose the Tenant Name, Project Name, enter the Description, mention the Start and End Date. Give a new name to the Robot and not the name of the robot that is going to be copied.
Assign the Developer by providing the Username and the Developer’s Name will be auto populated.
Select the Copy Workflow checkbox. Select the existing robot that can be reused for the project in discussion, by choosing the name of the Tenant, Project, Robot and its Version from the corresponding options in the dropdowns. Save.
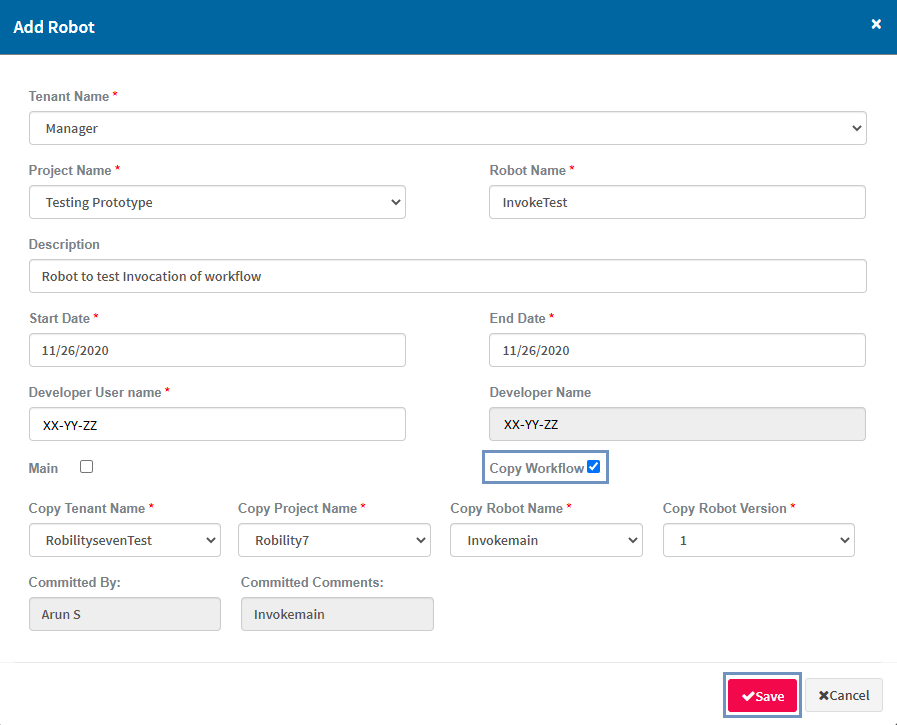
Figure 5
Note: One can use the search options such as Select Status, Tenant, Project and click on the Go button to access any given robot with corresponding details.
One can also identify if a robot is in locked or unlocked state. When a user is working on a particular robot, it will be in the locked status.
Note: The Start and end date denote the date within which the workflow must be completed. The owner’s name along with the Updated by and updated on fields are displayed as well.
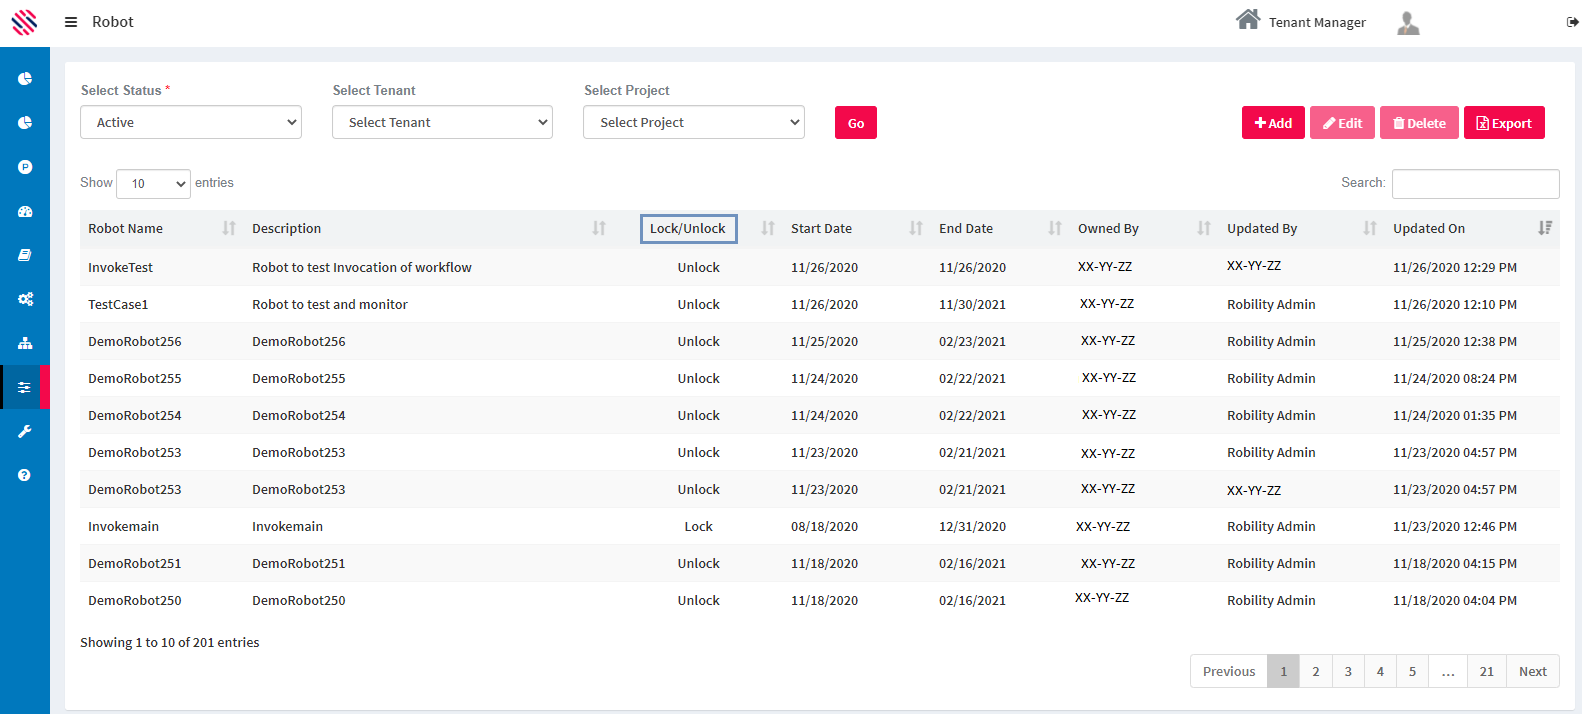
Figure 6