This activity is used to click on any element in the window in the web page. It searches
for the given string in the indicated element and clicks on it. The click activity can be
used to click on text boxes, URL’s (within the webpage), hyperlinks, buttons. The click
activity works only if the element is enabled.
Technical reference
|
|
INPUT
|
AlterIfDisable: Check this option, if you want to perform the "Click" action on the "Element" or detected "Button" that is disabled. By default, the option will be unchecked. |
|
BrowserType: Gets auto filled, once the element is indicated on the web page using Robility Spy. Here the browser type will be displayed. |
||
|
BrowserVersion: Indicates the version of the browser in use. |
||
|
ClickType: Specifies the type of mouse click (single, double, up, down) used when simulating the click event. By default, single click is selected. Click double - Wherever a double click action is required in a webpage we can choose this type. Click up– This action helps you to hold the selected element in the webpage. |
||
|
DelayAfter: It helps the user to add a delay to start the execution of the further activity. The format of the delay here is milliseconds. By default, it will be set to 300. When the option is left blank, no delay is considered. |
||
|
DelayBefore: It helps the user to add a delay to before the execution of the activities. The format of the delay here is milliseconds. By default, it will be set to 200. When the option is left blank, no delay is considered. |
||
|
ElementValue: Gets auto filled, once the element is indicated on the web page using Robility Spy. This contains the set of attributes for the specific spied element. |
||
|
FramePath: Gets auto filled, once the element is indicated on the web page using Robility Spy. The frame path is auto filled only if the selected element has a frame ID in the webpage. |
||
|
MouseButton: This specifies the click from the mouse to be performed. By default, the mouse uses only the left click. |
||
|
URL: Gets auto filled, once the element is indicated on the web page using Robility Spy. Indicates the URL in which this activity is performed. |
||
|
WaitForReady: Runs the activity once the webpage loading matches the wait for ready state. None – It will perform the activity functionality without checking the state of the browser. Interactive- The activity will be performed once the web element is found even if the webpage is still in loading state. |
||
|
WaitTime: It helps the user to add a delay to start the execution of the further activity. The format of the delay here is milliseconds. By default, it will be set to 30000. When the option is left blank, no delay is considered. |
||
|
MISC |
Display Name: Displays the name of the activity. The activity name can be customized which will help in troubleshooting. |
|
|
SkipOnError: Specify the Boolean value as “True or False.” |
||
|
Version: It specifies the version of the web automation feature in use |
||
|
OUTPUT |
Result: It helps to view the execution state of the activity. It returns the values in Boolean format. |
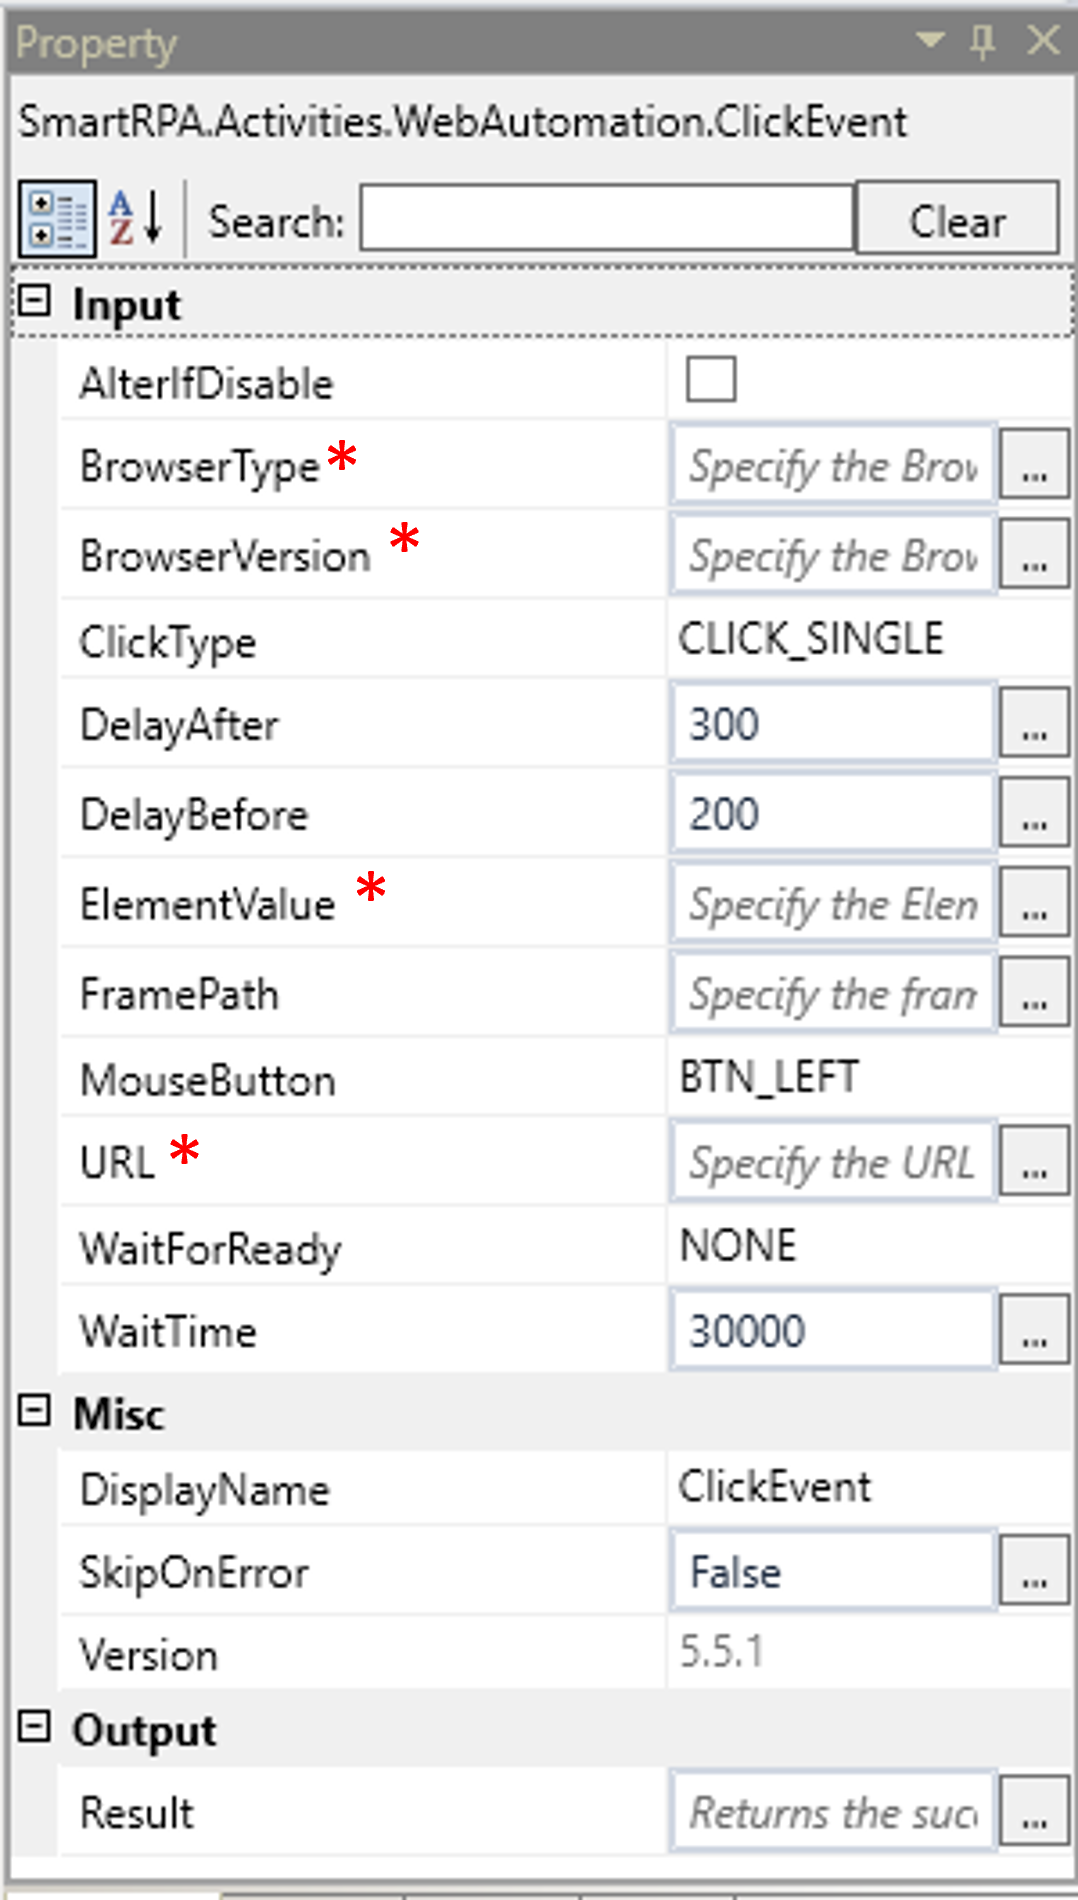
* Represents mandatory fields to execute the workflow.
