Generate Thumbnail
A thumbnail is a reduced-size representation of an image. Thumbnails are used to represent images and other data in a more economical, layout-friendly way. The Computer Vision API uses smart cropping, together with resizing the image, to create intuitive thumbnails for a given image.
The Computer Vision thumbnail generation algorithm works as follows:
- Remove distracting elements from the image and identify the area of interest, that is, the area of the image in which the main object(s) appears.
- Crop the image based on the identified area of interest.
- Change the aspect ratio to fit the target thumbnail dimensions.
Area of interest
- When you upload an image, the Computer Vision API analyzes it to determine the area of interest. It can then use this region to determine how to crop the image. The cropping operation, however, will always match the desired aspect ratio if one is specified
- You can also get the raw bounding box coordinates of this same area of interest by calling the areaOfInterest API instead. You can then use this information to modify the original image however you wish
- The generated thumbnail can vary widely depending on what you specify for height, width, and smart cropping, as shown in the following image.
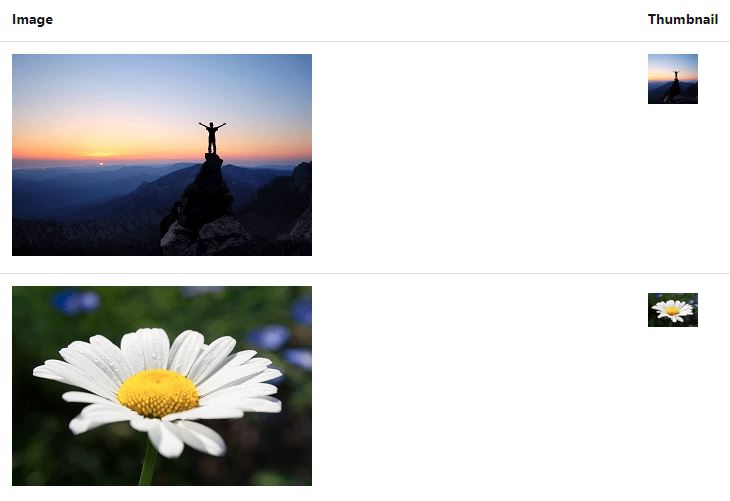
Figure 1
Important Point: Click on the following images to get full screen view.
How to use the activity
Drag a MicrosoftVisionScope dropzone activity from the MicrosoftComputerVision package and drop it on the canvas. Enter the Service URL and Subscription Key in the Property window.
Note: Append the version of MicrosoftVisionScope activity in the Service URL.
Drag and drop a Generate Thumbnail activity inside the MicrosoftVisionScope dropzone. Specify the Height and Width of the thumbnail image. Recommended height and width are 50.
Smart Cropping helps when you specify an aspect ratio that differs from that of the input image. It supports only Boolean values.
Specify the local ImagePath, to generate the thumbnail. Create a variable under the Output header in the Result field.
Drag and drop a WriteLog activity from the NotificationAutomation package. Provide the InputString and set the LogLevel.
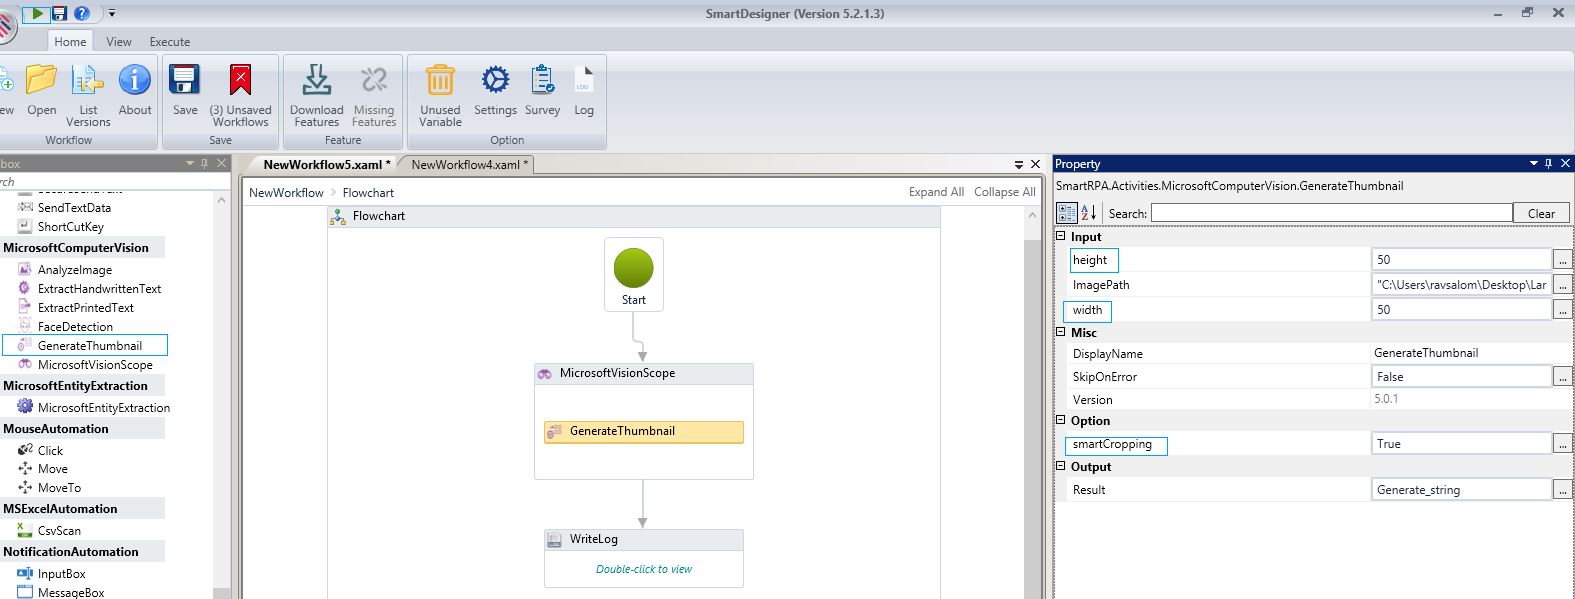
Figure 2
Execute the workflow to generate the thumbnail as per specifications.
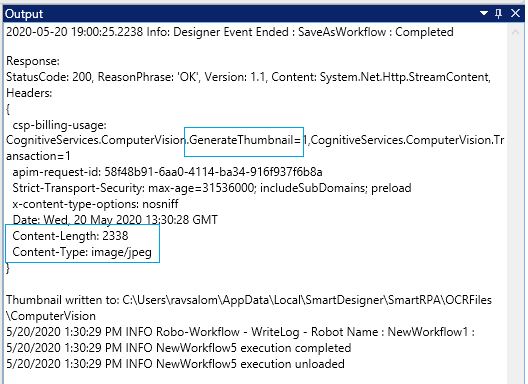
Figure 3