First get the installer for Designer Community edition.
<MSI link>
The interface
Creating a new project:
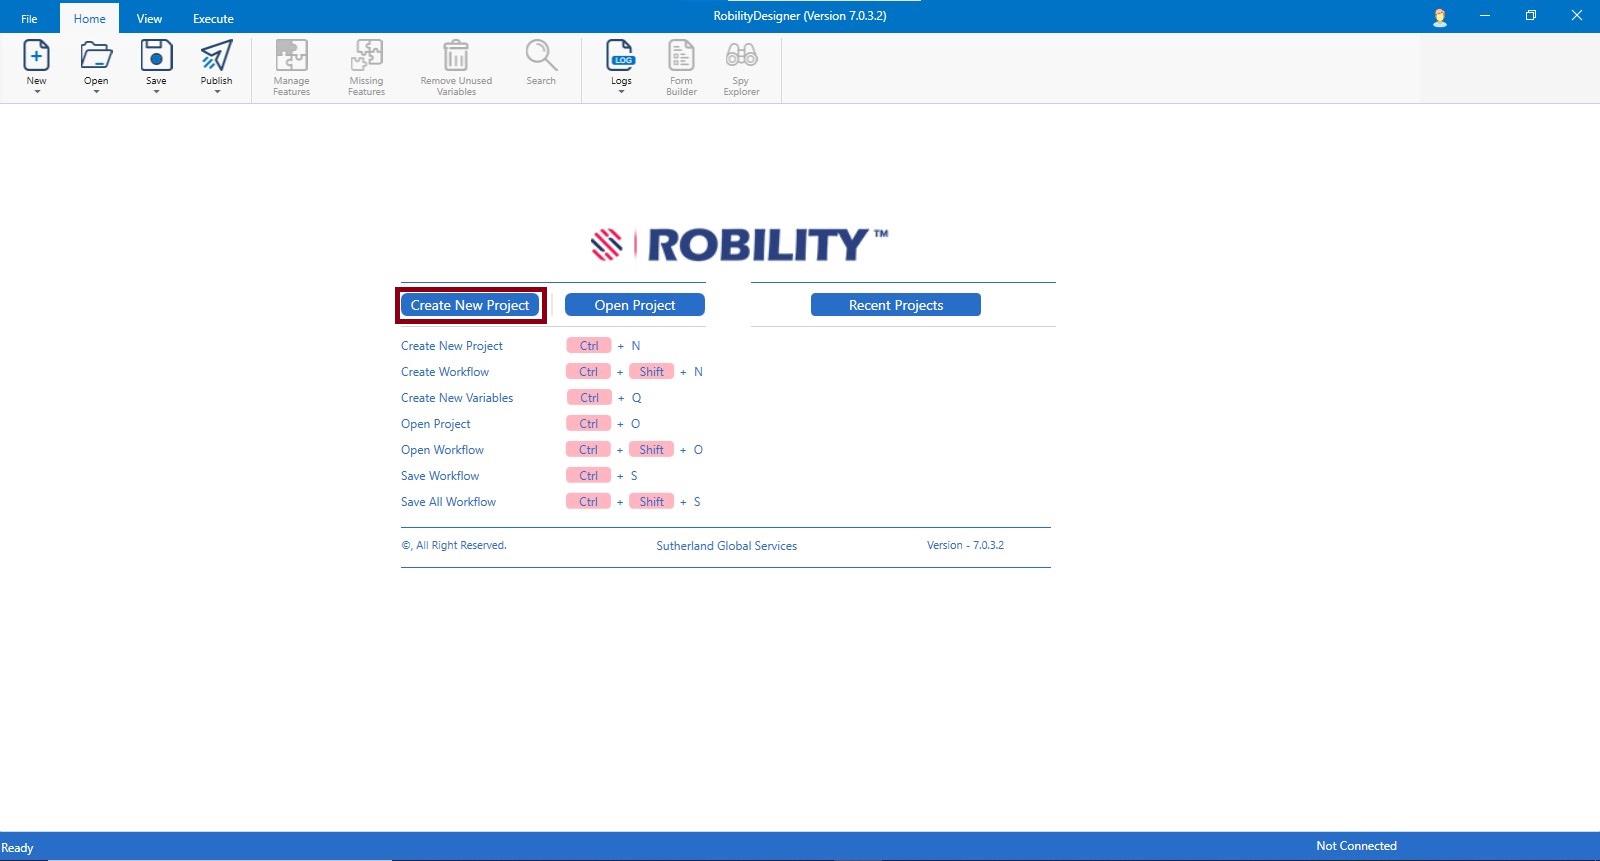
The user can create a new project by selecting “CTRL +N” or they can either select “Create New Project” button.
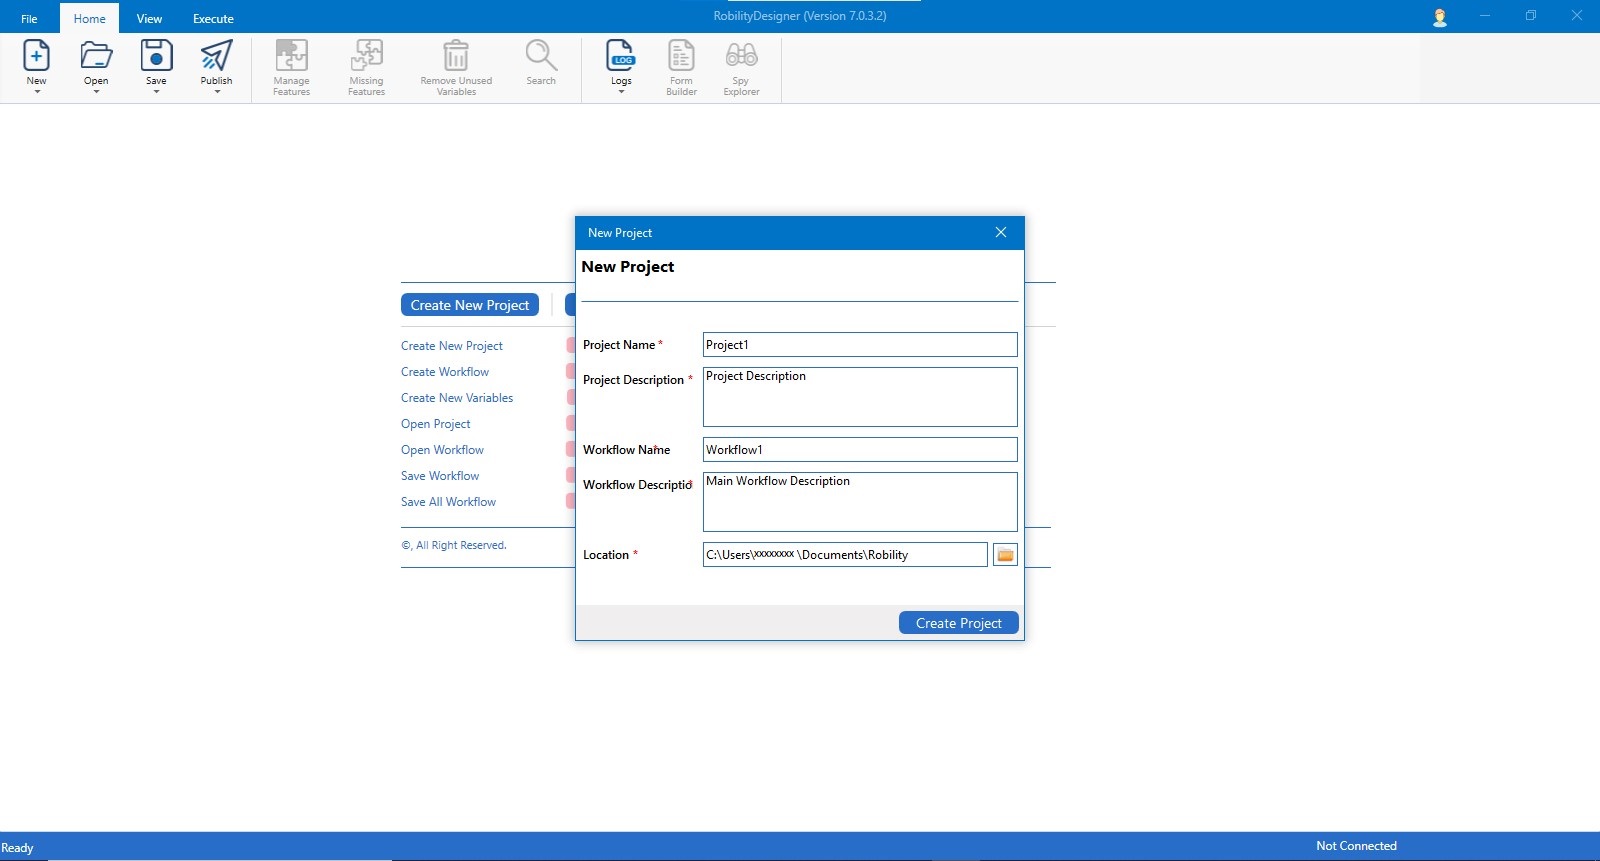
A Pop- up window labelled as New project appears to fill out the details of the Project Name, Project Description, Workflow Name, Workflow Description, and location path to be saved.
Open an Existing project:
To open an existing project, the user can either select the “CTRL + O” or select the “Open Project” button.
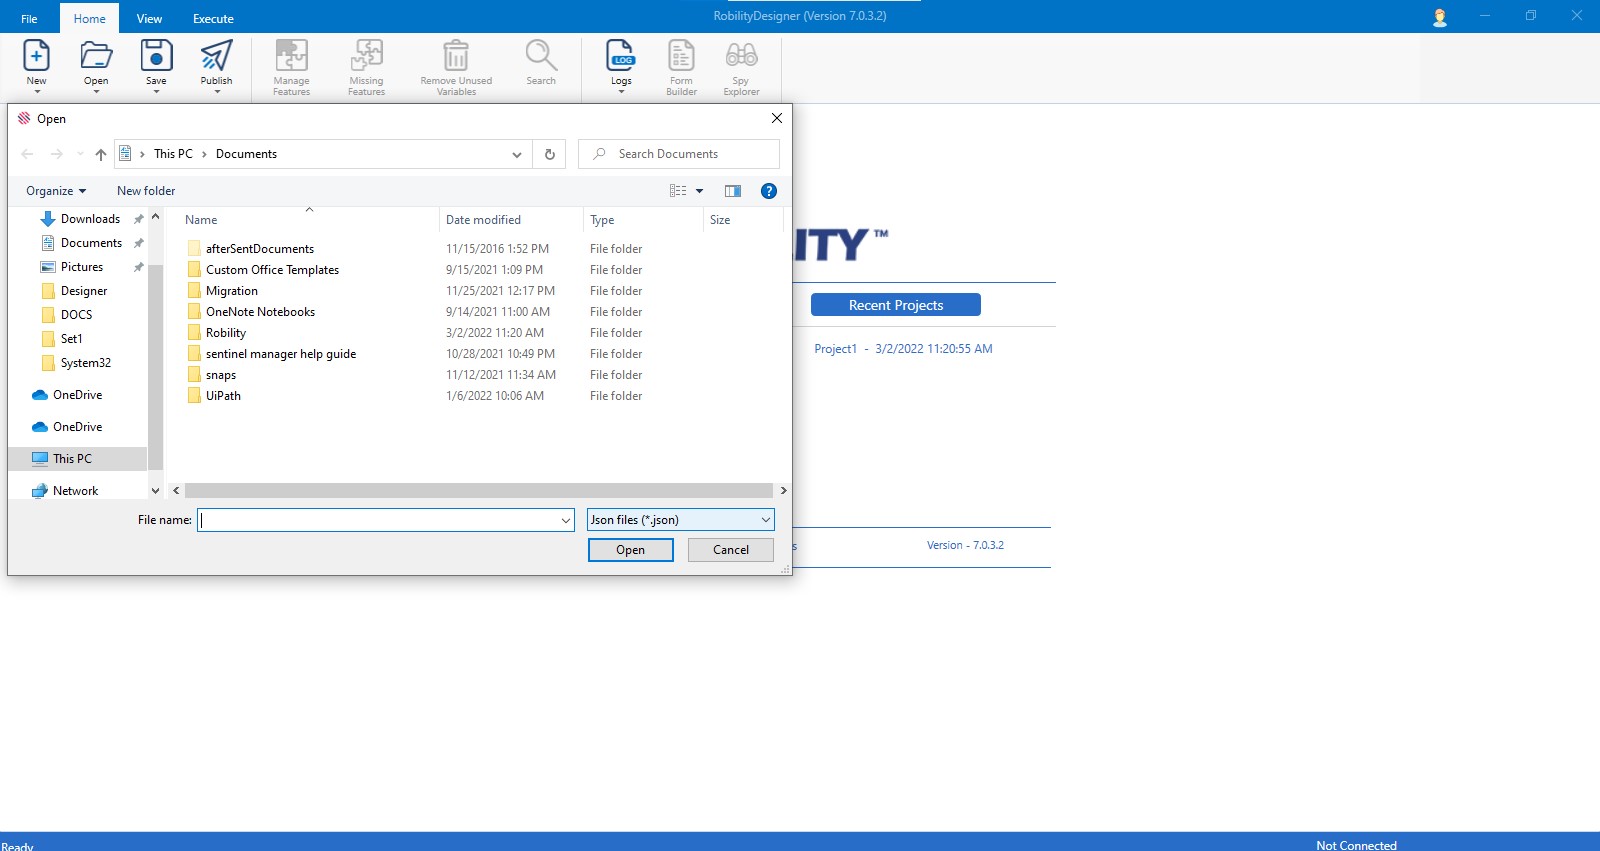
On clicking on the button, it redirects the user to the open dialog window. The user can select the respective project.
Project / Toolbox:
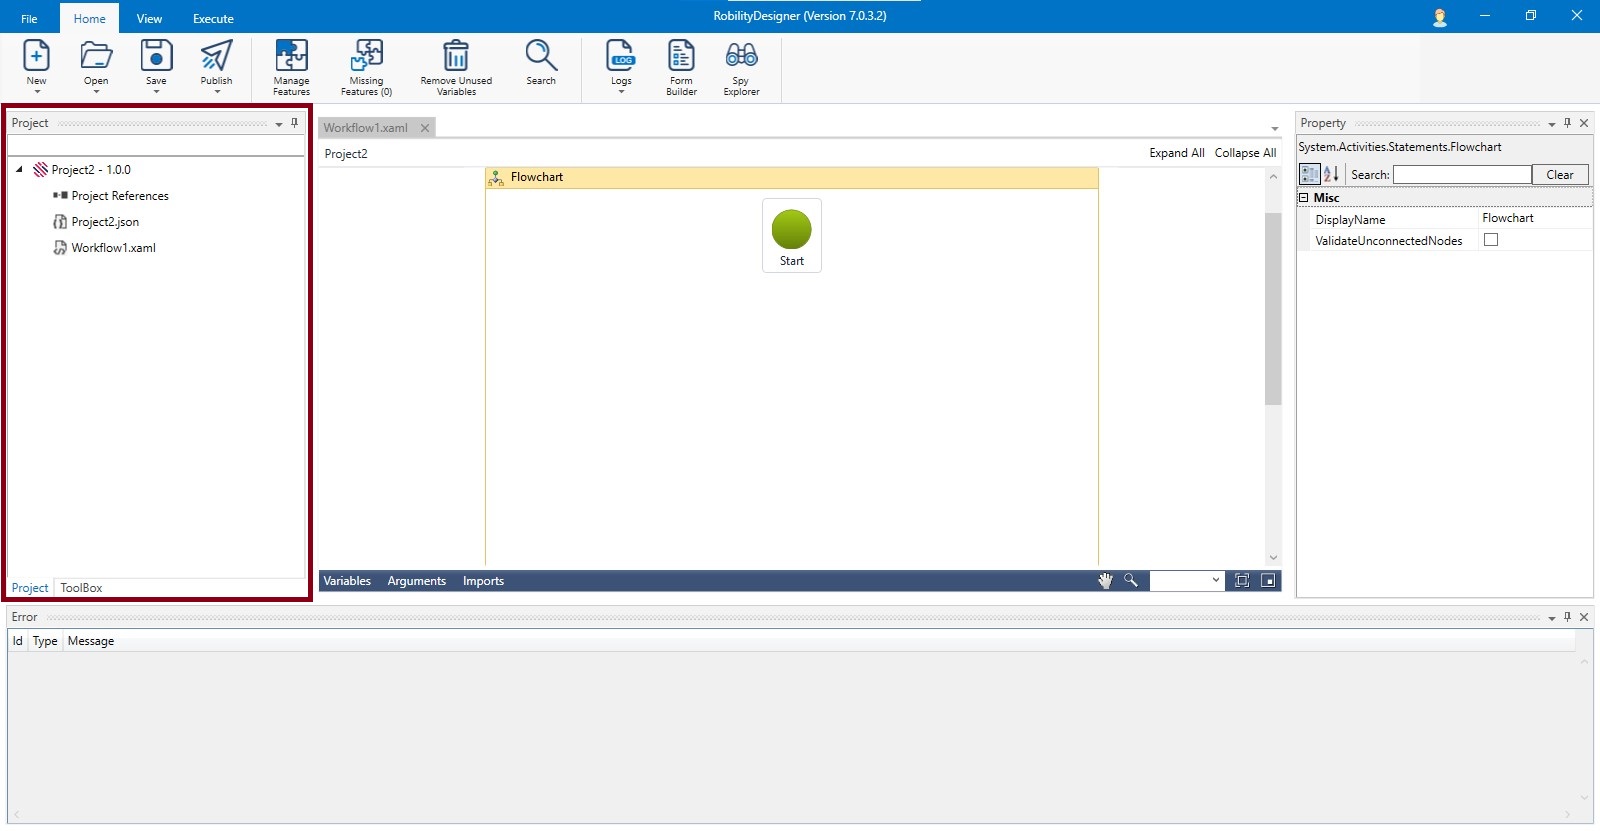
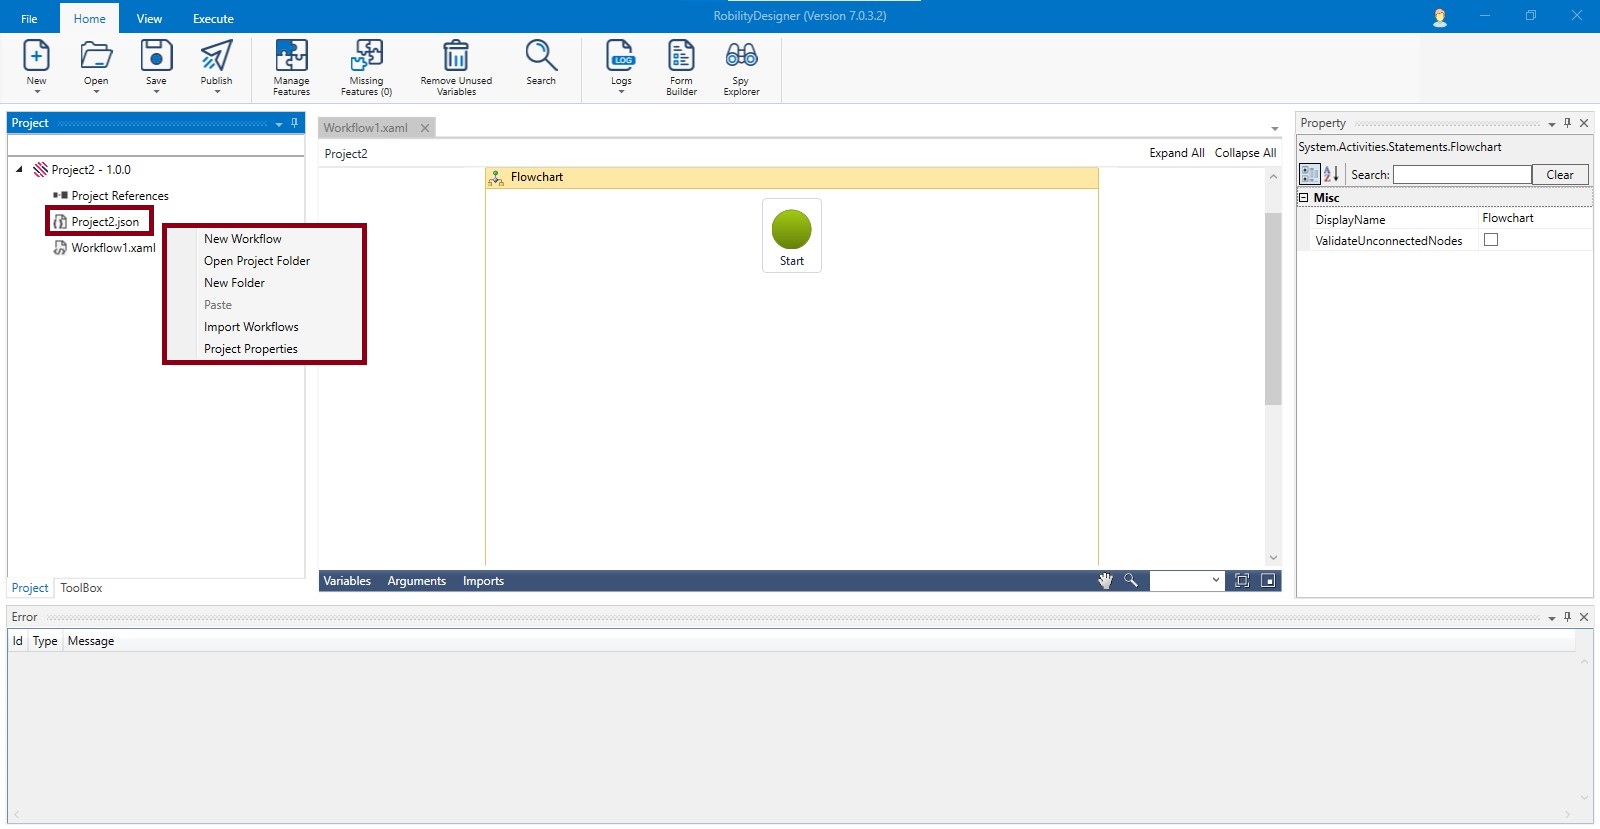
The project tree represents the project flowchart with number of workflows, folders in it.
Right clicking on the project enumerates few more options. These options help the user to view project properties, import workflows from another project, and to create a folder and workflows under a project.
New workflow: The user can also create a new workflow under the respective project by selecting the new workflow option.
Open Project folder: This helps the user to open a folder which was created in the project.
New folder: A new folder can be created under the current project.
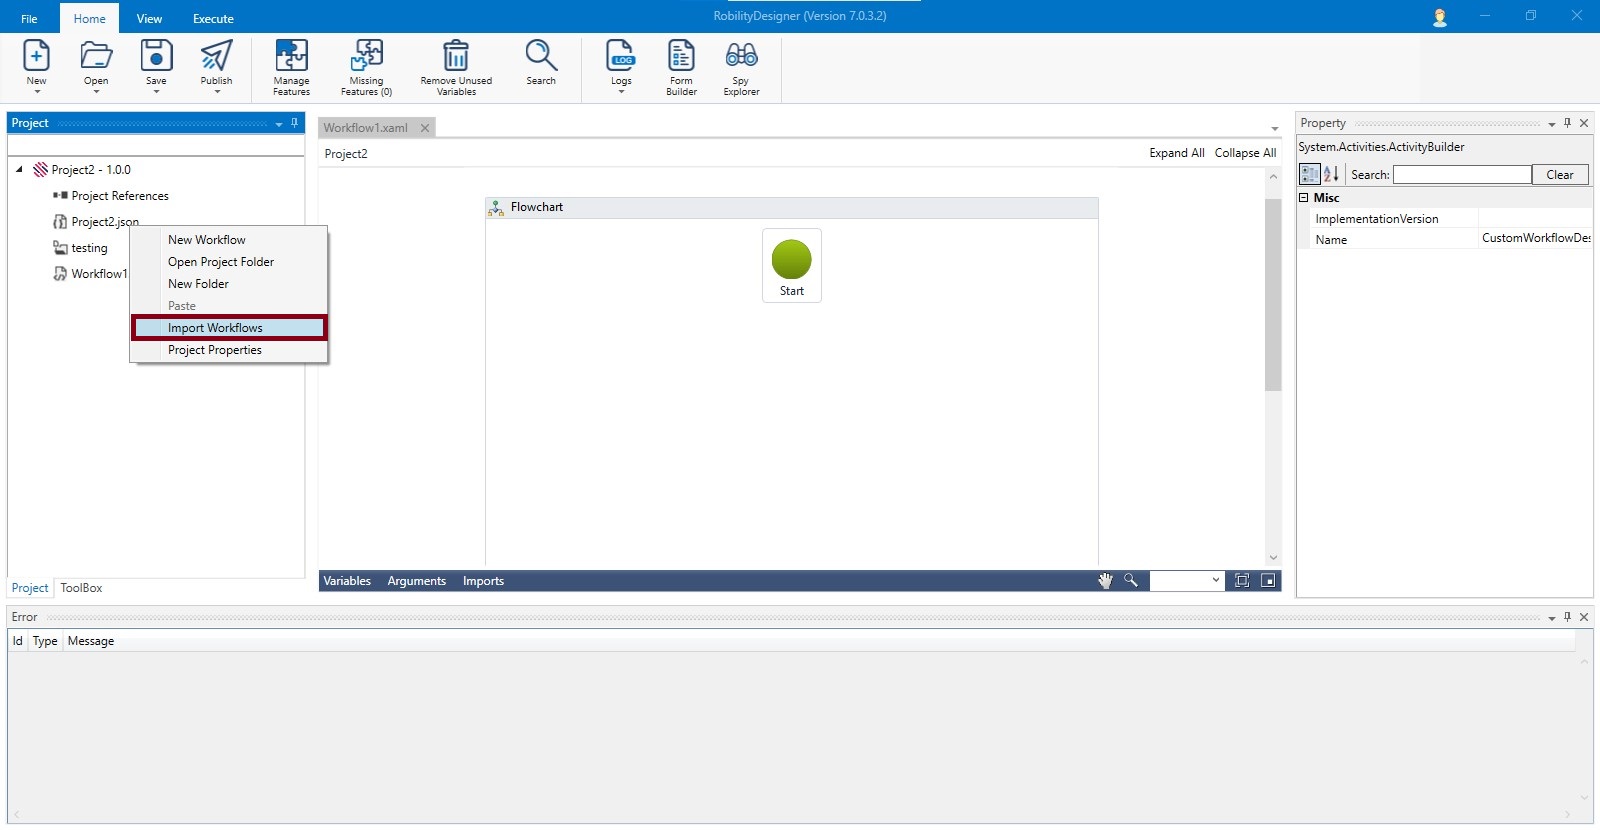
Import workflows: The user can import the workflows from another project also.
Step1: Select the Import workflows option.
Step2: an open dialog window will be opened.
Step3: Select the project from which the user intends to import the workflow.
Project Properties: The user will be able to view the properties of the project such as description, location path, startup workflow and name of the project.
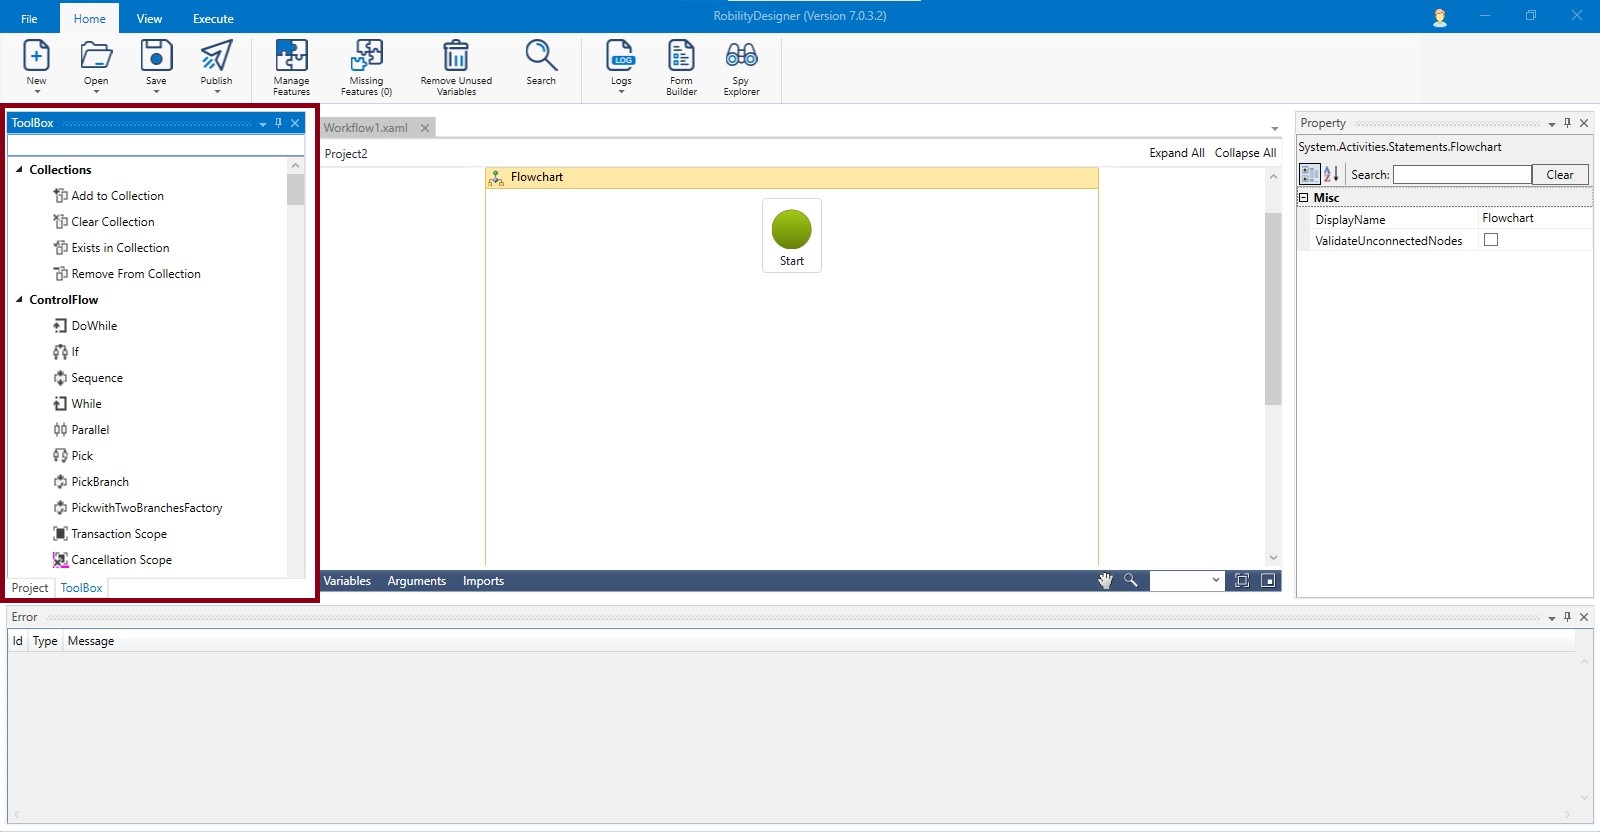
The toolbox enumerates the features and activities in the community designer. The activities can be dragged and dropped to the workflow.
Also refer these menus to learn more.
