This activity assists in saving the "Mail" in the "MailMessage" format to the
specified local path.

Technical Reference
|
|
INPUT |
FileName: Specify the “Name” in which the mails are required to save in the specified local path as “MailMessage.” This field accepts the value in "String" format. |
|
FolderPath: Specify the “Folder path” to where the “Mails” are required to be saved from the list. This field accepts the value in "String" format. |
||
|
MailItem: It specifies that the "MailItem" variable (which is declared in the "Read mail" activity) should be provided as an input value to save the emails from the list. |
||
|
MISC |
DisplayName: Displays the name of the activity. The activity name can be customized which will help in troubleshooting. |
|
|
SkipOnError: It specifies whether to continue executing the workflow even if it throws an error. This supports only Boolean value “True or False”. By default, it is set to “False.” True: Continues the workflow to the next step None: If the option is specified as blank, by default the activity will perform as “False” action. |
||
|
Version: It specifies the version of the Email automation feature in use |
||
|
OUTPUT |
Result: It helps to view the execution state of the activity. It returns the values in Boolean format. True: It indicates the activity has been executed successfully without any error. False: It indicates that the activity has been faulted due to some unexceptional error thrown. |
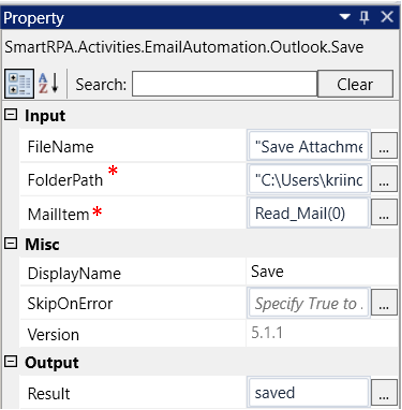
* Represents mandatory fields to execute the workflow
Use Case
The following use case demonstrates how the EmailAutomation feature works.
The company has requested to save the mail message and send back a
“ThankYou” mail to the customers for the feedback provided.
The Input folder in the mailbox consists a list of feedback provided from the
customer. Using the email automation activities, we are going to read the mails
and reply back to the customers with “MailItem” as variable.
Here, we have utilized the following activities to construct the workflow. Now, let's
dive into the steps.
Steps to execute a bot
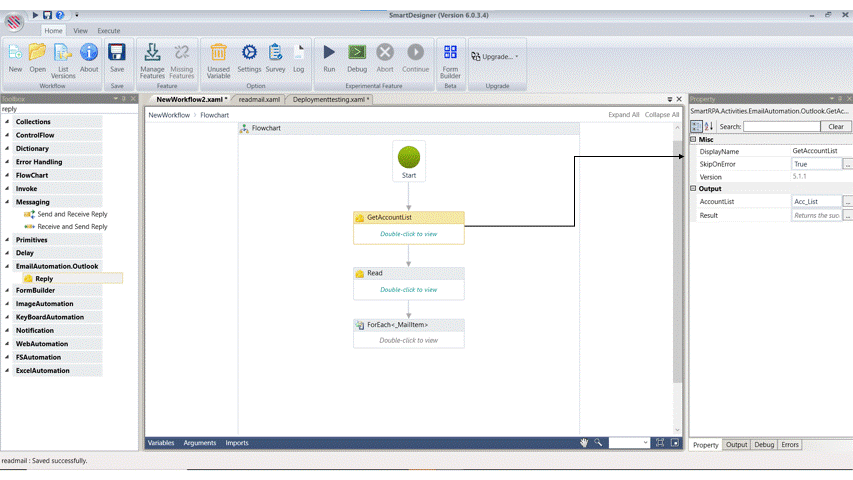
1. Create a solution named “FeedBack.”
2. Drag and drop the “Get Account list” activity from the Email Automation feature
and set as “Start node.”
a. This activity helps to retrieve the “account list” that are currently active
on the user’s machine.
b. Navigate to the properties and declare a variable as “Acc_list” in the
“Account list” property to store the account list. It returns the output
in the list format. It will be used in further activities for the “Account
Name” property.
c. There are two ways to declare a variable –
i. Method 1 – Click on the "AccountList" property within the
"GetAccountList" activity and enter the variable name. In this
case, we are using " Acc_list." Then, press "Ctrl+Q," which is
a shortcut key to create a variable.
ii. Method 2 - Click on the Variables pane and enter the name
" Acc_list." Then, in the "Variable Types" column, select
"Browse for Types" from the dropdown menu.
iii. The .Net window for data types will appear on the screen,
enter the type name as “System.Collections.Generic. List” and
choose “String” then click on “OK” button.
3. Now, drag and drop the “Create Directory” activity from the “FS Automation” feature.
a. This activity is used to create a folder in the specified path on
the user’s machine. Here are creating this folder to download
the report from the mail.
b. Double click on the activity and enter the folder name as
“FeedBack” in the “Name” property.
c. Provide the “full path” where you want to create the folder.
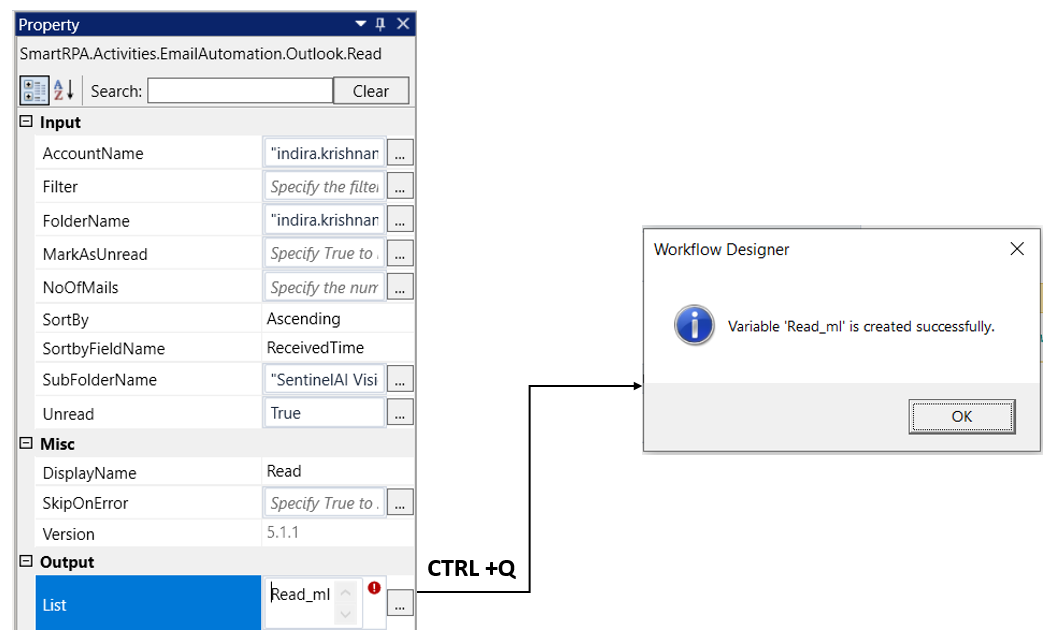
4. Place the “READ” activity from the Email Automation feature next to the Create
directory activity.
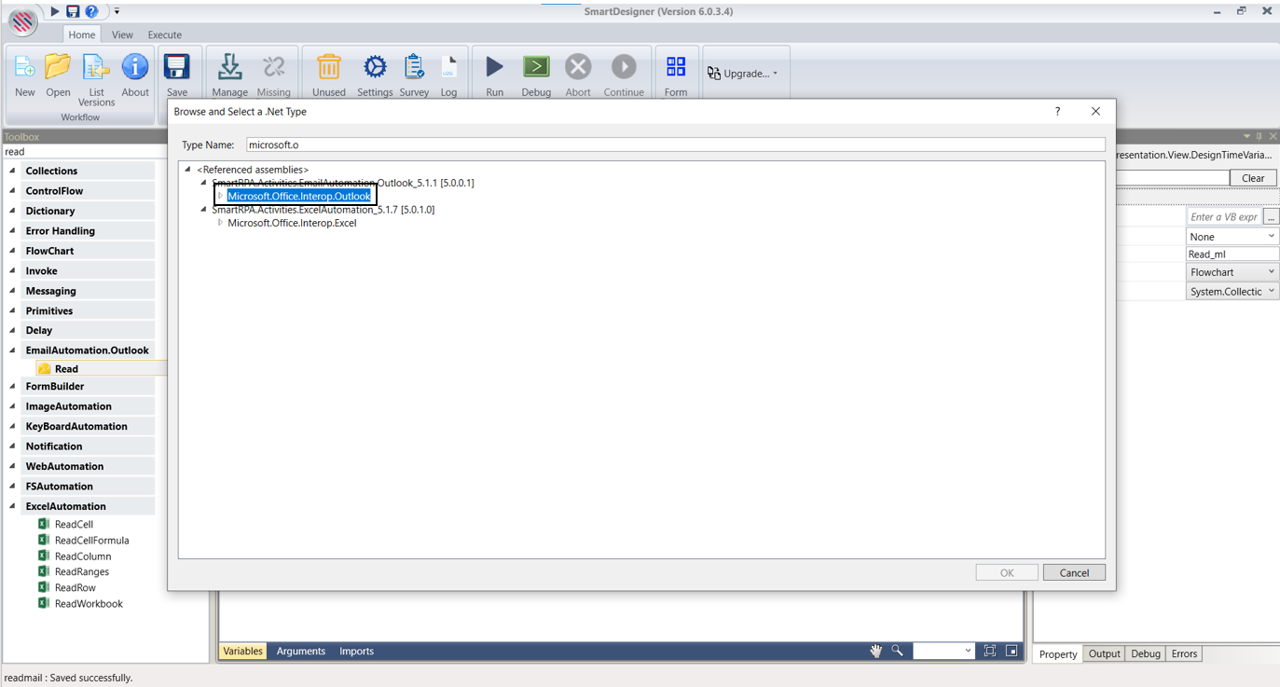
a. It helps to read the mail from the specified outlook account
and store the mails in the “MailItem” in a list format. Refer the
steps to create “MailItem” from
“Microsoft.Office.Interop.Outlook.MailItem” as the
“Email Automation” package requires this integration.
b. Double click on the activity and enter the “Account Name”
as “Acc_List(0)” in the property.
c. Specify the “Acc_list(0)” in the “FolderName” property as
well. This property is used to integrate with the account
name provided.
d. Navigate to the properties and specify the “No.of.Mails” as
“5” for the activity to read the number of mails from the
specified outlook account.
e. Set the “SortBy” field as “Ascending” from the drop-down
to sort and read the mails in ascending order.
f. Choose the “SortByFieldName” as “Subject” from the
drop-down to sort and read the mails with the received date
in ascending order.
g. Enter the “SubFolderName” as “CustomerFeedback” in the
property to choose the folder name from which the mails has
to be read.
h. Specify “True” in the “Unread” property to read only the mails
which has not been read.
i. Declare a variable as “Read_ml” in the “List” property to store
the read mails in a variable for further processing. It will be
used as input in other email activities.
i. Method 1 – Click on the "AccountList"
property within the "GetAccountList" activity and
enter the variable name. In this case, we are using
" Acc_list." Then, press "Ctrl+Q," which is a
shortcut key to create a variable.
ii. Method 2 - Click on the Variables pane and enter
the name " Acc_list." Then, in the "Variable Types"
column, select "Browse for Types" from the dropdown
menu.
iii. The .Net window for data types will appear on the
screen, enter the type name as
“System.Collections.Generic. List” and choose “String”
then click on “OK” button.
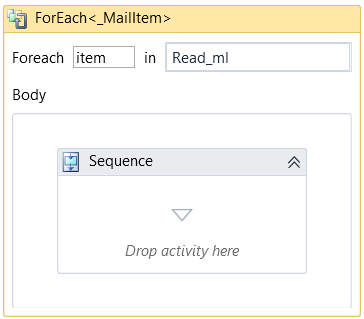
5. Place the “For each” activity next to the read mail to iterate each mail from the
“Read_ml” variable for further process of saving the report and extracting the values.
a. Enter "Read_ml" as the input value here, in which is where we have
stored the read mails.
b. The values from "Read_ml" have been assigned to the "Item."
c. Select "System.String" as the "TypeArgument" since it's a list of
values.
6. Drag and drop the “Save” activity inside the “For Each” activity.
a. Double click on the activity and provide the “FolderPath” as
the new folder path created above to save the mail messages.
b. Navigate to the properties and enter the “FileName” as
“Feedback” for the name in which the mail message needs to
be stored.
c. Specify the “MailItem” as “item” here to save the mails from the
mailbox using the variable.
7. Drag and drop the “Reply” activity and place it next to the “Save” activity.
a. It helps to reply to the mails using the “MailItem” variable.
b. Double click on the activity and enter the “MailBody” as “We are
grateful and appreciate your response! You are one of our
valuable customers, your feedback is our improvement” in the
property.
c. Navigate to the properties and provide the “MailItem” as “item”
here to send a reply to the mails using the variable.
d. Specify the “MailSubject” as “ThankYou” to address the mails.
e. Mention “True” in the “ ReplyAll” property to send the mail as
“ReplyAll” function.
8. Now, execute the workflow.
The bot will execute the workflow and fetches the mail from the specified “MailBox”
to save as “MailMessage” and sends a reply to the customers.