The following use cases demonstrate how to utilize the "Datatable" automation within the workflow.
In this use case, we are presented with two distinct Excel files as inputs. For one group of Excel files, the content comprises
a list of employee details for individuals working in different branches on the same project. The second set of input files contains
identical employee details, but these employees are relocating to different locations.
Based on the provided input files, our task involves cross verifying the Excel files and updating two columns: "Relocating To"
and "Effective From" for each employee. Subsequently, this information will be transformed into an HTML file and distributed to
the employees.
Steps to execute the bot:
Follow the below steps to automate the above use case.
Extraction of Data from first excel:
1. Launch the designer and create a workflow named “DataTable”.
2. Drag and drop the “Get Excel Object” activity from the Excel Automation feature.
a. It serves as a scope to automate all other activities within this. It will load the “Excel” file that has been
provided as input.
b. Enter the “filepath” of the excel file or select the “Three dots” and choose the “Excel File” from the system.
(Attached the sample excel file).
c. Drag and drop the “ReadRanges” activity from the Excel Automation feature.
i. We are using this activity to read the ranges from the provided “Excel” file and extract the data
to “Datatable” type as output.
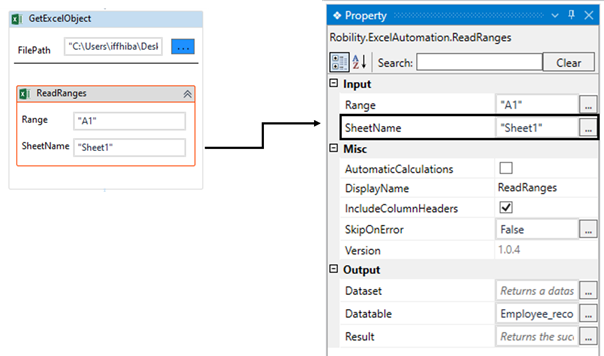
ii. Enter the “Range” as “A1” as we are reading the ranges from “A1” to the end of the data.
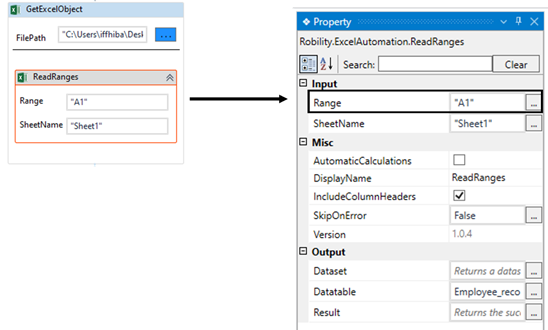
iii. Provide the “SheetName” as “Sheet1” as it contains the data that needs to be read.

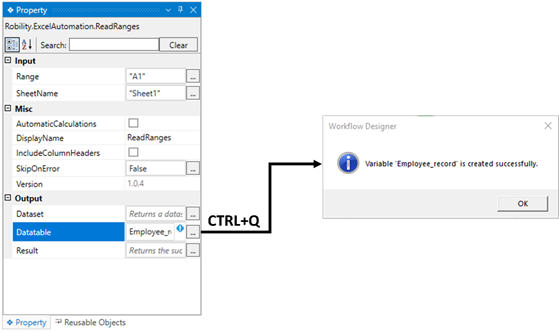
iv. Navigate to the properties and create a variable in the “DataTable” field as “Employee_record”. It
will convert and extract the read data to store in the variable “Employee_record”,
v. There are two ways to create a variable-
vi. Method 1 – Click on the "Datatable" property within the "ReadRanges" activity and enter the variable
name. In this case, we are using " Employee_record." Then, press "Ctrl+Q," which is a shortcut key
to create a variable.
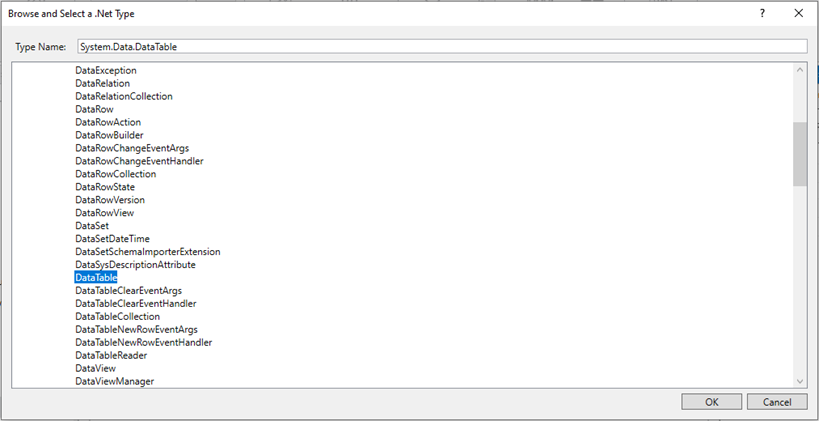
vii. Method 2 - Click on the Variables pane and enter the name " Employee_record." Then, in the "Variable
Types" column, select "Browse for Types" from the dropdown menu.
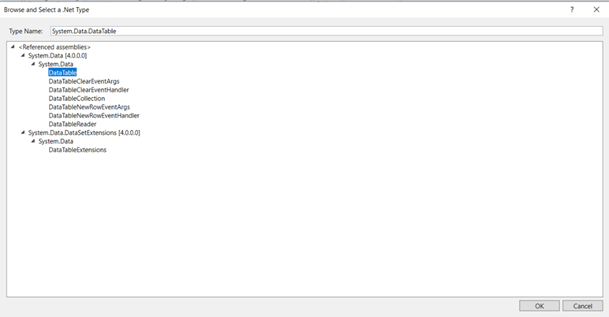
viii. The .Net window for data types will appear on the screen, enter the type name as “System.Data.Datatable”
and then click on “OK” button.

Extraction of Data from second excel:
3. Now, let’s drag and drop another “GetExcelObject” and place it next to the first one.
a. As we have two sets of excel file, we are using another “GetExcelObject” activity to extract the data from another excel.
d. Enter the “filepath” of the excel file or select the “Three dots” and choose the “Excel File” from the system.
(Attached the sample excel file).
e. Drag and drop the “ReadRanges” activity from the Excel Automation feature.
i. We are using this activity to read the ranges from the provided “Excel” file and extract the data to “Datatable” type as
output.
ii. Enter the “Range” as “A1” as we are reading the ranges from “A1” to the end of the data.
iii. Provide the “SheetName” as “Sheet1” as it contains the data that needs to be read.
iv. Navigate to the properties and create a variable in the “DataTable” field as “Employee_record2”. It will convert and
extract the read data to store in the variable “Employee_record2”.

v. There are two ways to create a variable-
vi. Method 1 – Click on the "Datatable" property within the "ReadRanges" activity and enter the variable name. In this
case, we are using " Employee_record2." Then, press "Ctrl+Q," which is a shortcut key to create a variable.
vii. Method 2 - Click on the Variables pane and enter the name " Employee_record2." Then, in the "Variable Types"
column, select "Browse for Types" from the dropdown menu.
viii. The .Net window for data types will appear on the screen, enter the type name as “System.Data.Datatable” and then
click on “OK” button.
Filtration of Columns:
4. Drag and drop the “FilterTable” activity and place it next to the “TableViewer” activity.
a. It helps to filter the values from the datatable by either “Keeping” it or “Removing” the columns or rows from the table.
b. In this case, we are using this activity to remove the “Position, Start date and Salary” from the first datatable “Employee_record”.
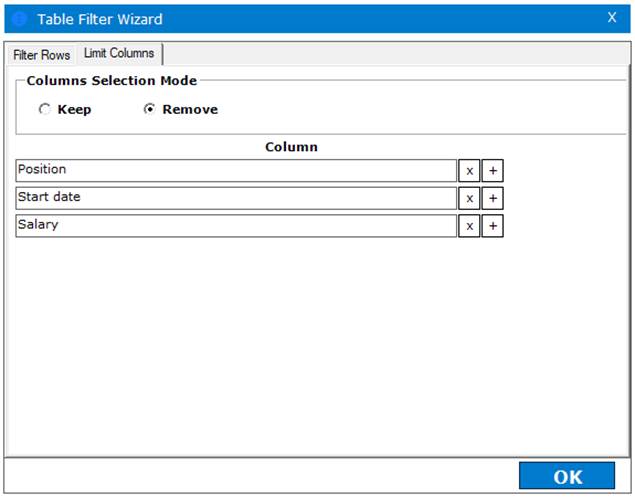
c. Double click on the activity and click on the “Filter Wizard” option.
d. A window will appear, select the “Limit Columns” tab.
e. Enter the column name as “Position” and select the “+” button.
f. Enter the column name as “Start date” and select the “+” button.
g. Enter the column name as “Salary” and choose the “remove” radio button.
h. Click on “OK” button.
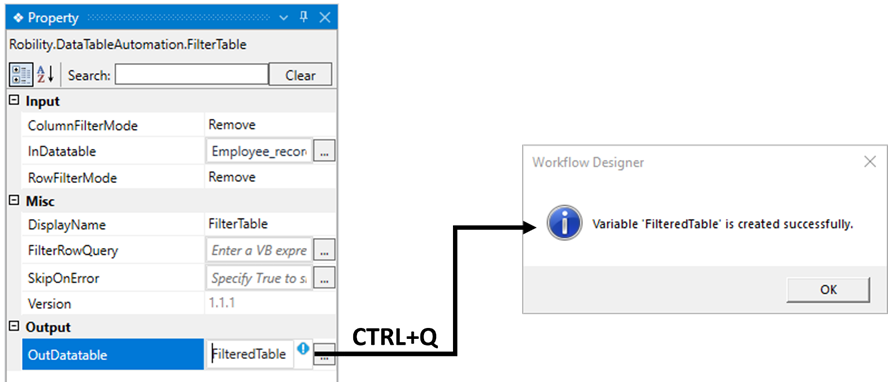
i. Navigate to the properties and provide the “InputDatatable” as “Employee_record”.
j. Declare a variable in the “OutDatatable” as “FilteredTable”.
k. There are two ways to create a variable-
i. Method 1 – Click on the "OutDatatable" property within the "FilterTable" activity and enter the variable name. In this
case, we are using " FilteredTable." Then, press "Ctrl+Q," which is a shortcut key to create a variable.
ii. Method 2 - Click on the Variables pane and enter the name " FilteredTable." Then, in the "Variable Types" column,
select "Browse for Types" from the dropdown menu.
iii. The .Net window for data types will appear on the screen, enter the type name as “System.Data.Datatable” and then
click on “OK” button.
Merging of Tables:
5. Drag and drop the “Merge Table” activity from the “ Datatable” automation.
a. It helps to merge two tables.
b. In this case we are going to merge the two tables from the second excel sheet and the filtered table.
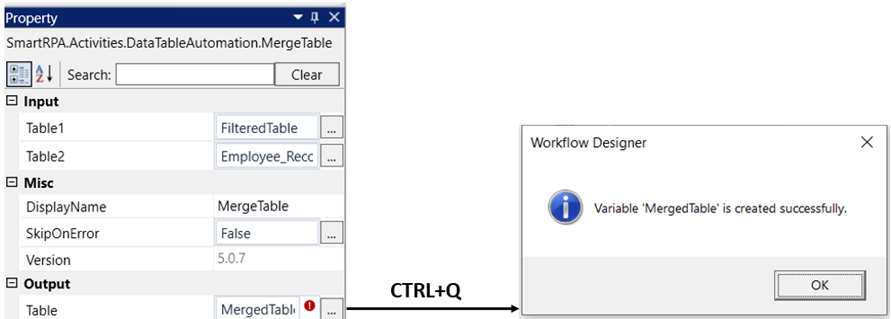
c. Navigate to the properties section and enter the Table 1 as “Filtered Table” and Table 2 as “Employee_Record2”.
d. Declare a variable in the “Table” as “MergedTable”.
i. Method 1 - Click on the "Table" property within the "MergeTable" activity and enter the variable name. In this case, we are using
"MergedTable" Then, press "Ctrl+Q," which is a shortcut key to create a variable.
ii. The .Net window for data types will appear on the screen, enter the type name as “System.Data.Datatable” and then click on “OK” button.
Removing Duplicates:
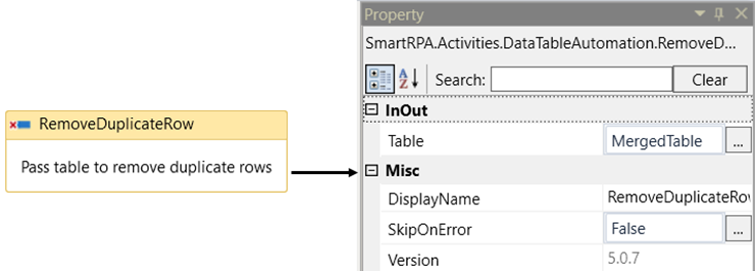
6. Drag and drop the “RemoveDuplicateRow” activity from the “Datatable” automation.
a) It helps to remove the “Duplicate rows” from the datatable variable.
b) In this case, we are using to check and remove the duplicate rows from the datatable variable “MergedTable”.
c) Navigate to the properties and enter the input table as “MergedTable” in the “Table” property.
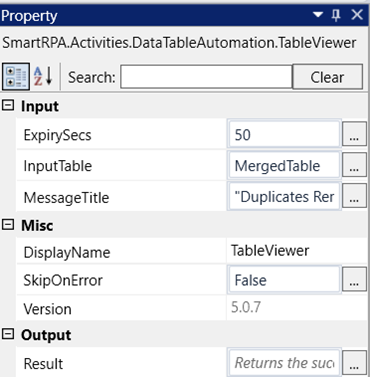
7. Place “Table viewer” activity next to the “RemoveDuplicateRow” activity.
a) It helps to view the datatable in a table format.
b) Navigate to the properties and enter the input table as “MergedTable” in the “InputTable” property.
c) Provide the “MessageTitle” as “DuplicatesRemoved” in the property.
d) The “ExpirySecs” will be set as “5” by default. If you want to increase or decrease the seconds, enter the number. Here we have
provided as “50”.
Adding a new column:
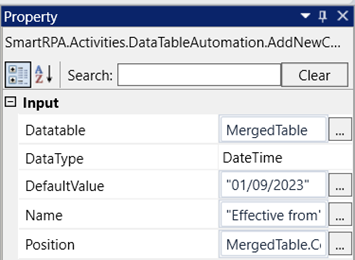
8. Drag and drop the “Add a new column” activity and place it next to the “RemoveDuplicateRow” activity.
a. It helps to add or update with a new column in the existing datatable. The values for the column can be provided only as default value.
b. In this case, we are going to add a new column as “Effective from” to the existing datatable “MergedTable” with default values as
“01/09/2023”.
c. Double click on the activity and enter the “column” name as “Effective From” that is needed to be added to the table.
d. Navigate to the properties and provide the “Datatable” as “MergedTable” to add the column in this table.
e. Choose the “datatype” as “DateTime” from the drop-down as we are going to add date as the default value. This datatype format indicates
the datatype of column.
f. Specify the “DefaultValue” as “01/09/2023”. It will be added as default values to all the rows.
g. Enter the “Position” to mention where the column has to be added. Here we are going to add as the last column.
ii. Enter the “Position” as “MergedTable.Columns.Count”.
Conversion to HTML FILE:
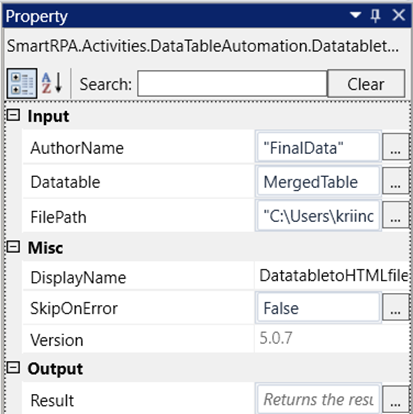
9. Drag and drop the “DatatableToHtmlFile” activity and place it next to the “AddNewColumn” activity.
a. It helps to convert the datatable to the html file format.
b. In this case, we are going to convert the datatable “MergedTable” to Html file.
c. Navigate to the properties and enter the “AuthorName” as “FinalData” to create the name for the html file.
d. Enter the “InputDatatable” as “MergedTable” in the field.
e. Provide the file path to store the “htmlfile” in the local system and add “\FinalData” along with the filepath.
f. Now, execute the workflow.
g. Once the flow has been executed, double click on the “htmlfile” stored in provided filepath to view on the browser.
