Post successful authentication, the user will be redirected to the Tenant home page.
The tenant home page consists of the following menus:
- Tenant home
- Robility AI
- Invited Users
- Administration
- Help
A grid view populates the list of tenants that are available in the platform (The tenant list shown on the grid is based on the role or privilege the user is granted.)
Another section named platform updates consists of the release notes and updates of activities, Designer, Runner, Assisted Robot, Manager and upcoming features.
The grid populates the Tenant Name, Tenant Owner name, Tenant Expiration Date, Status and Action options.
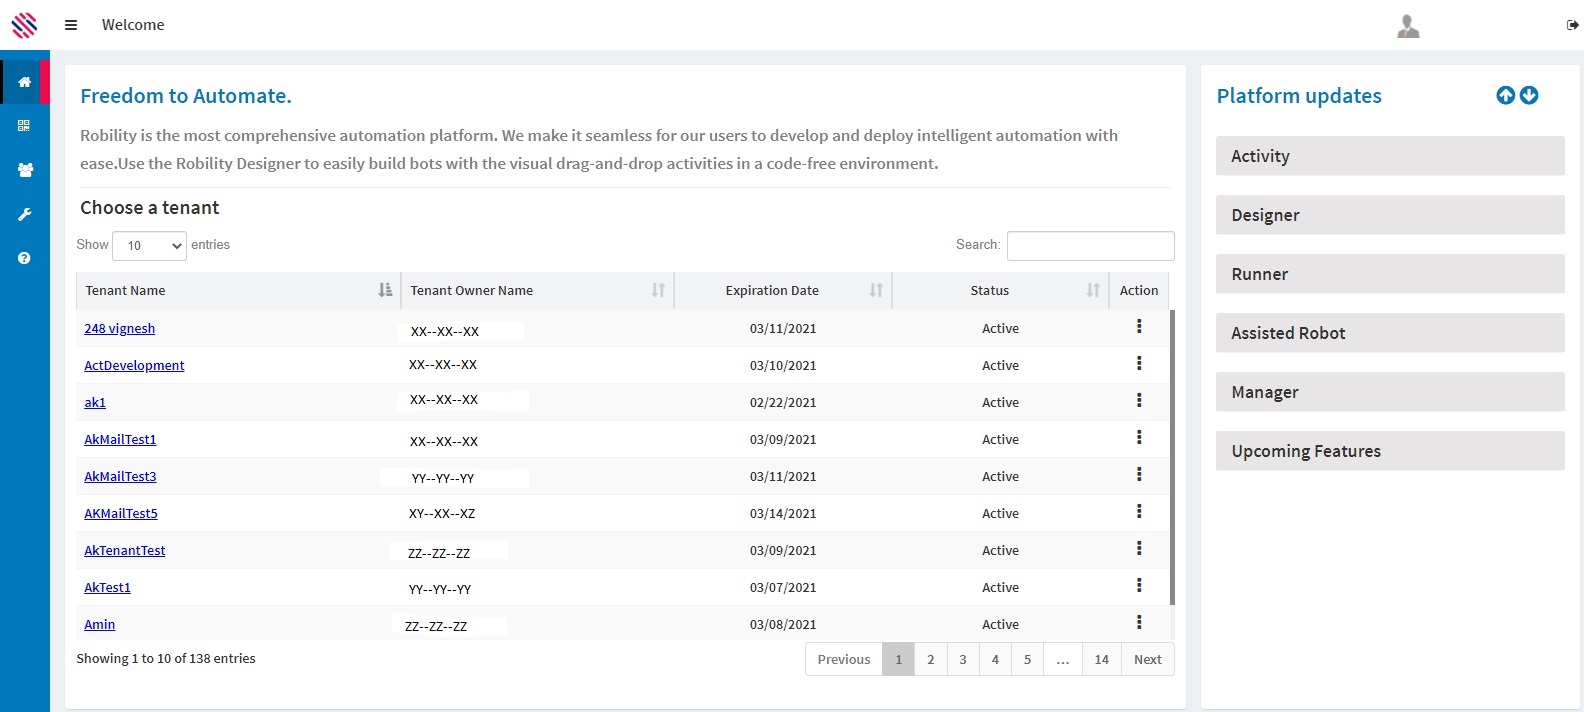
Figure 1
The action button in the grid allows the user to get information about the tenant, invite a new user and disable/enable a tenant. Clicking on the ellipsis that is available under the action column populates a list of actions that the user has been granted privilege to perform.
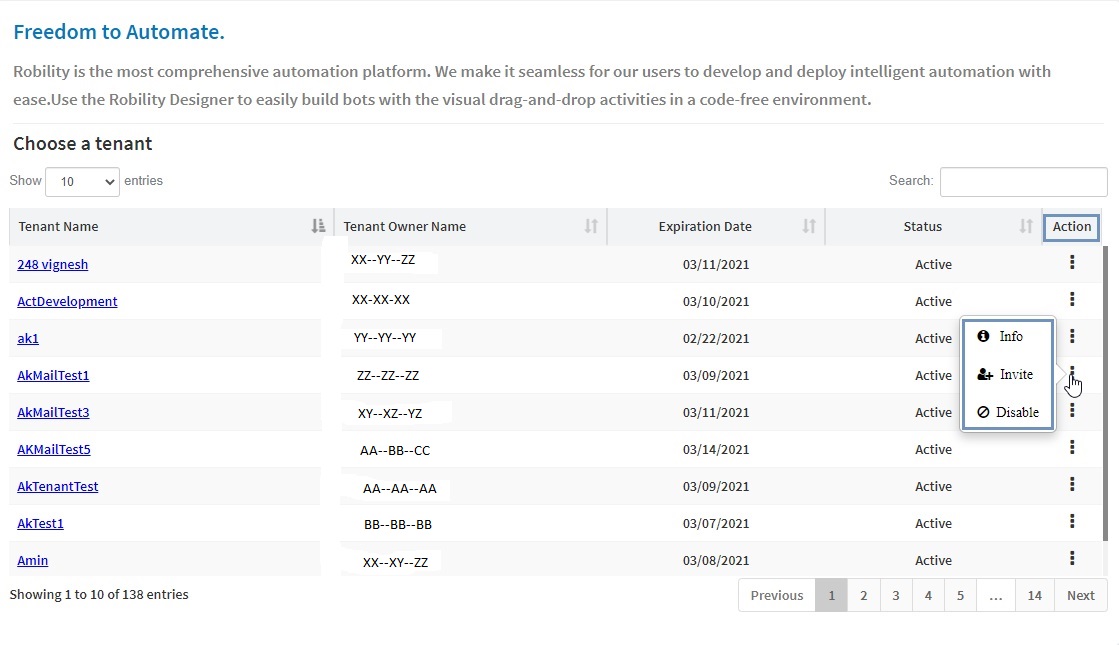
Figure 2
The info option populates the tenant information that the user had chosen.
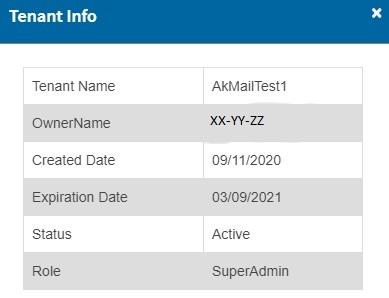
Figure 3
Invite User option enables one to invite a new user as a tenant by providing the email address of the recipient who is to be invited and by choosing the role to be granted and clicking on the invite option.
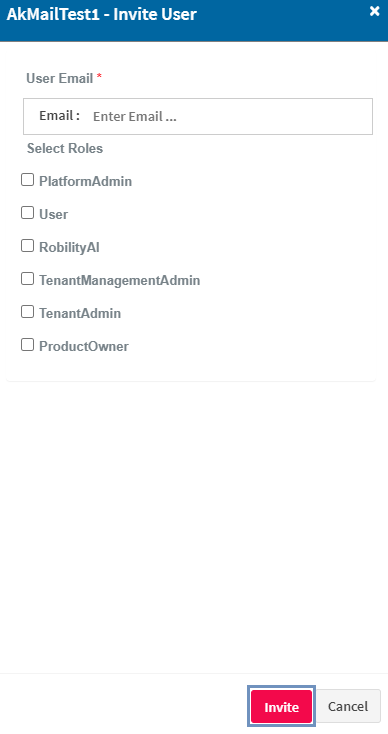
Figure 4
Disable option allows user to disable a tenant. Clicking the disable option prompts the user for confirmation.
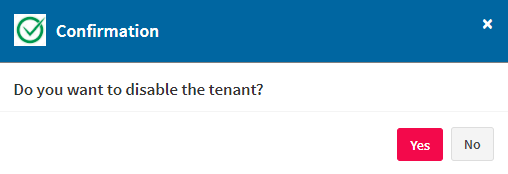
Figure 5
Clicking on the action ellipsis adjacent to a tenant that is disabled will populate the enable option.
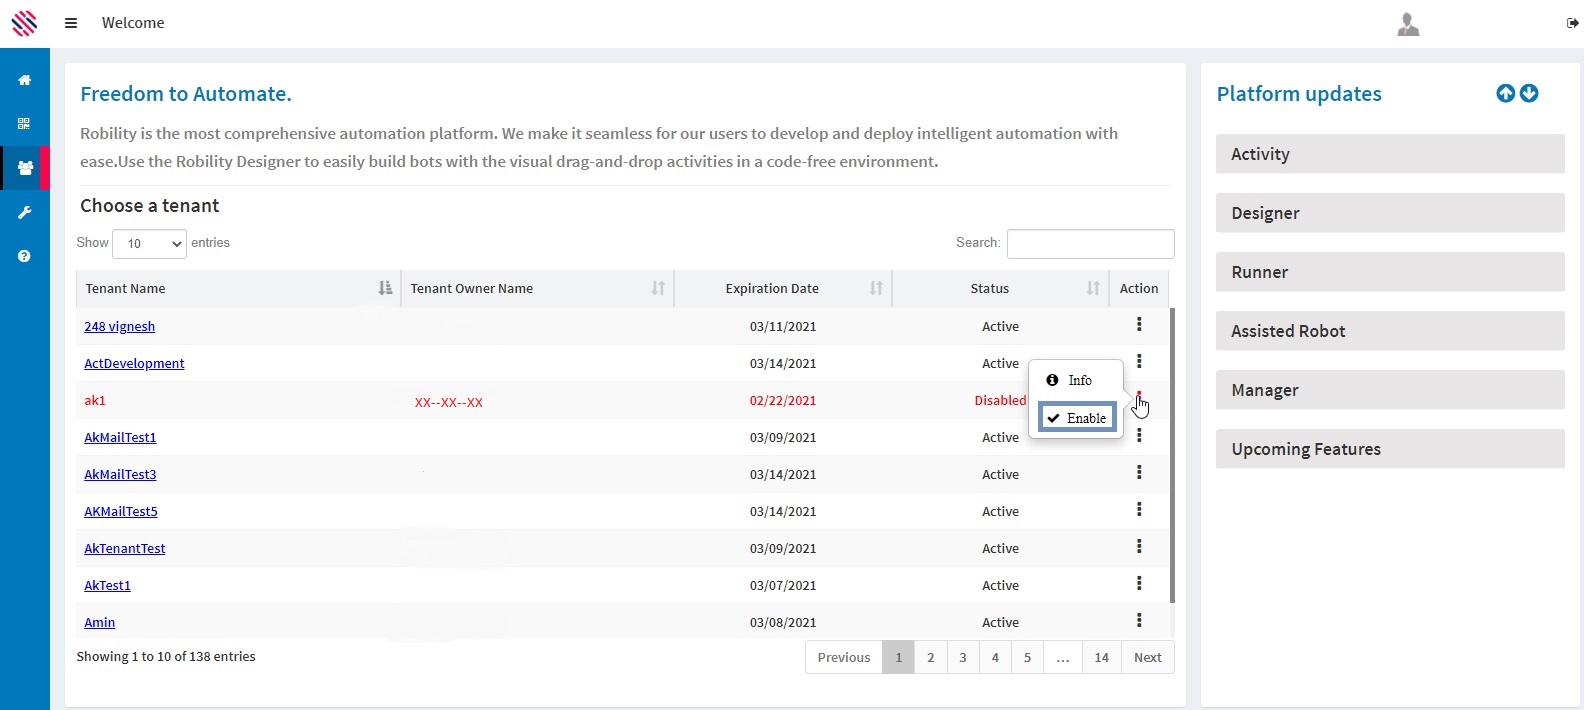
Figure 6
On clicking the enable option, a pop up appears for the confirmation to enable the tenant. By clicking on Yes, the disabled tenant gets enabled.
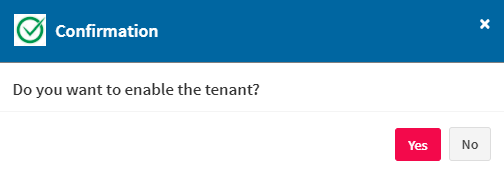
Figure 7
The enabled tenant will now be in active status in the tenant selection grid.
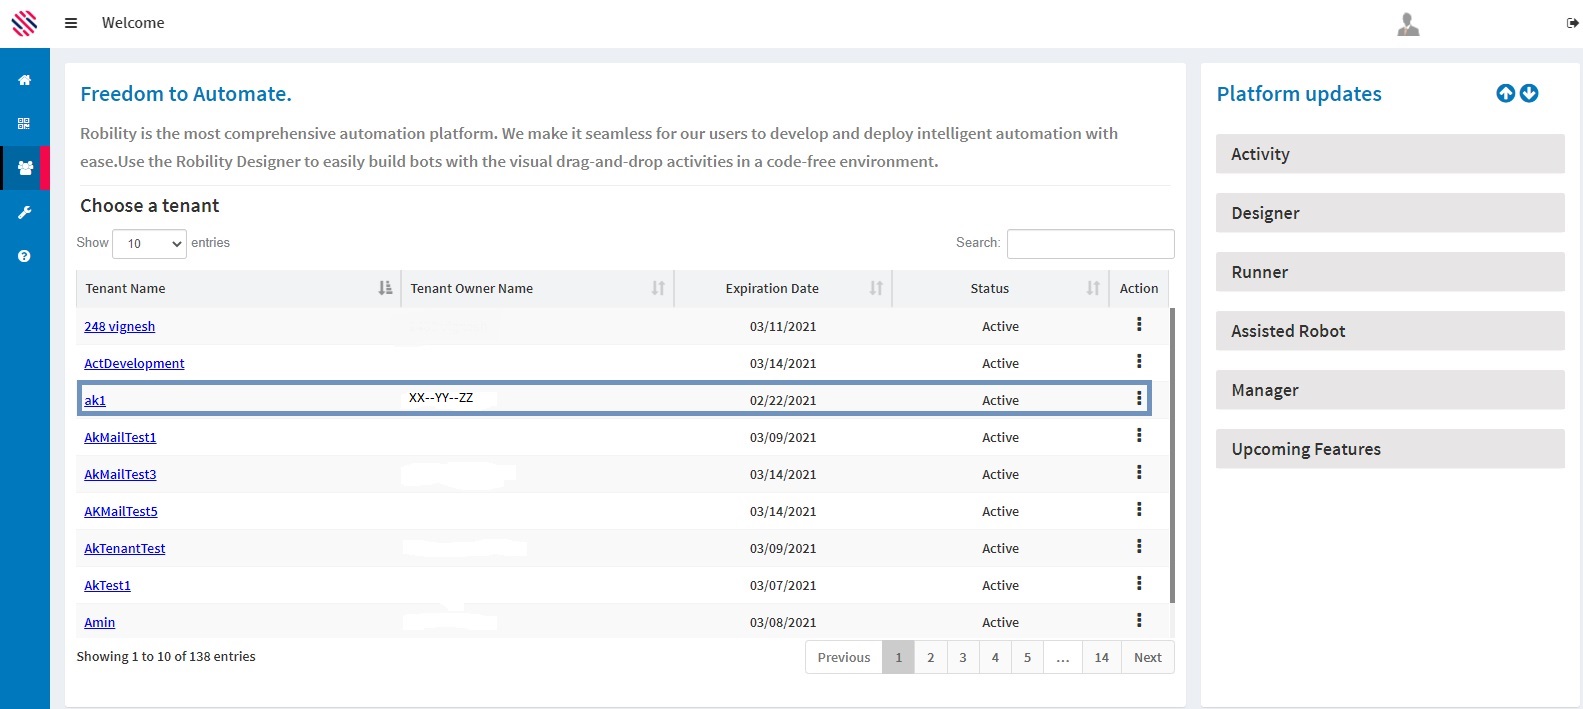
Figure 8
The Platform Updates section comprises the updates and release notes of features and products available in the platform.
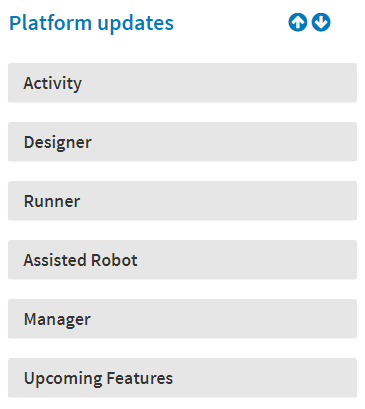
Figure 9
Clicking on each link shows the updates in order, with the latest being on top .
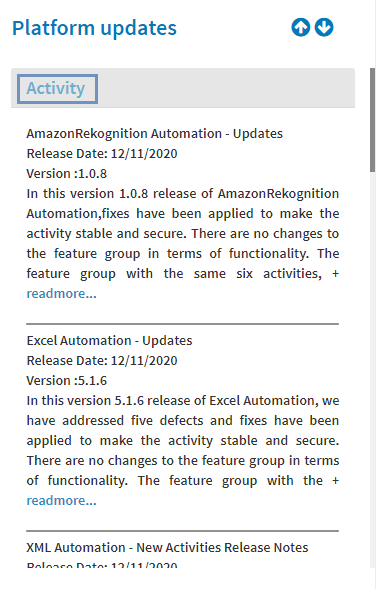
Figure 10
The tenant home option redirects the user to the Tenant home page from other menus.
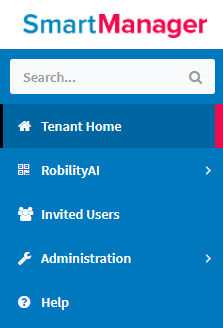
Figure 11
The Robility AI menu comprises features to build new models on Entity extraction, Image Classifier, Object Detection and Text classifier.
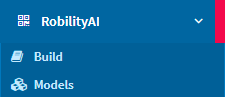
Figure 12
The administration menu contains the Product Management, Platform Configuration and Add Tenant sub-menus.
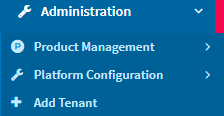
Figure 13
Product management menu comprises Product Sync sub-menu that is available only for Platform Administrators to Sync the Manager with the latest Robility product versions. Additionally, users can download newer and older versions of the software. Using Edit Log Levels menu, one can re-set or change log levels. Log Viewer menu is used to view the logs of the modules.
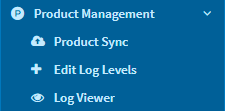
Figure 14
Platform Configuration menu comprises of the Email Configuration sub-menu and enables users to update EmailTo and EmailCC .The Configuration Management menu enables users to update the configuration that has been setup while configuring the platform. Job scheduler menu is a prepared SQL code that is saved, so it can be used over and over again.
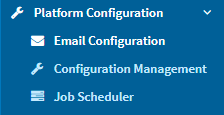
Figure 15
Add tenant provides the option of creating tenants that further facilitates creating numerous Projects against each tenant, resulting in timely deliverables and easy tracking.
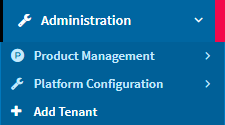
Figure 16
Clicking on the profile name populates the user details available in the platform, such as, the NT ID, First and last name, email ID , phone number and roles assigned to the user.

Figure 17

Figure 18