When to use the Get Transaction activity
When a transaction is to be fetched from a queue for further processing this activity can be used. A wizard guides you to complete the activity designing.
Figure 1
|
Activity Name |
Picture |
|
GetTransaction |
|

Drag and drop the Get transaction into the flowchart, double click on the activity.
Figure 2
![]()
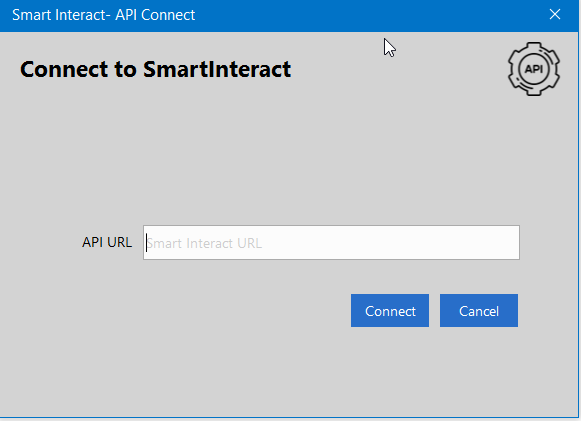
Click the Get Transaction option, a wizard screen pops up as shown below:
Figure 3
The unique API URL input shall be available in the project setup menu,
SmartInteractà ConfigurationàProject SetupàChoose the project from the dropdownàStep 10 API Key
Figure 4
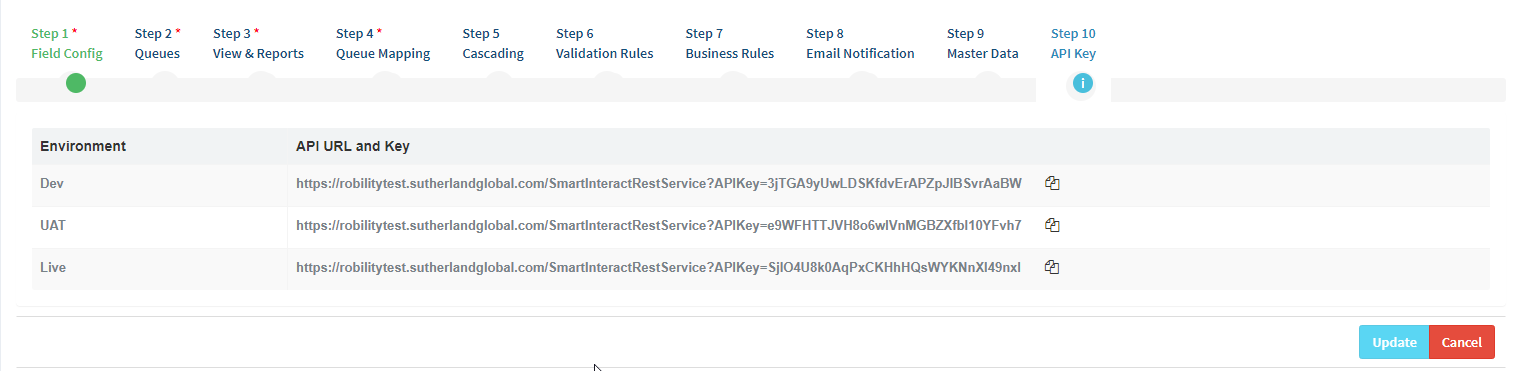
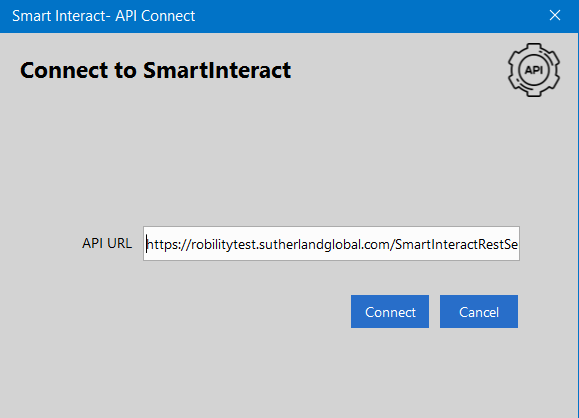
API key is environment specific, copy the appropriate key and paste it to the API URL field in the wizard.
Figure 5
Click on the connect option. a new screen loads to choose the preferred values.
Figure 6
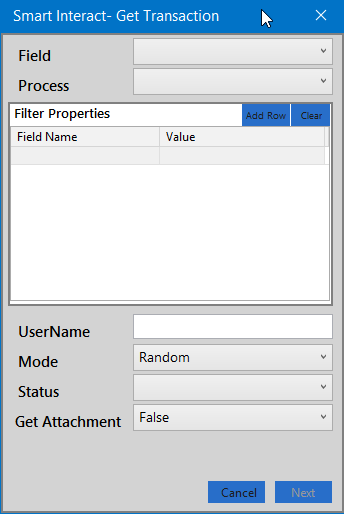
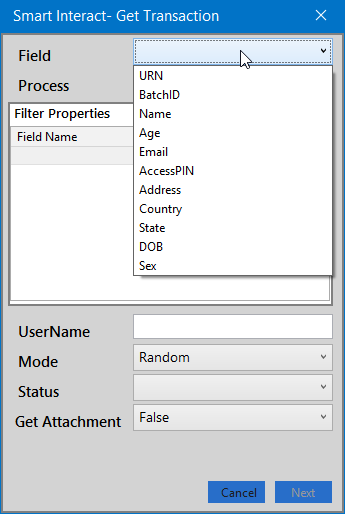
Choose an option from the Field drop down that determines the level in which the transaction needs to be processed.
Figure 7
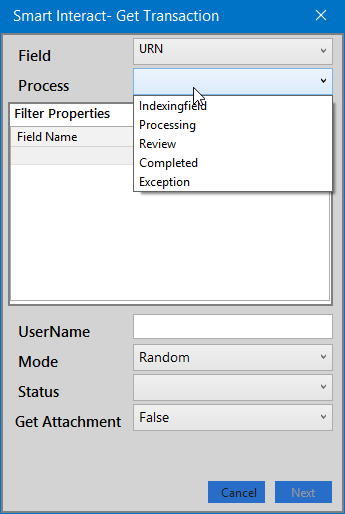
From the process drop down choose the queue from which the transaction is to be fetched in the process.
Figure 8
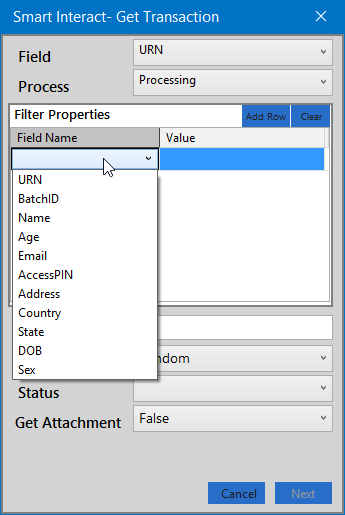
The Filter properties option is used in scenarios where the transaction needs to be fetched based the field and its value. Click on add row option and choose the Field and supply the value.
Figure 9
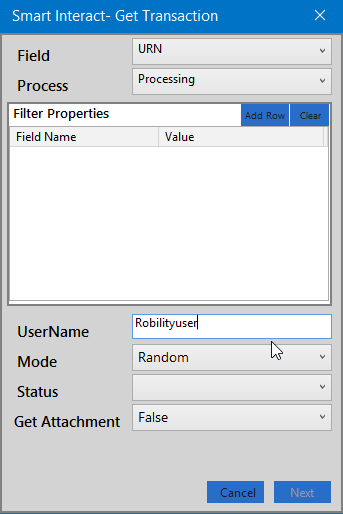
Provide the syntax (e.g. environment. username) which returns the name of the user that had fetched the transaction or hardcode the value in the username field.
Figure 10
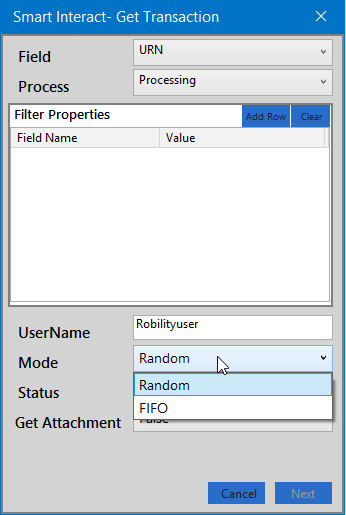
Set the mode in which the transactions are to be fetched, the drop down has 2 values
- Random
- FIFO
Figure 11
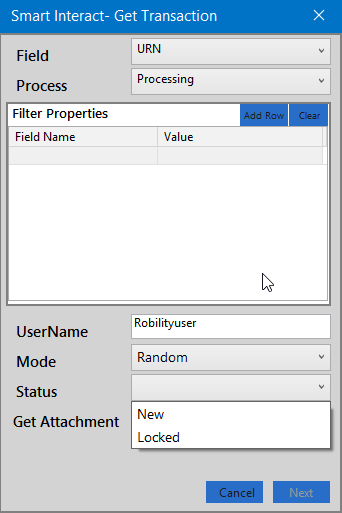
Select the status in which the transaction needs to be fetched from the previous queue, the drop down has 2 options
1. New
2. Locked
Figure 12
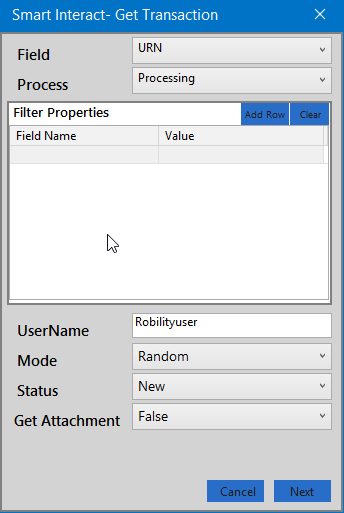
The next option is to choose if any attachment is to be downloaded in the transaction that is get, user to choose either of the Boolean based on the requirement.
Figure 13
Click next to proceed further.
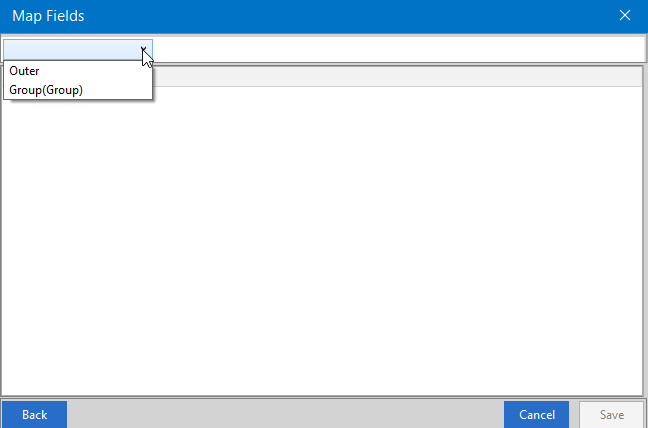
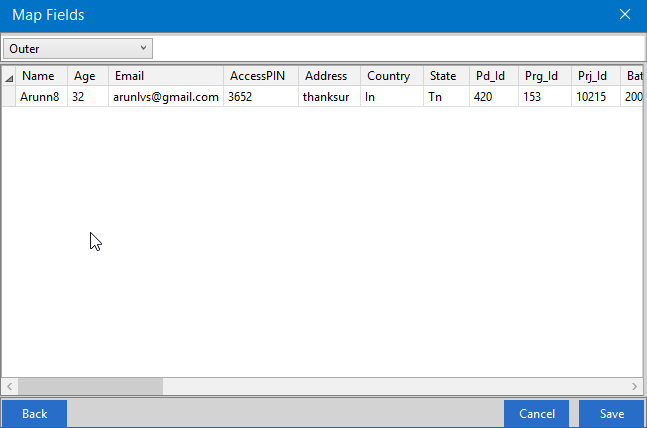
In the dropdown you will find options such as Outer and the group names that you had configured to view and confirm the values that will be fetched by executing the activity.
Figure 14
Choosing outer to view and validate the fields and its values which are configured apart from the ones that is available in the group. Click Save to complete the wizard.
Figure 15
Click Save to complete the wizard.
Technical Reference
