It assists the user in adding or updating a "new column" to the "Existing input
datatable" during runtime.
Technical Reference
|
|
INPUT |
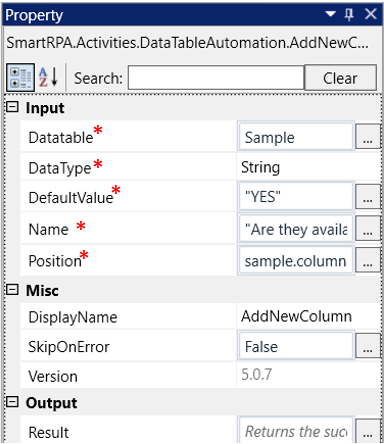
DataTable: Enter the "Input datatable" variable where the input data is stored. This parameter helps you to add a new column. This field only accepts the "datatable" data type. |
|
DataType: Choose the necessary data type to be added to the "Column": Int: This only accepts the "Integer" datatype. (For example, 1, 2, 3) String: This only accepts the "String" datatype. (For example, "sample") DateTime: This only accepts the "DateTime" datatype. (For example, 01/01/2001 12:00 AM) Double: This only accepts the "Double" datatype, referring to floating-point and decimal values. (For example, 123.456 or -3.145). |
||
|
DefaultValue: Specify the "Default value" that should automatically populate for the column values. This value will remain consistent for all rows in the column. You can assign "default values" solely to the columns; it is not feasible to add multiple values. This field exclusively accepts data of the "string" type. |
||
|
Name: Provide the "Header" for the column to be inserted into the table. This field only accepts the "string" data type. |
||
|
Position: Specify the "Position" for the column where it should be inserted. This corresponds to the "index" position to which the column should be added. This field only accepts data of the "int" type. |
||
|
MISC |
DisplayName: Displays the name of the activity. The activity name can also be customized to help in troubleshooting. |
|
|
SkipOnError: This setting determines whether to proceed with executing the workflow even if an error occurs. It only accepts Boolean values: "True" or "False". The default setting is "False". True: The workflow continues to the next step. False: The workflow halts if an error is encountered. None: If this option is left blank, the activity will inherently act as if set to "False". |
||
|
Version: It specifies the version of the Datatable automation feature in use |
||
|
OUTPUT |
Result: It helps to view the execution state of the activity. It returns the values in Boolean format. True: It indicates the activity has been executed successfully without any error. False: It indicates that the activity has been faulted due to some unexceptional error thrown. |
* Represents mandatory fields to execute the workflow

Here's an example of how the Add new Column activity works –
In the following example, I am using the “Excel sheet” which is used to automate
in the Use case. To get a better understanding, click here.
1. Create a solution to build a workflow.
2. Install the "DataTableAutomation" feature from "Manage Features."
3. Drag and drop the "AddNewColumn" activity onto the designer pane.
a. This activity can only be utilized after the other “Datatable activities.”
b. It helps to add or update the existing datatable with a “New column.”
c. Here I am extracting the output as “Datatable” from the “Excel sheet” using the
“ReadRanges” activity from the “Excel Automation.” (Refer the Use case to
get detailed information).
i. “JoinedTable” is the output for the “datatable” which is declared here.
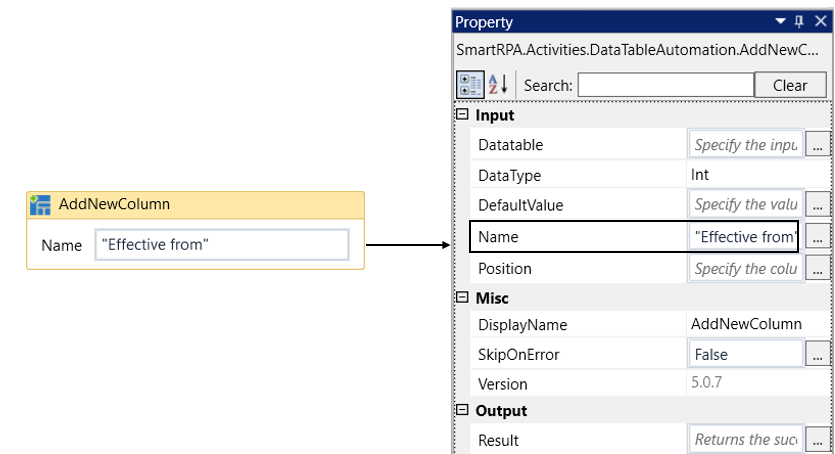
d. Double-click on the activity. It prompts you to enter the “Column Name”
to be created.
i. Here I am providing the “Column header” name as “Effective From” in the box.
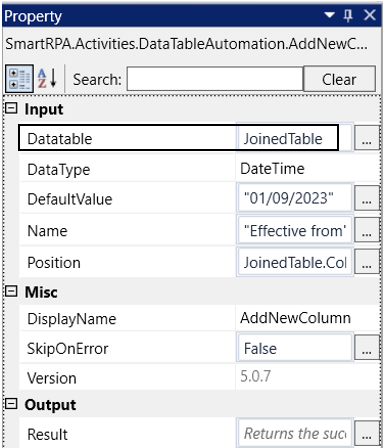
e. Navigating to the “Datatable” in the properties to provide the input to
add the column in the datatable.
i. Here I am using the datatable “JoinedTable” extracted as output from the
Excel sheet”.
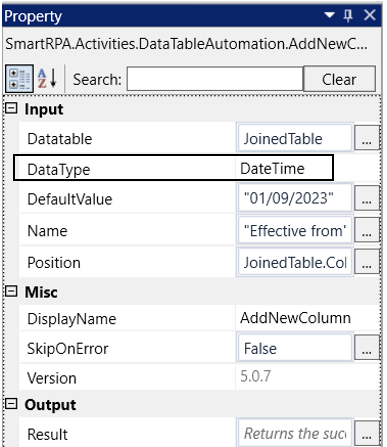
f. Then moving to the next property, “DataType” to select the datatype for
the “Column” to be created.
i. Here I am choosing the “datatype” as “DateTime” from the drop-down as I
am going to add “Date and Time” as the default value.
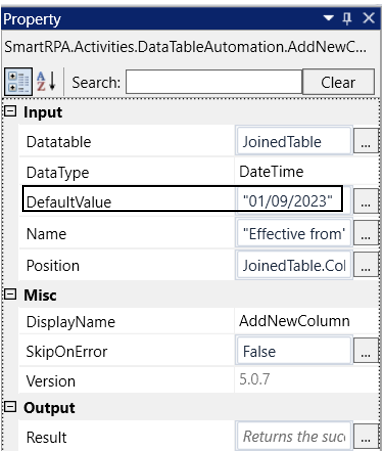
g. The next property is “Default value”, using this field, I am going to add
a default value for the column to be created.
i. Specifying the “DefaultValue” as “01/09/2023” and it will be added to all the
rows against the column.
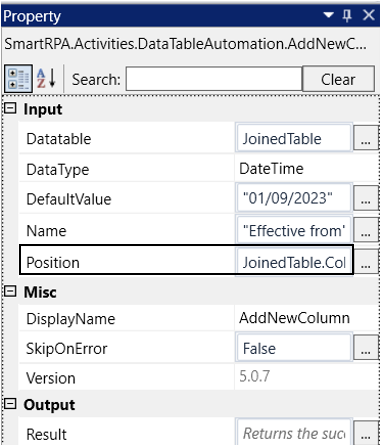
h. Finally, the last property is “Position”, using this field I am going to mention
where the column needs to be added in the “Datatable”.
i. Here I am going to add as the last column.
ii. Since I am unsure about the column index position in the "JoinedTable," I am
specifying the “Position” as "JoinedTable.Columns.Count" to determine the
count of columns and then add the new column adjacent to it. For instance,
if the count is "3," the new column will be appended as the "4th" column.
4. Now, I am executing the workflow to add the “New Column” to the “datatable”.
5. To view the added “Column”, you can use the “Table viewer” activity.
Click here to know how the activity is used in the workflow.