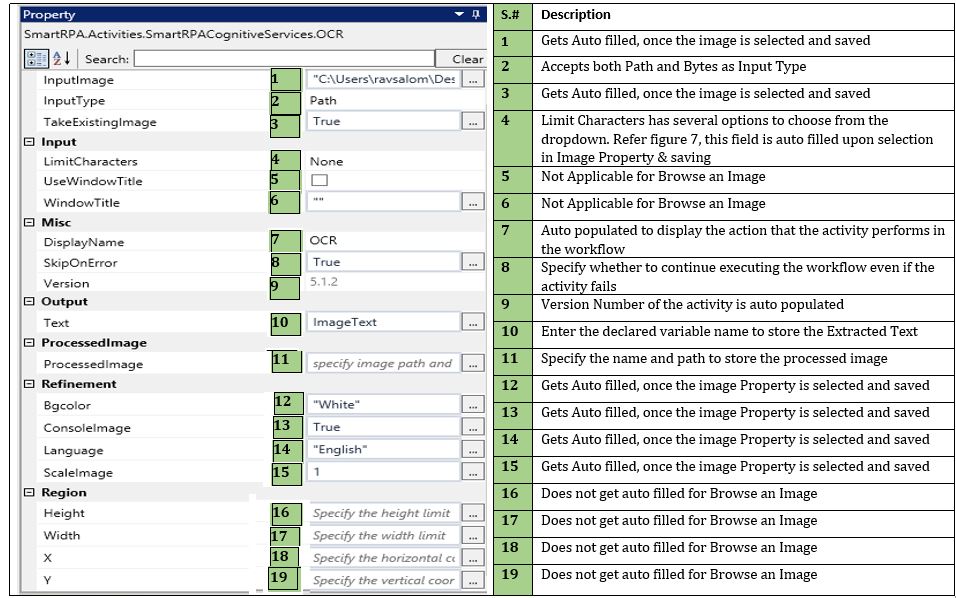
OCR
When to use the OCR Activity
When you want to use OCR on specific text section or images to extract the content, this activity can be used.
Figure 1

As soon as you drag and drop an OCR activity, the Selection Wizard will be enabled. You can straightaway start snipping text or Browse for an image. However, if you are not ready with your selection, you can set it as Start Node and follow these steps.
Double-click to view. Click on Snip Text Position to enable the Selection Wizard.
Figure 2
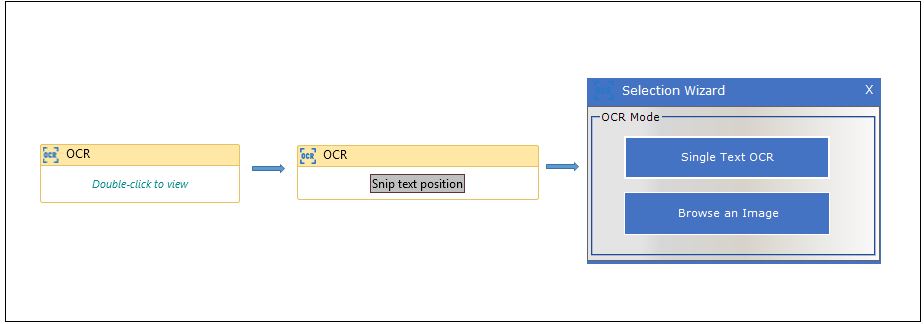
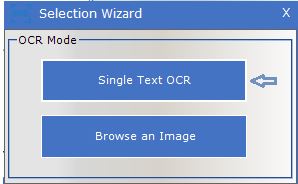
Click on the Single Text OCR option to snip the required text.
Figure 3
Snip the required text.
Figure 3.1
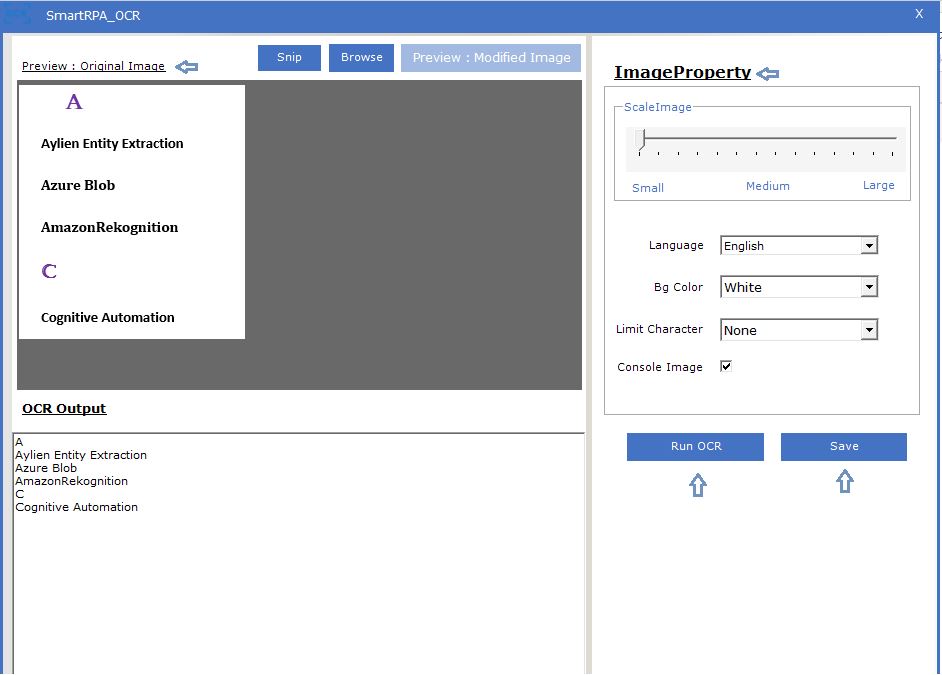
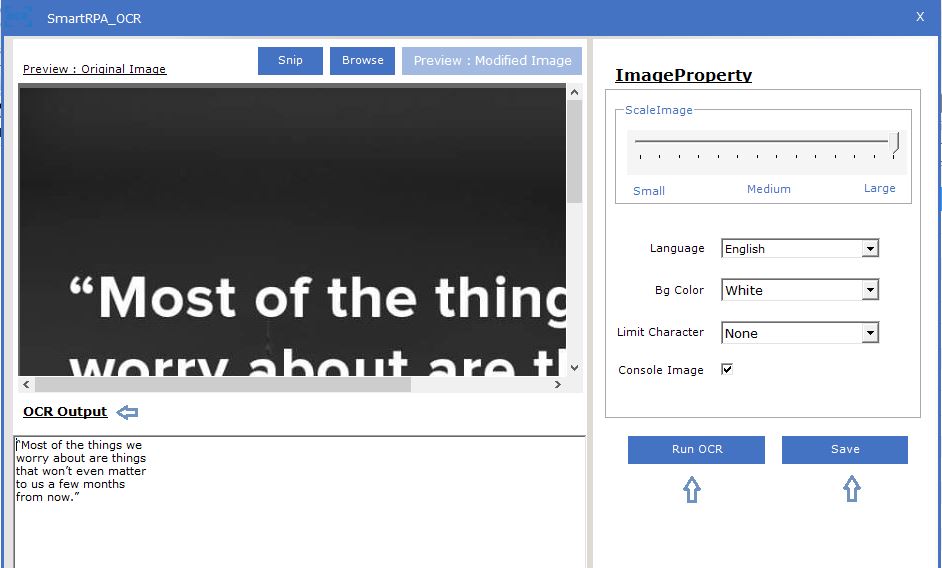
The snipped text will be displayed in the SmartRPA _OCR Screen. You will be able to preview the OCR Output of the original image. Image Property will be displayed as well. You can set the size of the output using the Scale Image. Select the Language, currently English and Arabic are available. Set the Background Color - choices are black and white. In Limit Character dropdown, you have many options to specify the characters that you want to allow in the output. If None is chosen, the original snipped text will be extracted. Console Image will be checked by default. You can uncheck it as per requirement. Snip option on the top will take you back to snipping text and Browse will allow you to browse for another image for text extraction. Run OCR option is available for scenarios where you change the properties and want to preview the changes before saving.
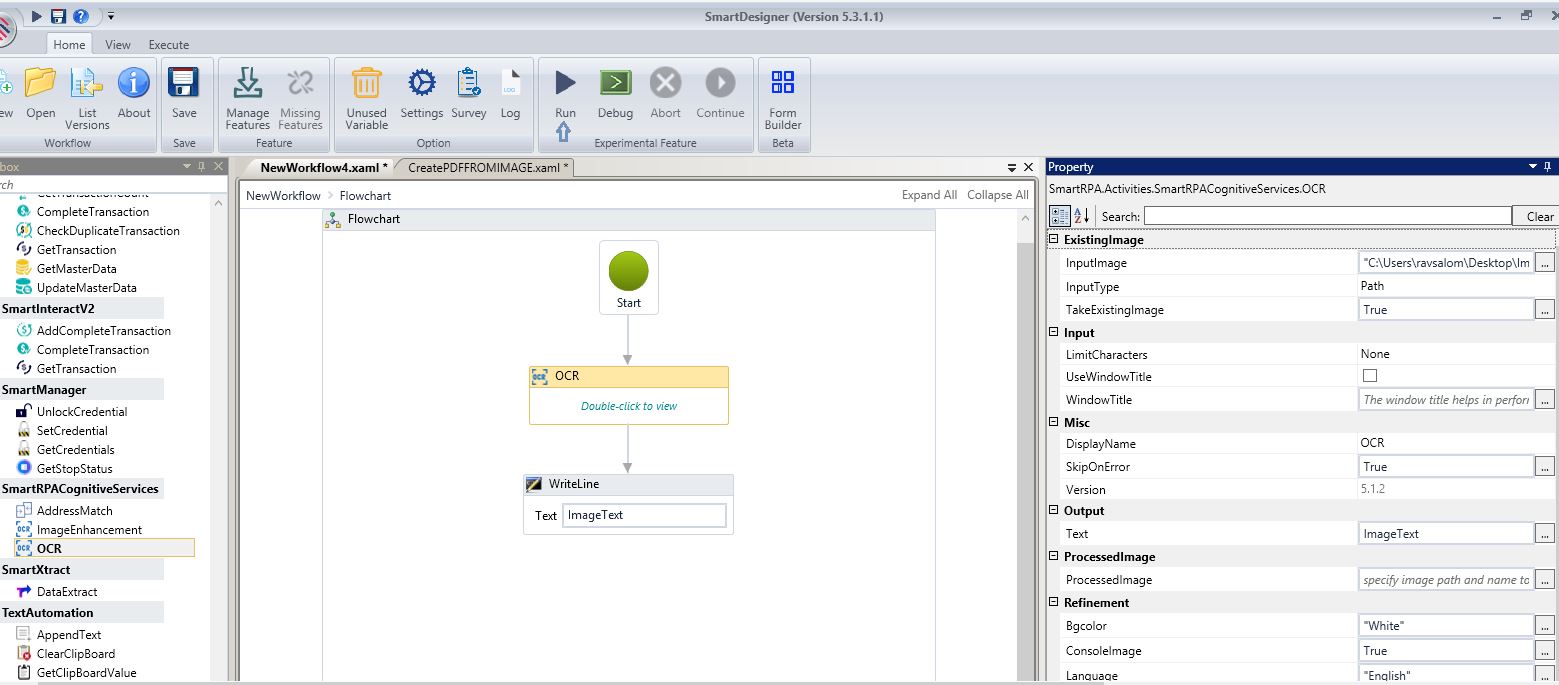
After setting image properties, you can Run OCR and Save. The chosen values will be replicated in the Property window and yield similar output while executing the workflow. Refer Figure 5. 5. Or even without running OCR, you can save, and the properties will be auto filled in the respective fields in the Property Window of the Designer. You can then proceed to execute the workflow and extract the OCR Output.
Figure 4
Drag and drop a Write Line activity, pass the Text Field output to view the extracted text. Execute.
Figure 5

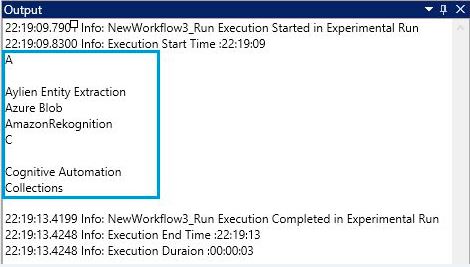
Output
The output in the OCR preview screen will be seen here as well.
Figure 5.5
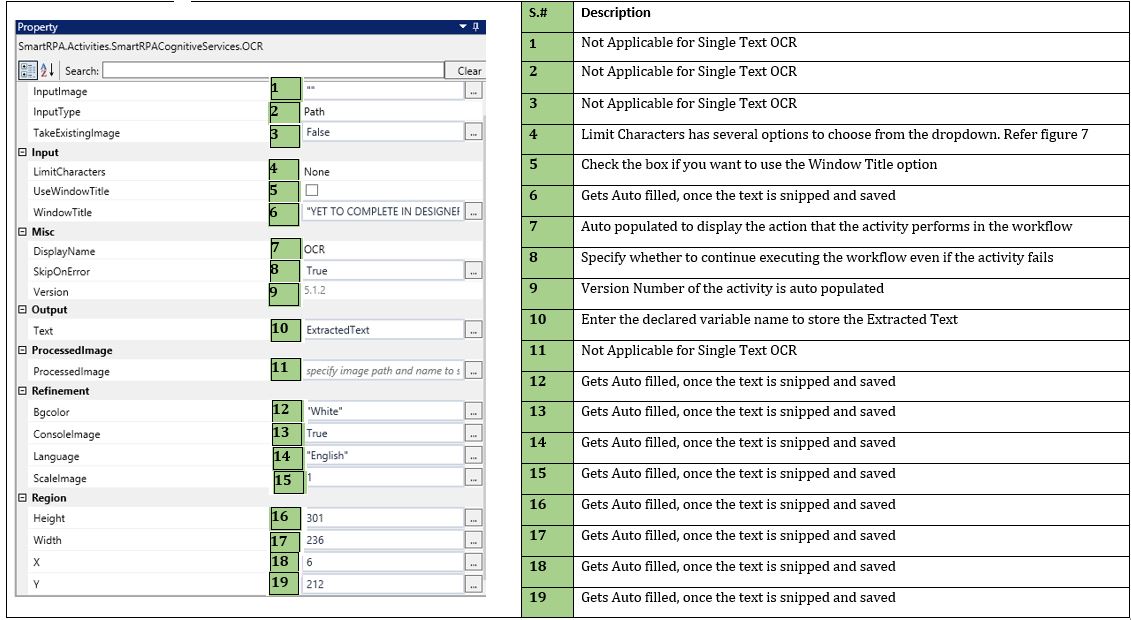
Technical Reference
Figure 6
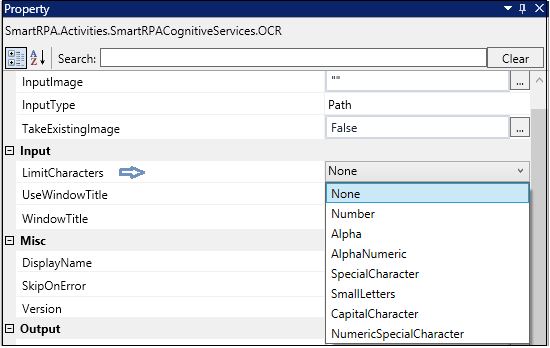
None Options
These are options to specify the characters that you want to allow in the output.
Figure 7
Browse an Image
Double-click to view. Click on Snip Text Position to enable the Selection Wizard. Click on Browse an Image and select the image from which text will be extracted.
Figure 8
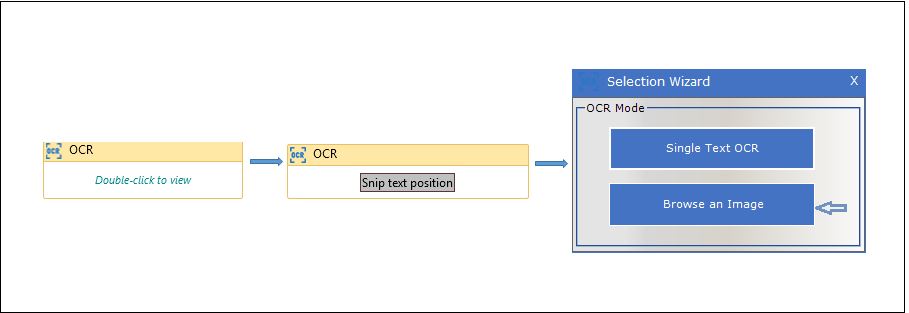
Image Property will be displayed as well. Select as per requirements. Run OCR and Save.
Figure 9
Enter the declared variable name to store the Extracted Text in the Text field. Drag and drop a Write Line activity, pass the Text Field output to view the extracted text. Execute.
Figure 10
Output
Figure 11
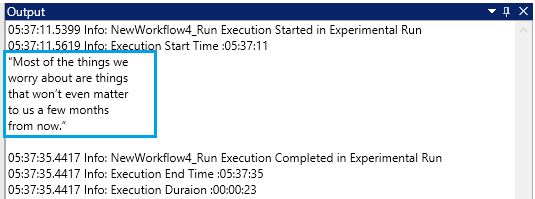
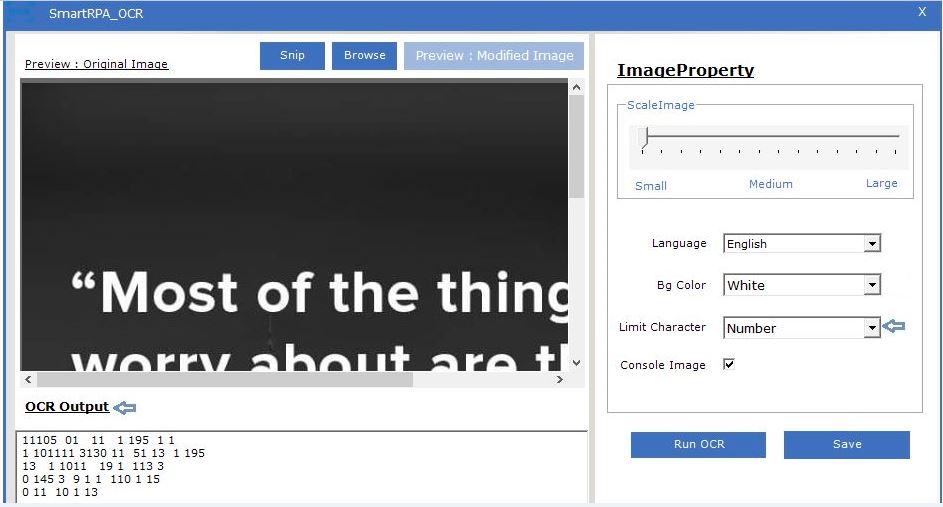
Image Property
In Limit Character dropdown, you have many options to specify the characters that you want to allow in the output. In the following example, Number is chosen, thus the selected text ‘s OCR output will be extracted as numbers.
Figure 12
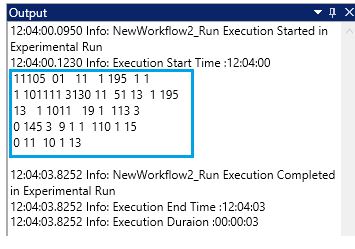
As Number was chosen, the OCR output is extracted as numbers and the same will be displayed in the workflow's output.
Figure 13
Technical Reference
Figure 14