Our license module in the SmartManager is robust and easy to use. Licensing protocol is required for every type of robot. Thus, the license will be dynamically allocated for each run-time, depending on the run-time status.
All licenses are centrally stored and managed from the SmartManager license common pool. The SmartManager allocates licenses based on run-time Status.
It monitors and tracks each run-time against status such as:
-
- Allocate
- Idle
- Running and
- To-Check
Such activities are done with the aid of the License Management menu.
Figure 1
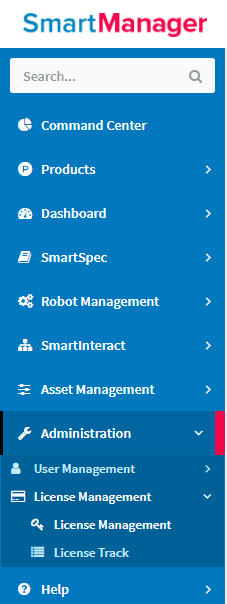
Administration-->License Management-->License Management
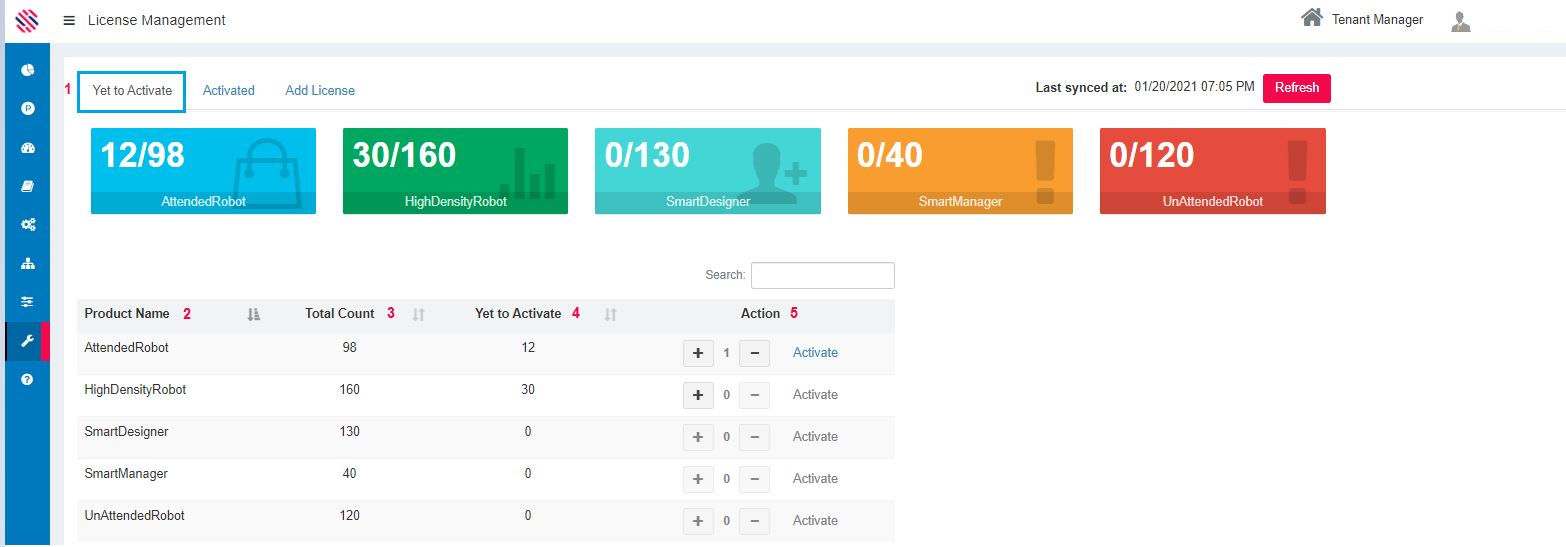
The Admin user can check the validity as and when they desire to do so. The last synced details are displayed at the top right. The Product Name and the Total Count against each is projected.
Yet To Activate
Yet To Activate tab will list out the Product Name, Its Total Count, Yet To Activate count and the Action button. The same details are represented as a pictorial representation in the colorful boxes.
Figure 2
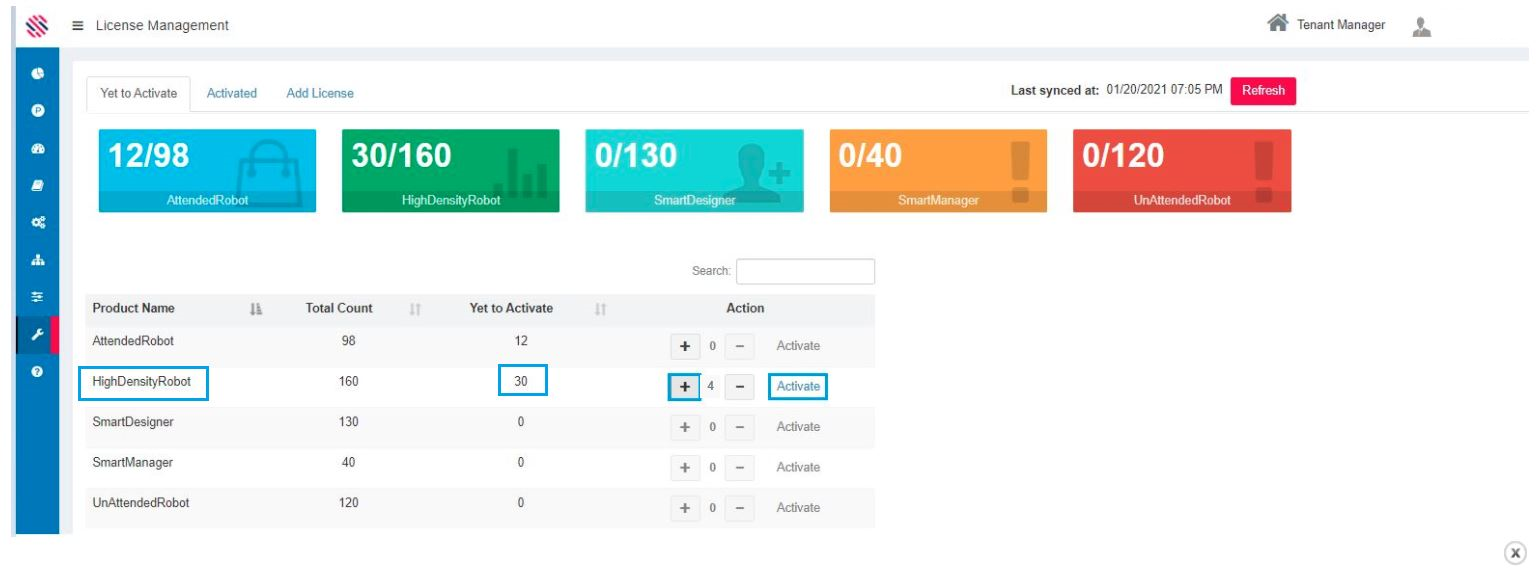
As displayed, the Yet to Activate Products are seen here, along with the Total Count. If one wants to activate, they can choose to do so by clicking on the + symbol and clicking on the Activate button, under the Action tab. For every click on the plus symbol number will be incremented and vice versa for the minus symbol. In the following example, out of 30 yet to activate licenses,4 have been activated for High Density Robots.
Figure 3
Confirm.
Figure 4
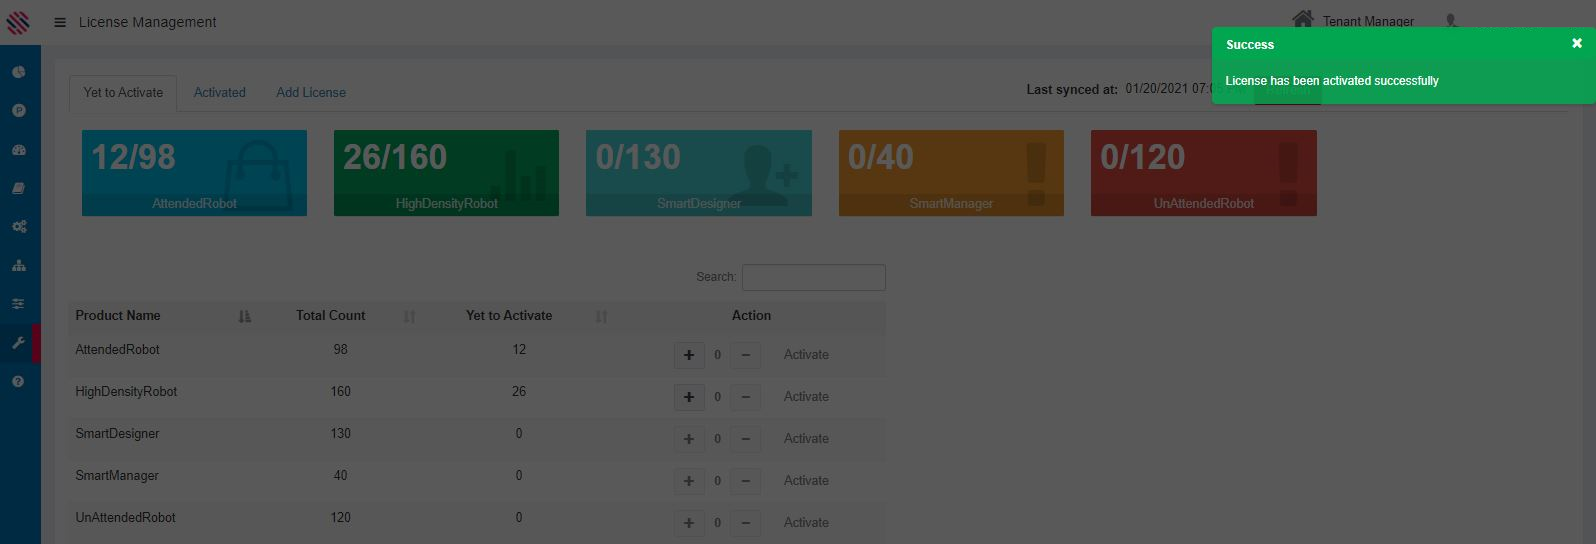
One will get a reiterating message and the licenses will be activated successfully.
Figure 5
Activated
Click on the Activated option to access the following screen, which will display all activated products and their counts.
The activated Count = Occupied+ Expired+ Available
Figure 6
In the following example, for SmartManager, 40 licenses are activated, out of which six are occupied, 31 have expired and three are available.
Figure 7
If one wants to obtain comprehensive details, click on the box containing the number under the Activated Count header that is adjacent to the Product Name for a further drill down.
Figure 8
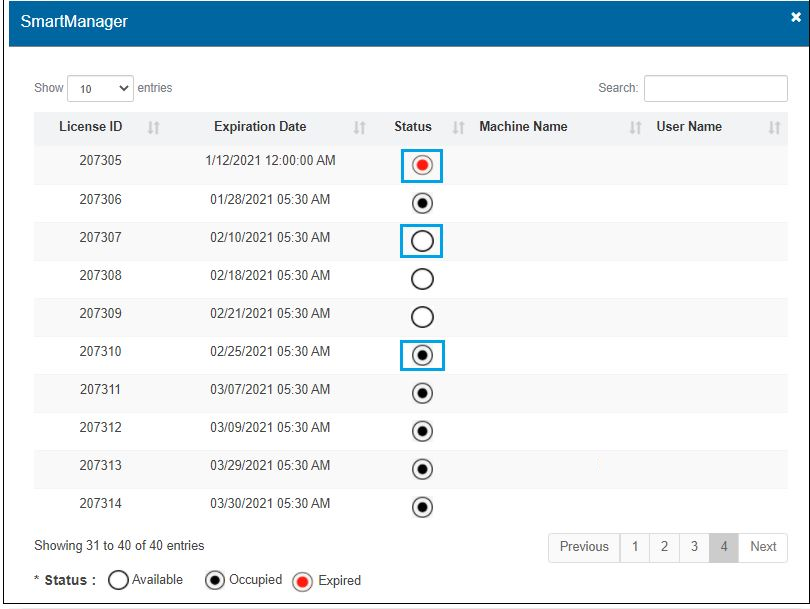
A comprehensive current report with each License ID, along with its pertaining information such as the Expiration Date, Status, the Machine Name and the Username are displayed. Each status is projected using different colors.
Figure 9
Similarly, clicking on the number on the Occupied header will provide all pertaining information of the selected product.
Figure 10
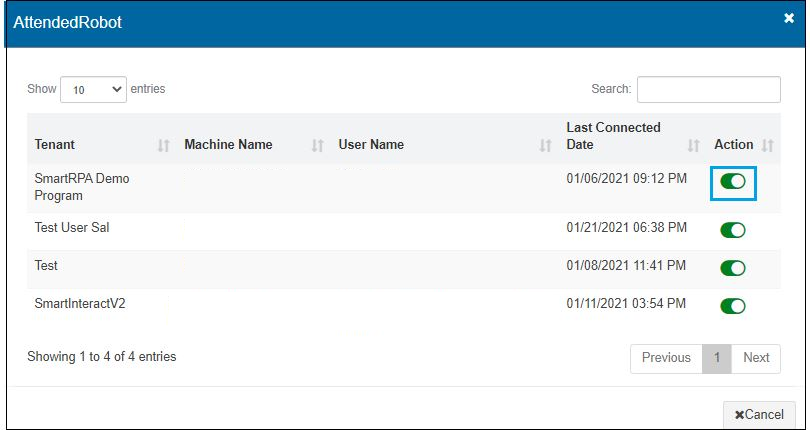
Details such as the Tenant, Machine Name, User Name, the Last Connected Date are displayed. To disconnect the License, click on the Action button.
Figure 11
Confirm by clicking on the Yes option.
Figure 12
The license will be deactivated successfully.
Figure 13
Likewise, clicking on the number box adjacent to the Expired header will display the expiration details.
Figure 14
Expiration details for the specified product can be viewed.
Figure 15
Add License
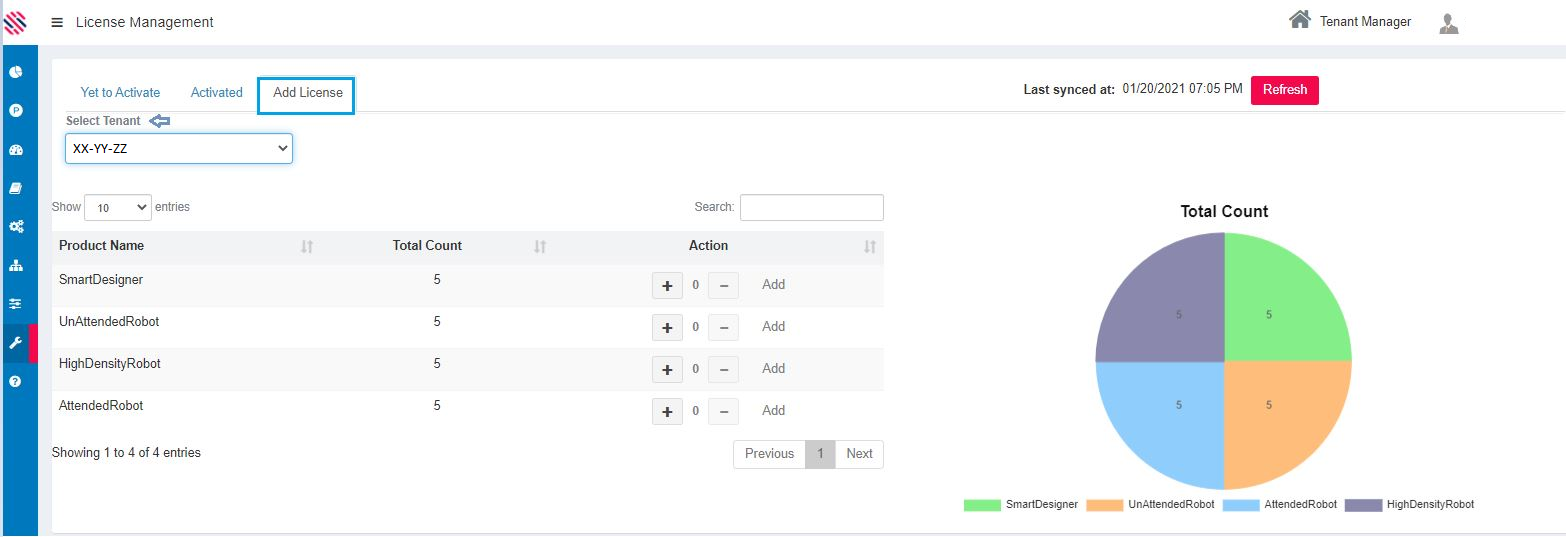
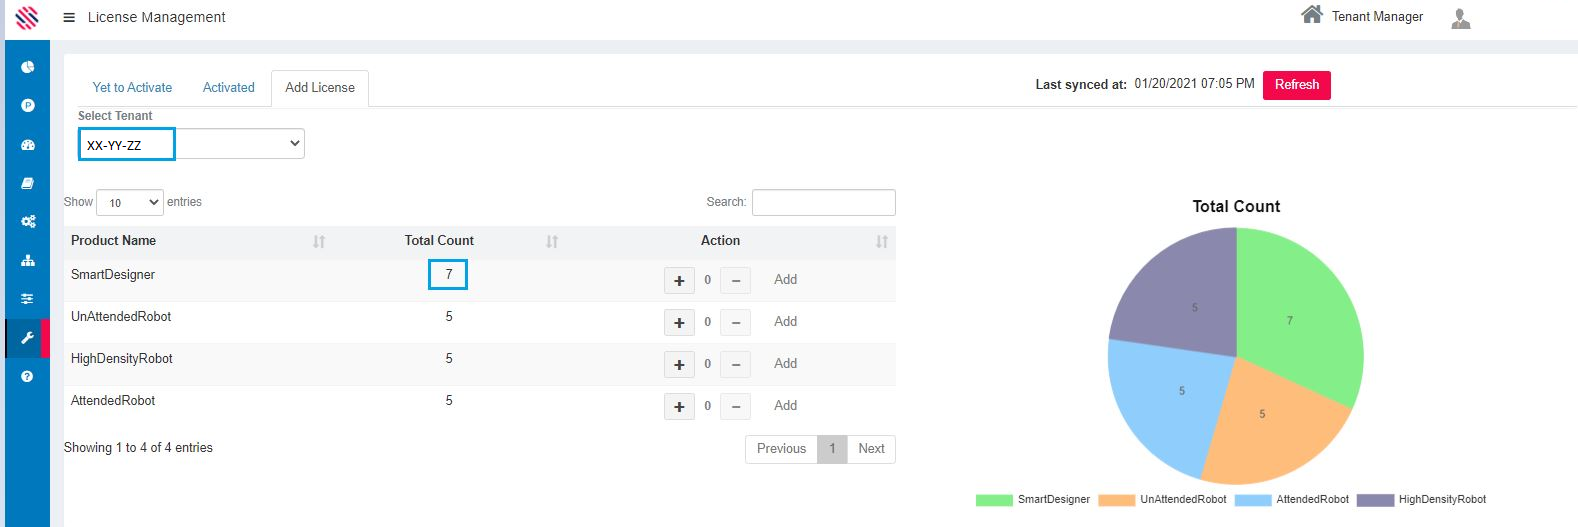
Click on the Add License to access the following screen, which will display the total count of licenses allocated for the tenant against each product.
The Total Count Split for each product is represented as a pie chart on the right side.
Figure 16
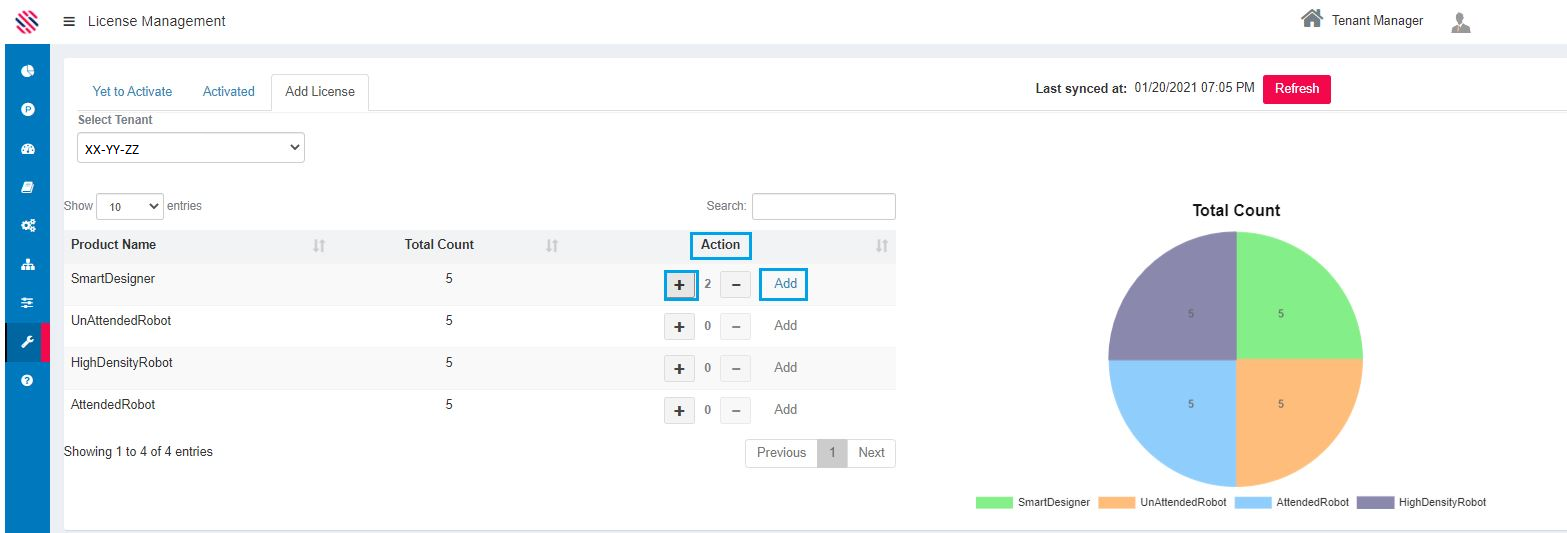
Initially when creating a tenant, 5 licenses for each of the products (SmartDesigner, Unattended Robot, High Density Robot and Attended robot) will be allocated. If the user requires additional licenses, it can be added using the increment option under the Action tab aligned against each product by clicking on the Add option.
Figure 17
Confirm by clicking on the Yes option.
Figure 18
The License will be added successfully.
Figure 19
Thus, the license count of SmartDesigner product increases to seven from the originally allotted 5, for the selected Tenant.
Figure 20
