When workflows are created in the Designer that require a DLL, it should be loaded against a specific project or it can be made available to all the projects.
Hence, one can click the DLL Management menu and avail the code to be used for the creation of workflows.
To access the module use the left-hand menu bar.
Figure 1
Asset Management--> Tenant Management -->DLL Management
Click on the Add button to access the following screen.
Figure 2
Select the Environment, Tenant Name and the Project Name from their respective dropdowns.
Figure 3
After selecting the aforementioned parameters, one is required to fill in the Type. It has options in the drop-down such as:
Figure 3.1
- Service is used to create codes to call web- based applications
- Assembly is used for small sized workflows and creates the codes accordingly. This type is not program or project specific
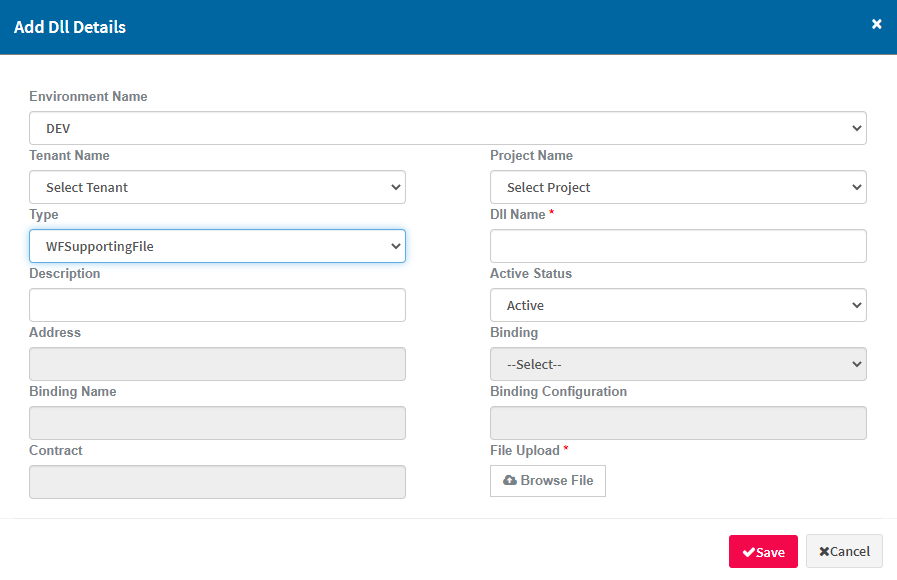
- WFSupportingFile type is again common for all programs and corresponding projects. It supports any type of file, such as word, PDF, images, etc.
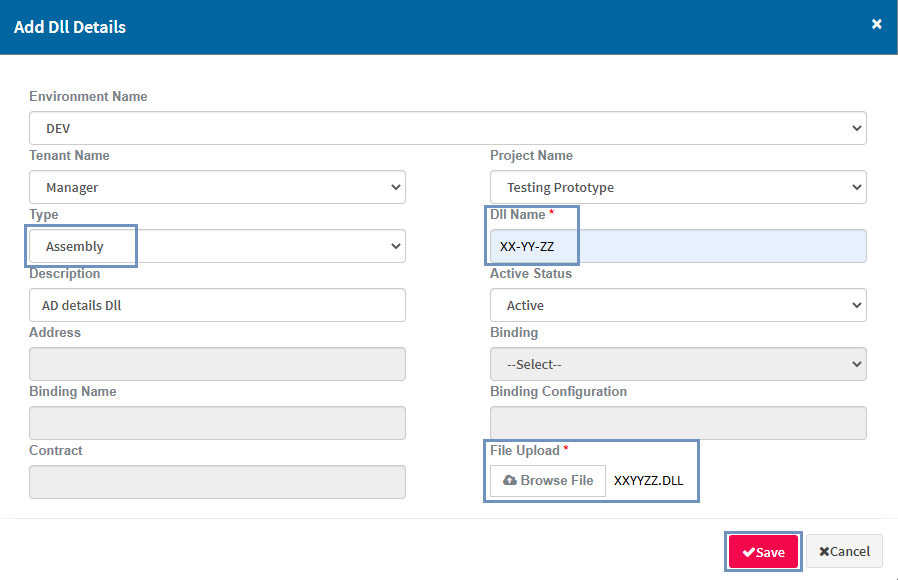
In the following example Assembly is selected in the type field. Select the Environment ,Tenant Name, Project Name, Type and Status from the respective dropdowns. After filling in all details such as, DLL Name and Description, upload the relevant file. Save.
Figure 3.2
It will be saved in the DLL Management page.
One can view the Name of the file, its Description, Address, Updated By and Updated On details. If it is mapped to a tenant and a project, it can be specifically used for that tenant only.
Figure 4
For types such as Assembly and WF Supporting files, certain fields need not be filled as displayed in the following image.
Figure 5
If users select service in the Type field, provide the necessary information such as, Binding Name, Binding Configuration, etc.
Figure 6
There are two choices in the Binding Field's Dropdown and they are as follows:
Figure 6.1
Note: If the user uploads a DLL without a tenant and project, it can be used across all tenants and projects.


