ImageEnhancement
When to use the ImageEnhancement activity
This activity is used to improve the quality of an image that is used in the processing.
Figure 1
|
Activity Name |
Picture |
|
ImageEnhancement |
|
Technical Reference
|
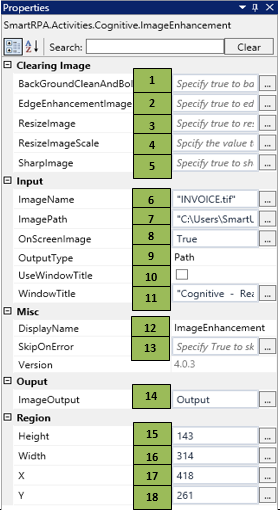
Figure 1.1
|
S.no |
Description |
|
1 |
Specify True to clean the background and bold the Characters |
|
|
2 |
Specify True to Enhance the edges of the characters |
|
|
3 |
Specify True to Re-size the images |
|
|
4 |
Specify The value to resize the image scale |
|
|
5 |
Specify true to sharpen the image/characters |
|
|
6 |
Specify the name of the Input |
|
|
7 |
Specify the path in which the input is stored |
|
|
8 |
Specify as true if an Onscreen area is to be enhanced |
|
|
9 |
Choose the Output type from the Dropdown |
|
|
10 |
Check the option to use the WindowTitle |
|
|
11 |
The window title gets recorded when the image is snipped |
|
|
12 |
Displays the action that the activity performs in the workflow |
|
|
13 |
Specify whether to continue executing the workflow even if the activity fails |
|
|
14 |
Enter the declared variable name to store the enhanced text |
|
|
15 |
Height gets auto filled once the image is snipped |
|
|
16 |
Width gets auto filled once the image is snipped |
|
|
17 |
X gets auto filled once the image is snipped |
|
|
18 |
Y gets auto filled once the image is snipped |
![]() ResizeImageScale value should be defined as variable type Double.
ResizeImageScale value should be defined as variable type Double.
Illustration
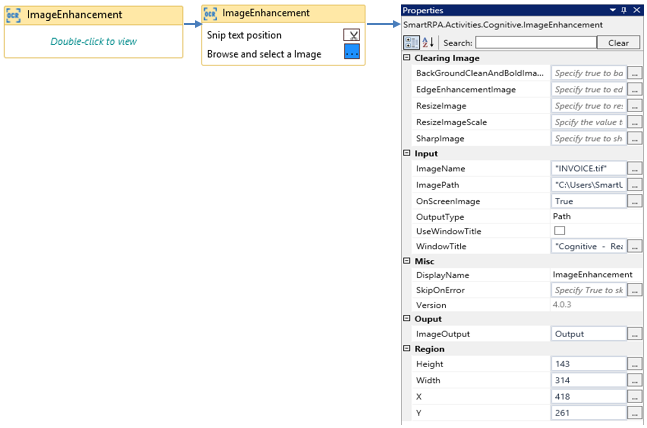
Drag a ImageEnhancement activity and connect under the start node of the flowchart
- Double-click the activity and click on the Spy symbol to snip the image to be enhanced
- Specify the image name and the image path of the input to the respective fields that needs to be processed
- Specify the declared string variable in the image output field.
Figure 1.2
Figure 1.3

