Write Cell
This activity is used to write content to a specific cell.
Technical Reference:
|
|
INPUT |
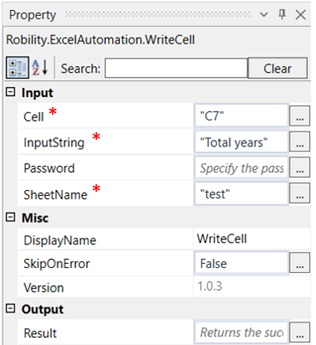
Cell: Specify the cell to which the input has to be given. |
|
InputString: Specify the text to be given in the specified cell. |
||
|
Password: Specify the password if the worksheet is protected. |
||
|
SheetName: Specify the sheet name in which the specified cell is present. |
||
|
MISC |
Display Name: Displays the name of the activity. You can also customize the activity name to help troubleshoot issues faster. This name will be used for logging purposes. |
|
|
SkipOnError: It specifies whether to continue executing the workflow even if it throws an error. This supports only Boolean value “True or False.” True: Continues to execute the workflow irrespective of any error thrown. False: Stops the workflow if it throws any error |
||
|
Version: It specifies the version of the excel automation feature in use |
||
|
OUTPUT |
Result: Define a Boolean value to validate the success state of the activity. This is not a mandatory field. |
*Mandatory fields to execute the workflow
![]()
1. Drag and drop a get excel object activity to the workflow.
2. Enter the file path of the excel file in which a worksheet has to be created.
3. Drag and drop a write cell activity into the Get Excel object activity.
4. Click on the write cell activity.
5. Specify cell number to which an input has to be given. Here it is C7
6. Specify the input to be given in the “input string”. Here it is “Total years”.
7. Specify the name of the sheet. Here it is “Test”.
8. Execute the activity
The bot executes the activity and gives the input as “Total years” in “C7”.