Secure Workbook
This activity helps you secure the entire workbook by locking / unlocking, using a password.
Technical Reference:
|
|
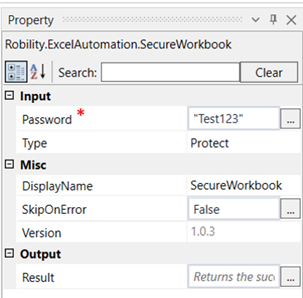
INPUT |
Password: Specify the password to be used to protect the workbook. |
|
Type: Specify if you want to protect or unprotect the workbook. |
||
|
MISC |
Display Name: Displays the name of the activity. You can also customize the activity name to help troubleshoot issues faster. This name will be used for logging purposes. |
|
|
SkipOnError: It specifies whether to continue executing the workflow even if it throws an error. This supports only Boolean value “True or False.” True: Continues to execute the workflow irrespective of any error thrown. |
||
|
Version: It specifies the version of the excel automation feature in use |
||
|
OUTPUT |
Result: Define a Boolean value to validate the success state of the activity. This is not a mandatory field. |
*Mandatory field to read the workbook
![]()
The following activity illustrates on how we can use the secure workbook activity to assign a password to the whole workbook.
1. Drag and drop a get excel object activity to the workflow.
2. Enter the file path of the excel file in which the worksheet to be worked on is present.
3. Drag and drop a secure workbook activity.
4. Click on the activity.
5. Assign a password to the workbook in the password box.
6. Choose the type. Here we are going to use “Protect”.
7. Execute the activity.
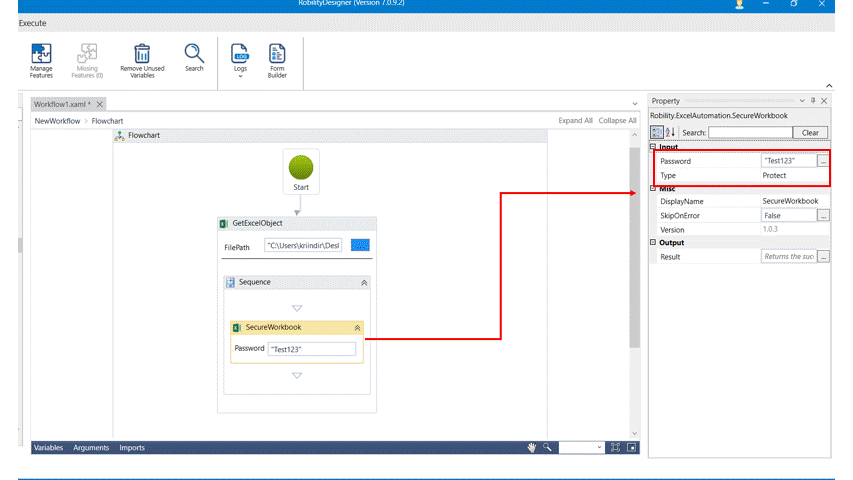
The bot executes the activity and assigns a password to the given workbook.