Robots that have been created or added in SmartManager would be developed in the SmartDesigner. While saving, this robot will be committed to UAT. The committed robots will be available in the Move to UAT. From move to UAT, if it passes UAT testing, it will go to In UAT. From there, it will move to In Live-ready for Production environment.
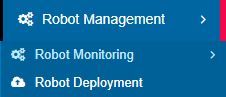
Figure 1
Robot Management à Robot Deployment
In deployment, there are three tabs - Explanation follows.

Figure 2
Move To UAT
Select the Program and Project. Click on the Go button. The Robot Name along with the latest version will be displayed. Select the robot and click on the Deploy/Download button. Let us assume, one selects the Robot Named DemoReadArgo - that is first on the list. Refer Figure 3. Click on the Deploy button.

Figure 3
It will display the Robot List By Version as displayed in the following image, comprising the Program Name, Project Name and the Robot Name. The Version, The Workflow Type, Comments provided while committing, Committed By, Committed Date are displayed. The Deployed By and Deployed Date are empty for new workflows because they are yet to be deployed. Select the New Workflow Type and Click on the Deploy button. Refer Figure 4.
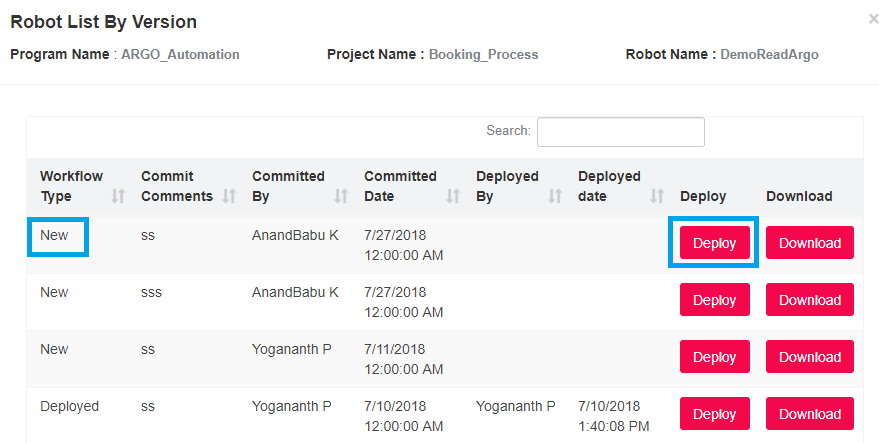
Figure 4
When one clicks on the Deploy button, the following screen is displayed. Refer Figure 5.
One finds the Robot’s Name, Workflow Type (Main or Sub) and the Version. Provide a note in the Comments box and click on the Proceed button.
Note: A workflow can be categorized as sub or main workflow. While creating the workflow in the Designer or in the SmartManager, the user will be given the option to categorize the workflow as a main or sub workflow. The workflow defined as the main workflow accommodates the sub workflows.
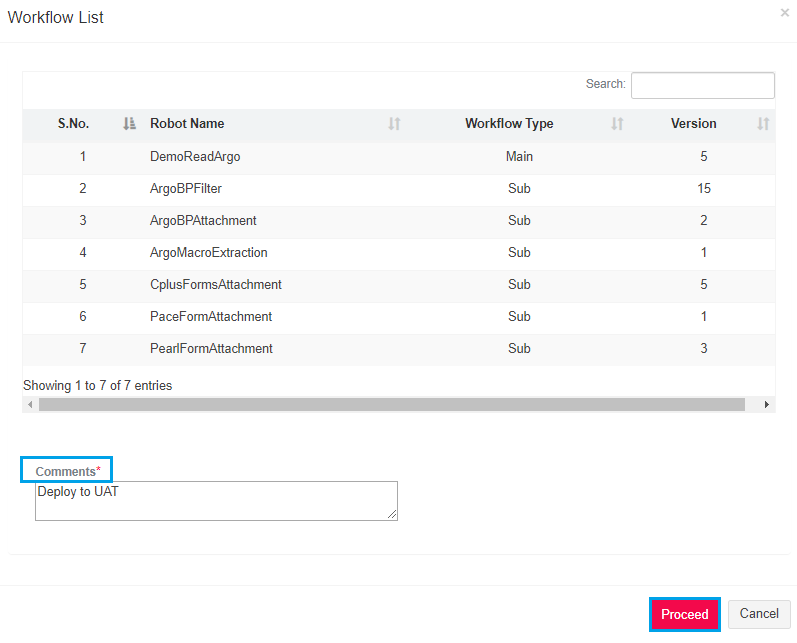
Figure 5
The workflow is moved successfully and will be reflected in the In UAT along with details such as, Program Name, Project Name, Robot Name along with the UAT version as displayed in Figure 6.

Figure 6
Once the workflow is moved successfully to UAT, all pertaining information is available in the Robot List By Version. Once again click on the Deploy button. Workflow Type will show as Deployed. Commit Comments, Committed By , Committed Date , Deployed By, and the Deployed Date and Time are displayed.
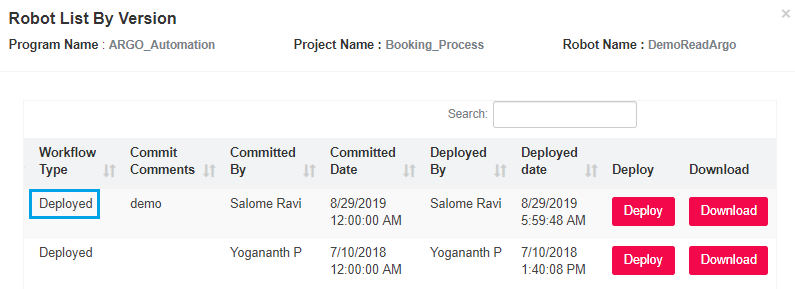
Figure 7
Once the workflow is in the UAT, it should pass the UAT protocol, upon which, it can be moved to the Live environment. Click on the Deploy button - Refer Figure 7- and the Workflow List will be displayed as shown in Figure 8. Here, Provide your comments and click on Proceed.
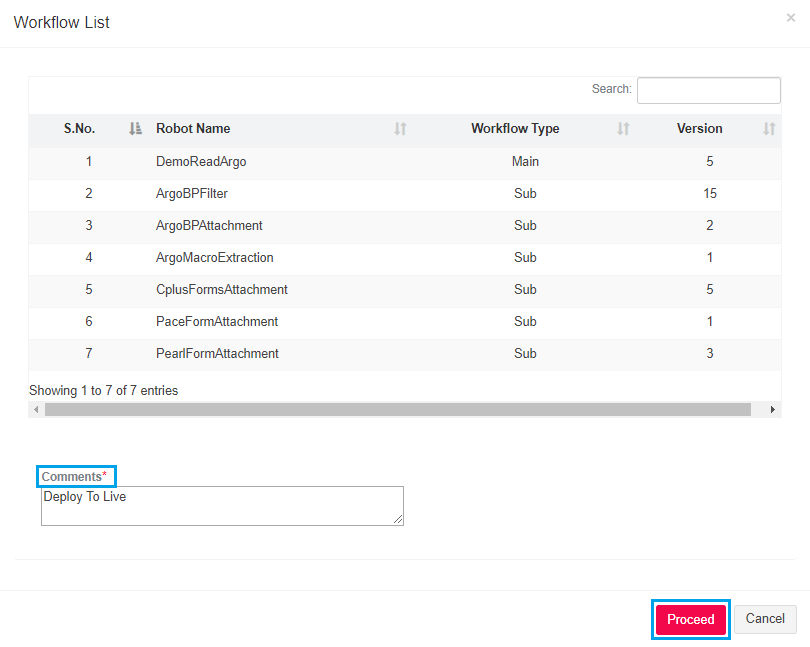
Figure 8
Thus, it is deployed to the Live environment. Refer Figure 9.
Note: One can run robots that are in the UAT as well as Live environments.
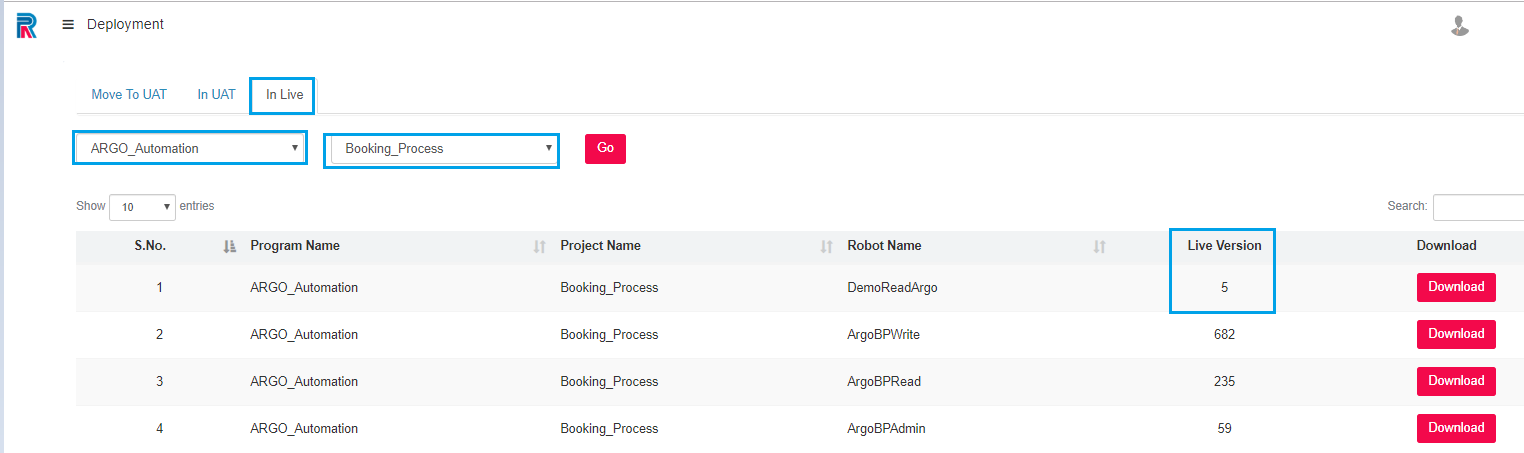
Figure 9
Additional Details:
Download
One can download the workflows' versions and save, in order to run the same in Smart Desktop runner.
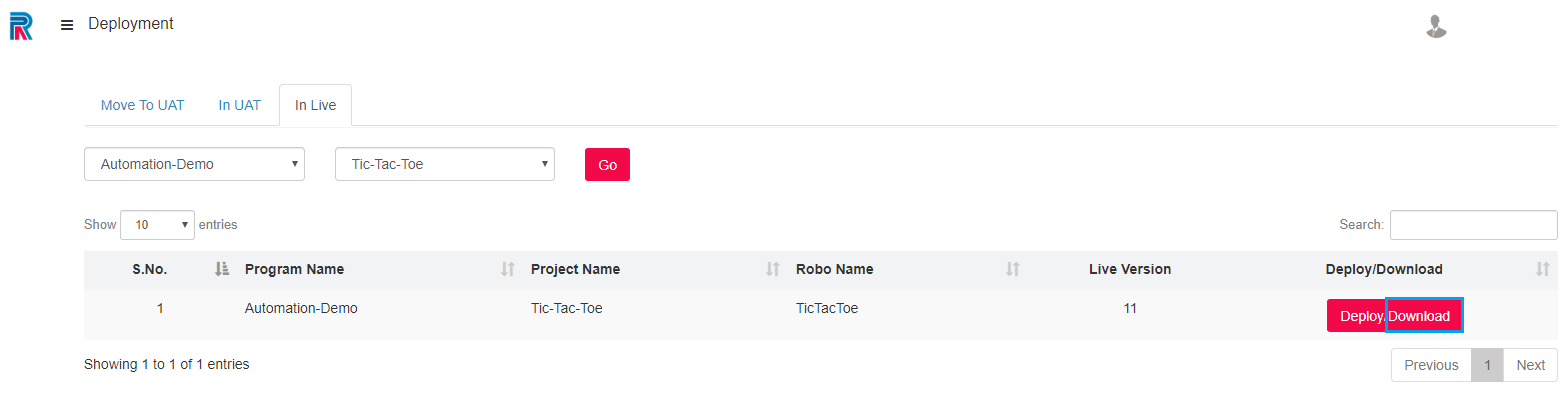
Figure 10