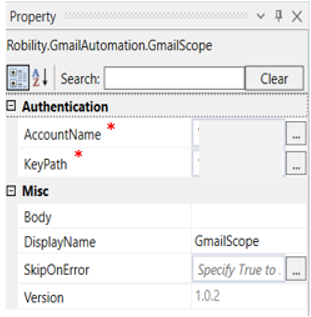
Gmail Scope
This activity acts as an authentication package for all the activities that are dropped inside this scope.
Technical Reference:
|
|
AUTHENTICATION |
AccountName: Specify the mail ID of the account in which the activities are going to be performed. |
|
KeyPath: Specify the JSON key file got at the time of registration. |
||
|
MISC |
Body: This remains empty and auto fills once the activity is dropped into the Gmail scope. |
|
|
Display Name: Displays the name of the activity. You can also customize the activity name to help troubleshoot issues faster. This name will be used for logging purposes. |
||
|
SkipOnError: It specifies whether to continue executing the workflow even if it throws an error. This supports only Boolean value “True or False.” True: Continues to execute the workflow irrespective of any error thrown. False: Stops the workflow if it throws any error |
||
|
Version: It specifies the version of the Text Automation feature in use |
How to get the key path:
Step 1: Login to Google Developer Console with your registered Gmail account details https://console.developers.google.com/
Step 2: Create a Project if you haven’t created before and specify a valid Project Name and Organization for your reference.
Step 3: Search for “Gmail API” in the “Search for APIs and Services” tab

Step 4: Select Gmail API from the marketplace list and it will be redirected to the Gmail API service page. Click on Enable API button and your Gmail API will be enabled after this (You can disable this API anytime if you want to discontinue with this process if required)
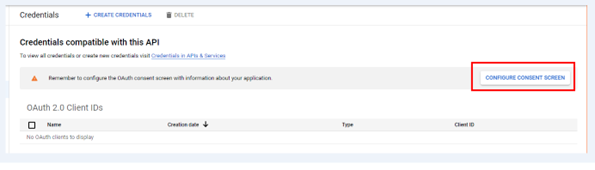
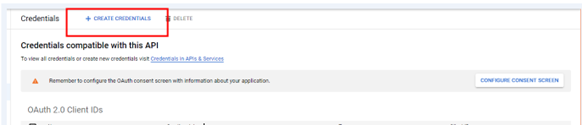
Step 5: Click Credentials tab from the left side panel and click “CONFIGURE CONSENT SCREEN” button.
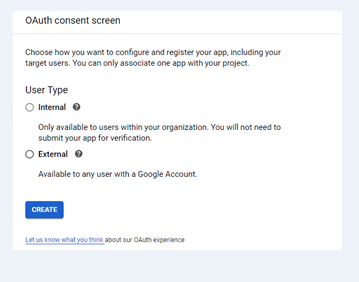
Step 6: Select External and click Create.
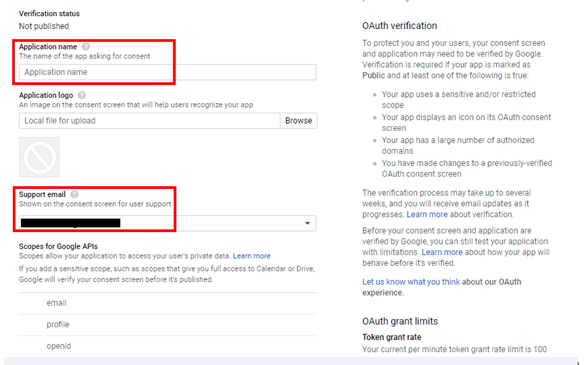
Step 7: Specify “Application name” and “Support email” and click Save.
Step 8: Back to the API screen, Click on Create Credentials à OAuth Client ID
Step 9: Specify Application Type as Desktop App and specify name of the App (you can use any desired name for your app, which will integrate with your Gmail account later)
Step 10: Click “Save” and OAuth Client will be created with Client API and Client Secret Keys
Step 11: You can download it as a JSON file and store it in your local folder

Step 12: Provide the downloaded JSON file path in Gmail Automation Scope activity along with your Gmail Account. User needs to do one-time authentication while running the Read and Send activities first time.