Last Logged-In Time field
Add user sub - menu offers yet another improvement in the user details grid.
Administration _User Management_ Add User
Figure 1
Last Logged-In Time field has been incorporated in the User Details grid to improve traceability.
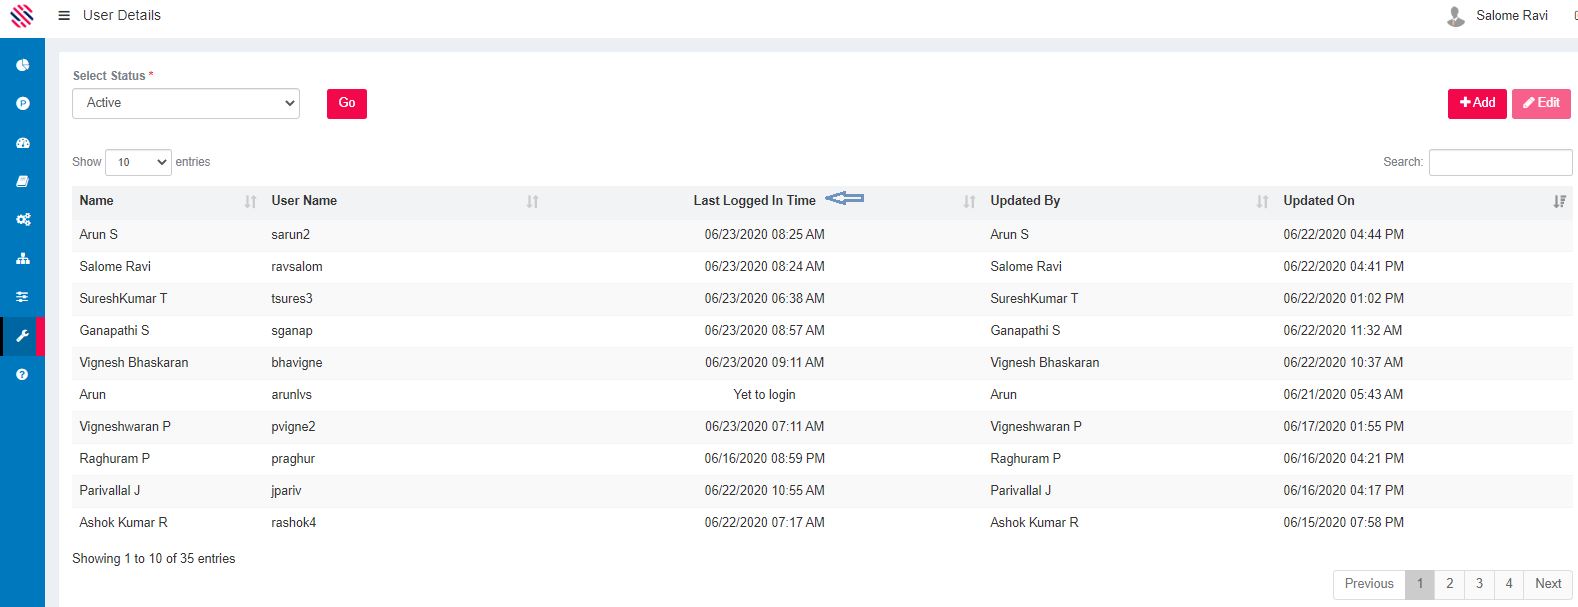
Figure 2
Sync Option
Administration_Product Management_Feature Management

Figure 3
A new Sync option is included to the Feature Management grid, which will automatically sync the approved activities from the centralized feature repository.

Figure 4
Role Configuration
The role configuration has undergone a massive revamp were the grid has permission for various pages. This facilitates Robility administrator to provide granular access to pages if a user requires view only, edit, delete, etc., access to certain pages.
The page also supports default landing page that can be mapped to user roles. So, users mapped to those roles will be automatically routed to the landing page set here.
Figure 5
AdministrationàUser ManagementàCreate Roleà Role Creation PageàAdd

Figure 6
The user will be routed to Role Management page. All the menus will be displayed under the Menu header. Proceed to provide the name of the role ,its description and select the Landing Page from the drop-down. This is what the user with the respective role will see as his or her default landing page. Select the menus and check the privileged actions that are appropriate for the user. Click on the Save button.
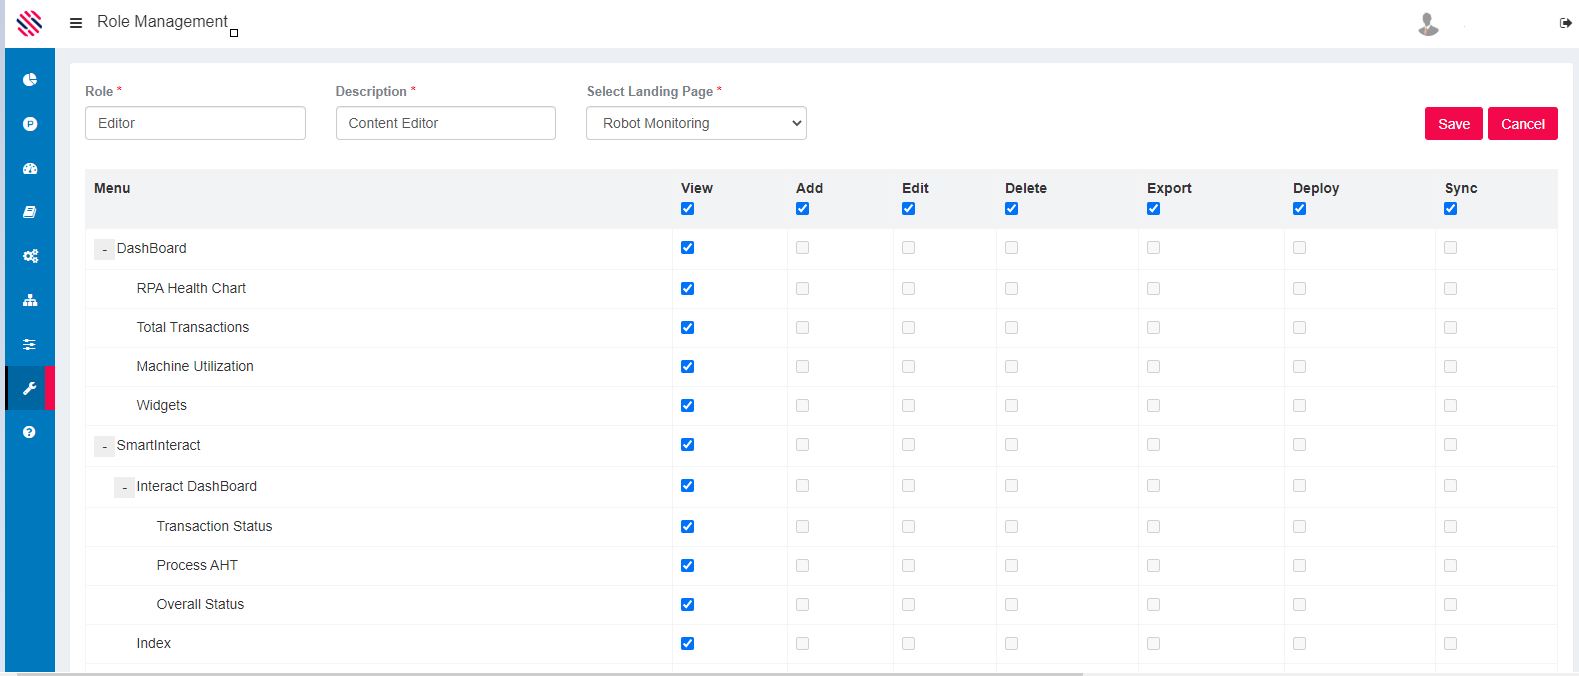
Figure 7
Scroll down to see your selection under the various headers.

Figure 8
Role will be added successfully.Close.
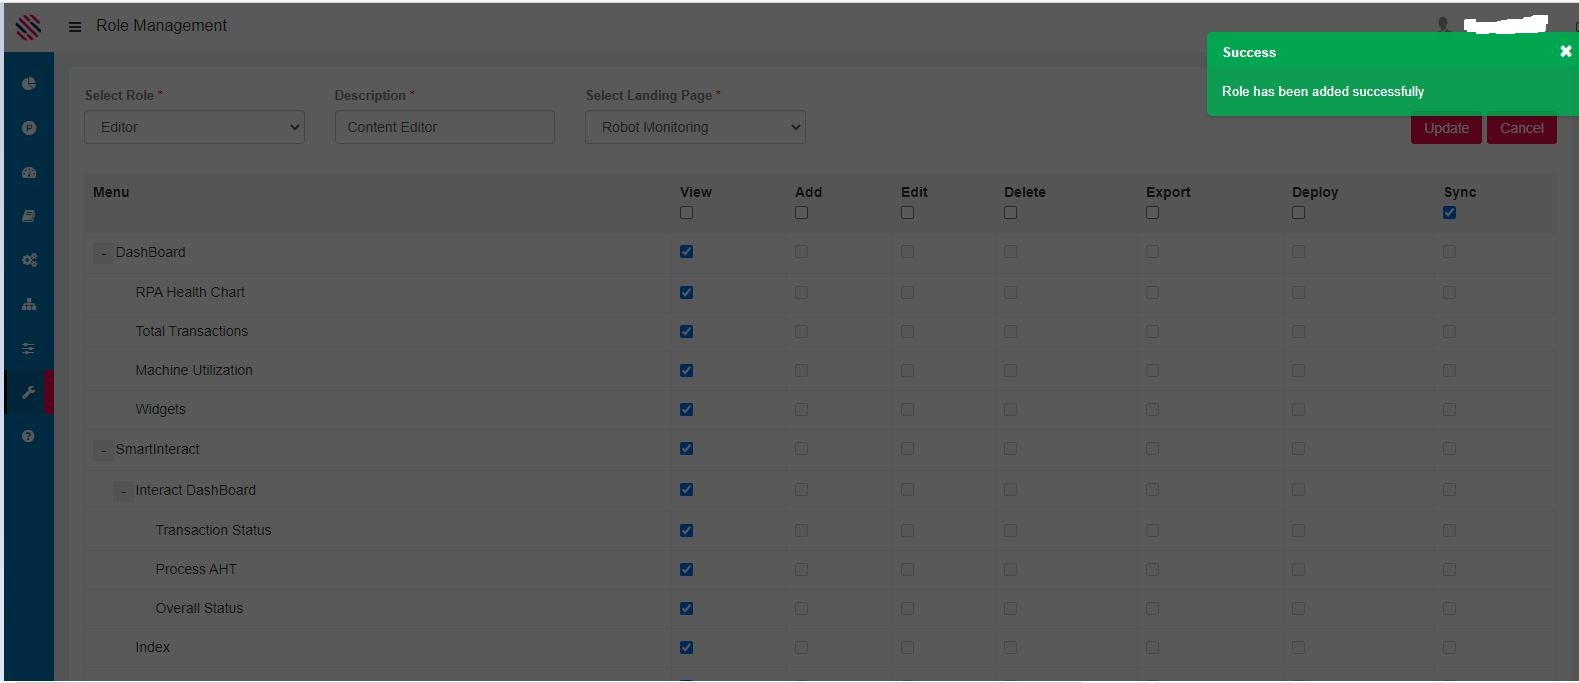
Figure 9
The new role is added in the role creation grid as displayed in the following image. One has options to Edit, Delete and Export the created role. The Add option here allows the user to create new roles just as before.there is a view icon present to view details about the created role.
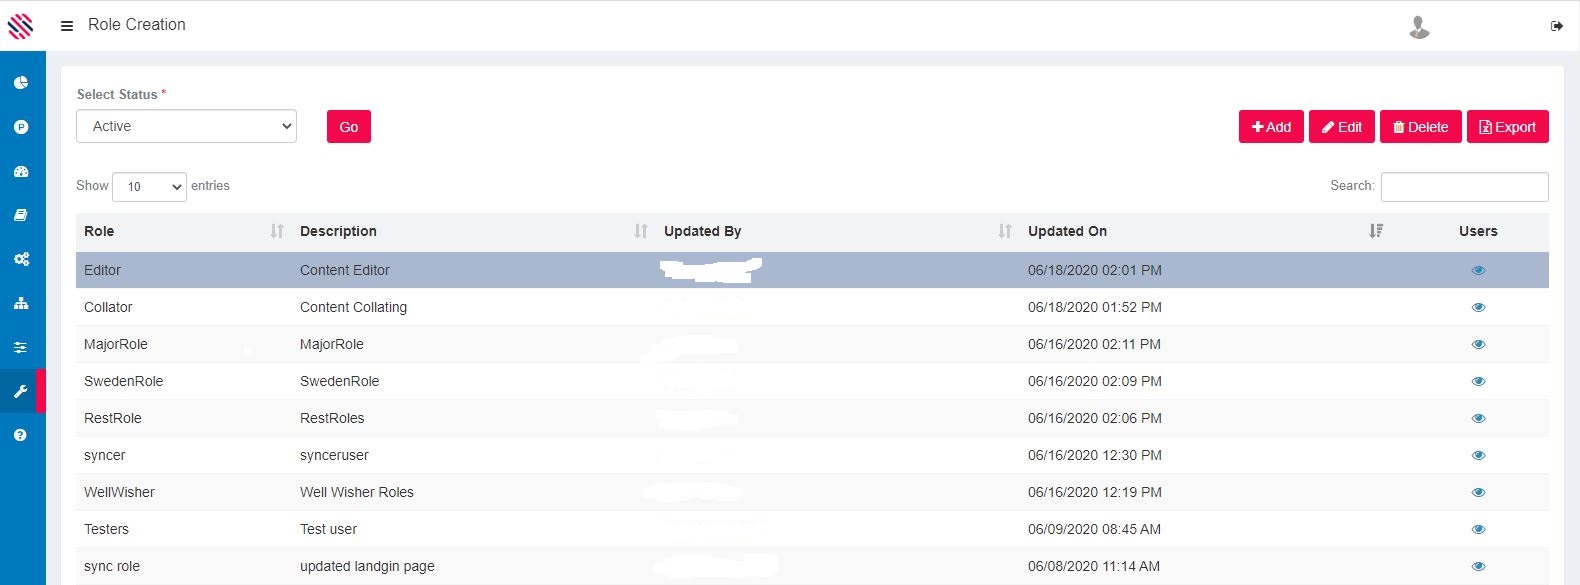
Figure 10
View option is provided to view the details of the role.

Figure 11
Choices in the landing page are as follows:
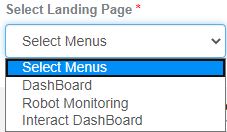
Figure 12
Note: The created role will be reflected in the Add User details screen.
Administration_ User Management_ Add User _ Select Status_ Add
The Add User details screen will be displayed. Here you will find the created role that was earlier created,under Roles in order to map roles. Proceed to provide the NT Login, Username, etc. Proceed to select the role , program, projects, etc. Save.
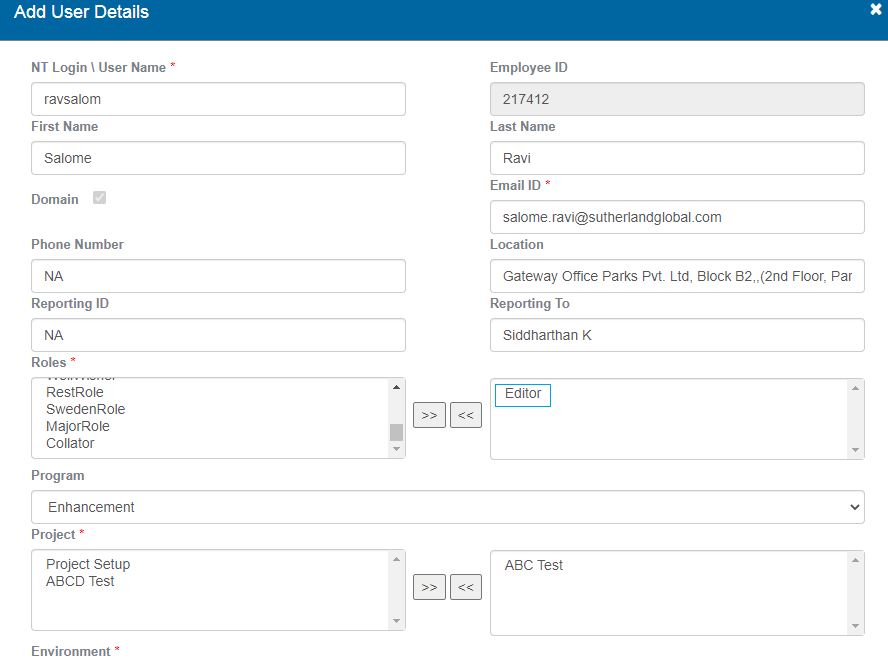
Figure 13
User details will be successfully added. It can be viewed in the User Details grid. Last Logged In Time, Updated By and Updated On fields enable comprehensive traceability.One can use the edit option to view the Roles that have been mapped to the user for Project Or Projects under a specific Program under the given Environments. Changes can be made, don’t forget to update,to save the changes.

Figure 14