InputBox- Notification
The notification automation package is a group of activities that are used to record the footprints of the robot and indicate any message that is required to be printed visibly during the execution. It also helps to provide the input during the execution.
This activity is used when there is requirement of human intervention to provide inputs for processing during the execution.
Technical Reference:
|
|
INPUT |
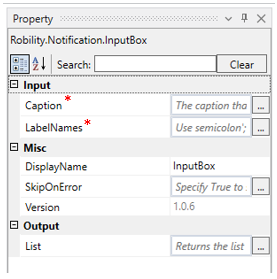
Caption: Specify the Caption/title for the Input box that needs to be displayed. E.g., “Input”. |
|
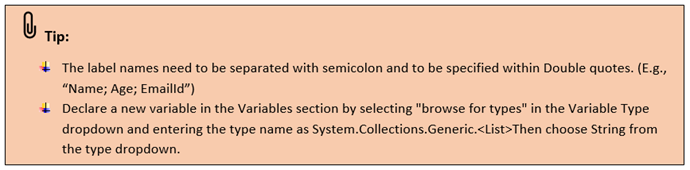
LabelNames: Specify the names for labels. You need to use Semicolon in between the label names. |
||
|
MISC |
Display Name: Displays the name of the activity. You can also customize the activity name to help troubleshoot issues faster. This name will be used for logging purposes. |
|
|
SkipOnError: It specifies whether to continue executing the workflow even if it throws an error. This supports only Boolean value “True or False”. By default, it is set to “False.” True: Continues the workflow to the next step False: Stops the workflow and throws an error. |
||
|
Version: It specifies the version of the web automation feature in use |
||
|
OUTPUT |
List: Declare and assign a variable for Input box to view the values from the input box. This is not a mandatory field however declare a variable to get the result. |
* Mandatory fields to execute the workflow.
Creation of Variable:
1. Select the Variables panel.
2. Enter a variable name.
3. From the variable type drop down, select the Browse for types option.
4. Search for List and select the type System.Collections.Generic.<List>Then choose String from the type dropdown.
Example:
Here we are going to automate an Input form using the activity.
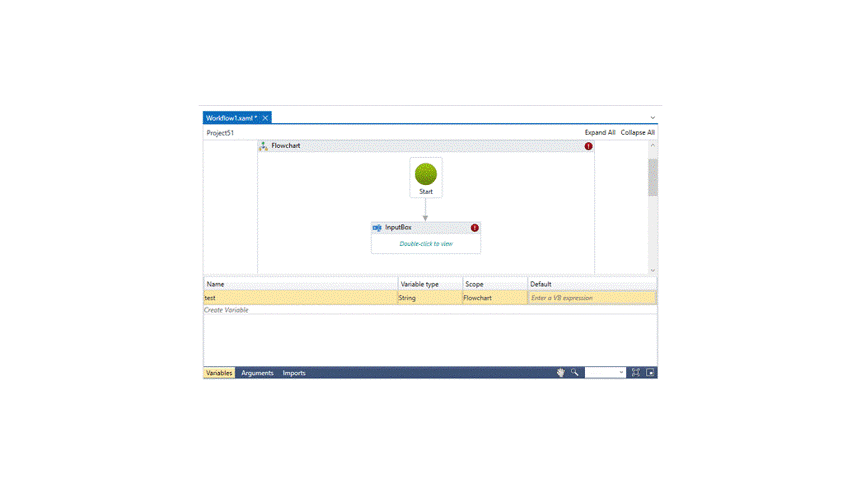
1. Open a project and create a workflow.
2. Search for InputBox activity and drag and drop it to the workflow.
3. Double click on the activity and enter the label names within double quotes.
4. If you have more than one input, add semicolon (;) in between the input while entering in the label name box.
5. Enter a caption for the box.

To view the output:
1. Drag and drop the For each activity from controlFlow feature.
2. Double click on the activity and enter the variable “test”.
3. Select the Argument type from the properties panel as String.
4. Drag and drop the message box activity inside the For Each activity.
5. Enter the For each activity variable in Message input and enter a title also.
6. Now, execute the workflow.
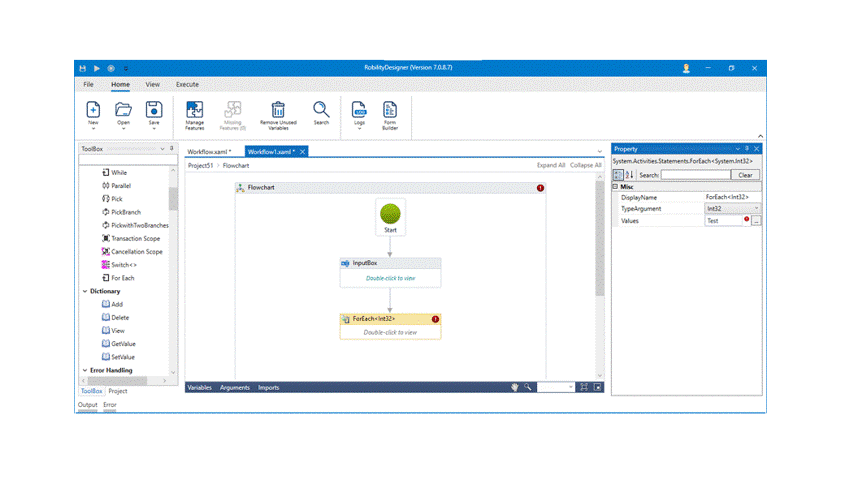
The bot will automate and create a form according to the number of labels and after entering the inputs, it displays the output.