Generate Table
This activity is used to seamlessly define the structure of a table, customize it as per requirements and sort and filter the data in the table very swiftly.
Technical Reference:
|
|
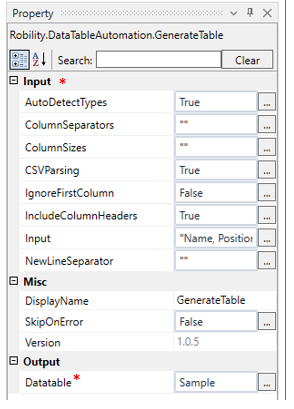
INPUT |
AutoDetectTypes: Enter the data in the table wizard and check this box to detect the type of the input entered such as string, int32 etc. |
|
ColumnSeparators: This option specifies whether the given input data column needs to be separated with Tab, Space, or newline option. You can select the option from the Drop-down. |
||
|
ColumnSizes: Specify the size of the column if required. E.g., “12,13,14”. You can edit and change the column size in the Generate Table Wizard. |
||
|
CSVParsing: Specify True to parse the input data according to CSV format. Specify False to skip the CSV parsing for the given input data. You can also edit from Generate Table Wizard by checking the box. |
||
|
IgnoreFirstColumn: You can also edit from Generate Table Wizard by checking the box to ignore the first column while generating the table. |
||
|
IncludeColumnHeaders: You can also edit from Generate Table Wizard by checking the box to use the first column as headers while generating the table. |
||
|
Input: You can enter the input data in the Generate Table Wizard in the sample input area. |
||
|
NewLineSeparator: This option specifies whether the given input data needs to be separated with Tab, Space, or newline option. You can select the option from the Drop-down. |
||
|
MISC |
Display Name: Displays the name of the activity. You can also customize the activity name to help troubleshoot issues faster. This name will be used for logging purposes |
|
|
SkipOnError: It specifies whether to continue executing the workflow even if it throws an error. This supports only Boolean value “True or False” True: Continues to execute the workflow irrespective of any error thrown. False: Stops the workflow if it throws any error |
||
|
Version: It specifies the version of the DataTable automation feature in use. |
||
|
OUTPUT |
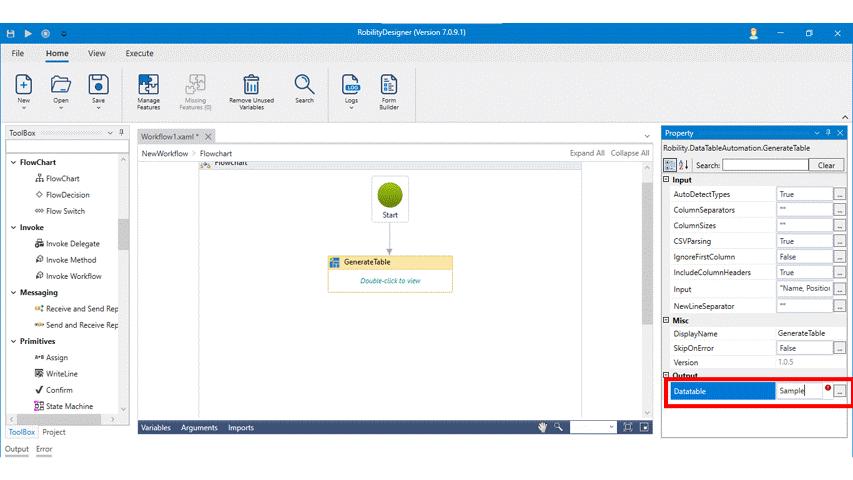
DataTable: Declare and assign a variable to view the table in Datatable format. This is not a mandatory field however declare a variable to get the result. |
* Mandatory fields to execute the workflow.


Let’s see how to generate the table:
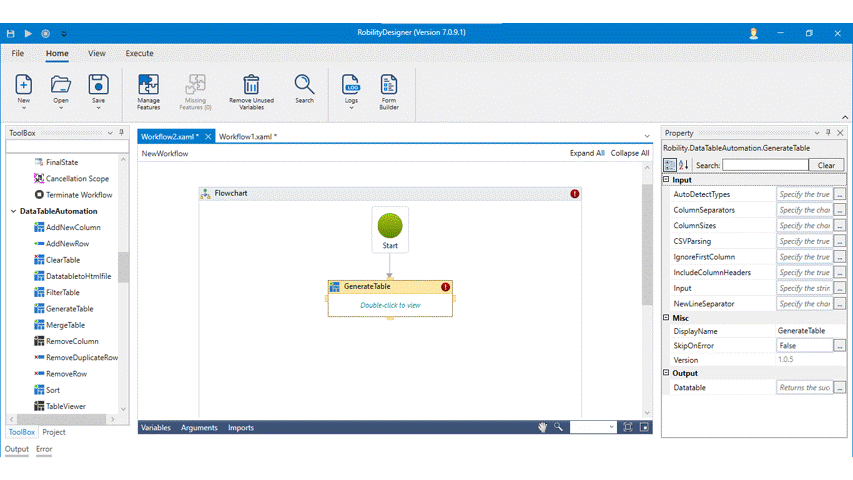
1. Drag and drop the Generate Table from DataTable Automation feature.
2. Double click on the activity and select Generate table option.
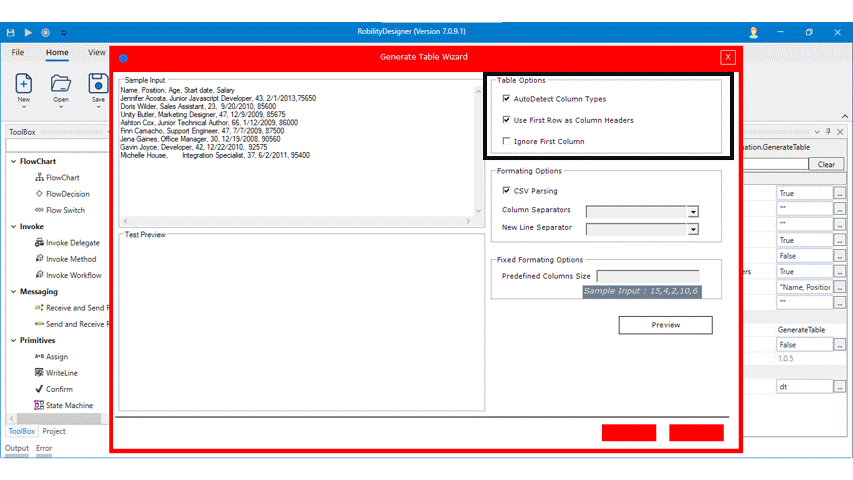
3. Generate table wizard appears on the screen.
4. If you have input already, paste it in the sample input area.
Utilization of Generate Table Wizard:
5. Once entering the inputs, you can opt for the following options in the wizard.
· Auto – Detect column types: Check this box to detect the type of input ( String, Int64, Datatype) and automatically creates the table.
· Use First Row as Column Headers: Check this box to use the first row as column headers.
· Ignore First column: Check this box to ignore the first column as header.
· CSV Parsing: This option is used to parse according to the CSV format when the given input data has been separated by comma.
· Column Separators: This option helps to separate the columns by space, Tab or newline option. Select any one from the drop-down.
· New Line Separator: This is as same as column separator, but this option generates a space , tab or new line between each row and column.
· Pre-defined Column Size: If you opt for pre-defined column size, enter the size of each column in the box.

6. You can select the Preview button and the table will be previewed in Test preview area. If the table has been generated perfectly, select Ok button.
7. Or else, edit the changes and select ok button.

8. Declare and assign a variable “Sample” in the output from the properties panel.
9. Drag and drop the table viewer activity and connect it below the generate table activity.
10. Enter the variable “Sample” and title for the activity.
11. Now, execute the workflow.