It helps the user to categorize related files, resources, and components by making it
easier to locate and manage in the solution. To create a “New folder” within the
solution, choose the option from the context menu.
Follow the below steps to add a new folder,
a. Open the Designer and navigate to the “Solution Explorer” on the
left-hand side.
b. Right click on the “Solution Name” from the “Solution Explorer”.
c. Choose the “New Folder” option from the context menu.
d. A pop-up window appears on the screen to enter the name for
the folder.
e. Provide the name as “Extraction.”
f. Click on “Create Folder” option.
g. A folder will be created against the “Solution” name, and it will
appear on the “Solution Explorer.”
h. The created folder will also be available in the following path –
“ C:\Users\Username\Documents\Robility\Solution1”, if the user
has opted for default location path at the time of creating the
solution.
i. If the user has opted another location path, it will be saved in it.
Why do we need to create a new folder?
i. It helps to maintain an organized structure within the
solution. The user can categorize the files, workflows and
resources and customize it manage them in an easier
way.
ii. Ease of navigation through the automation solution
when the scale of the process grows.
iii. Enhances the user experience efficiently when the
team members work on it.
What can be added to the Folder?
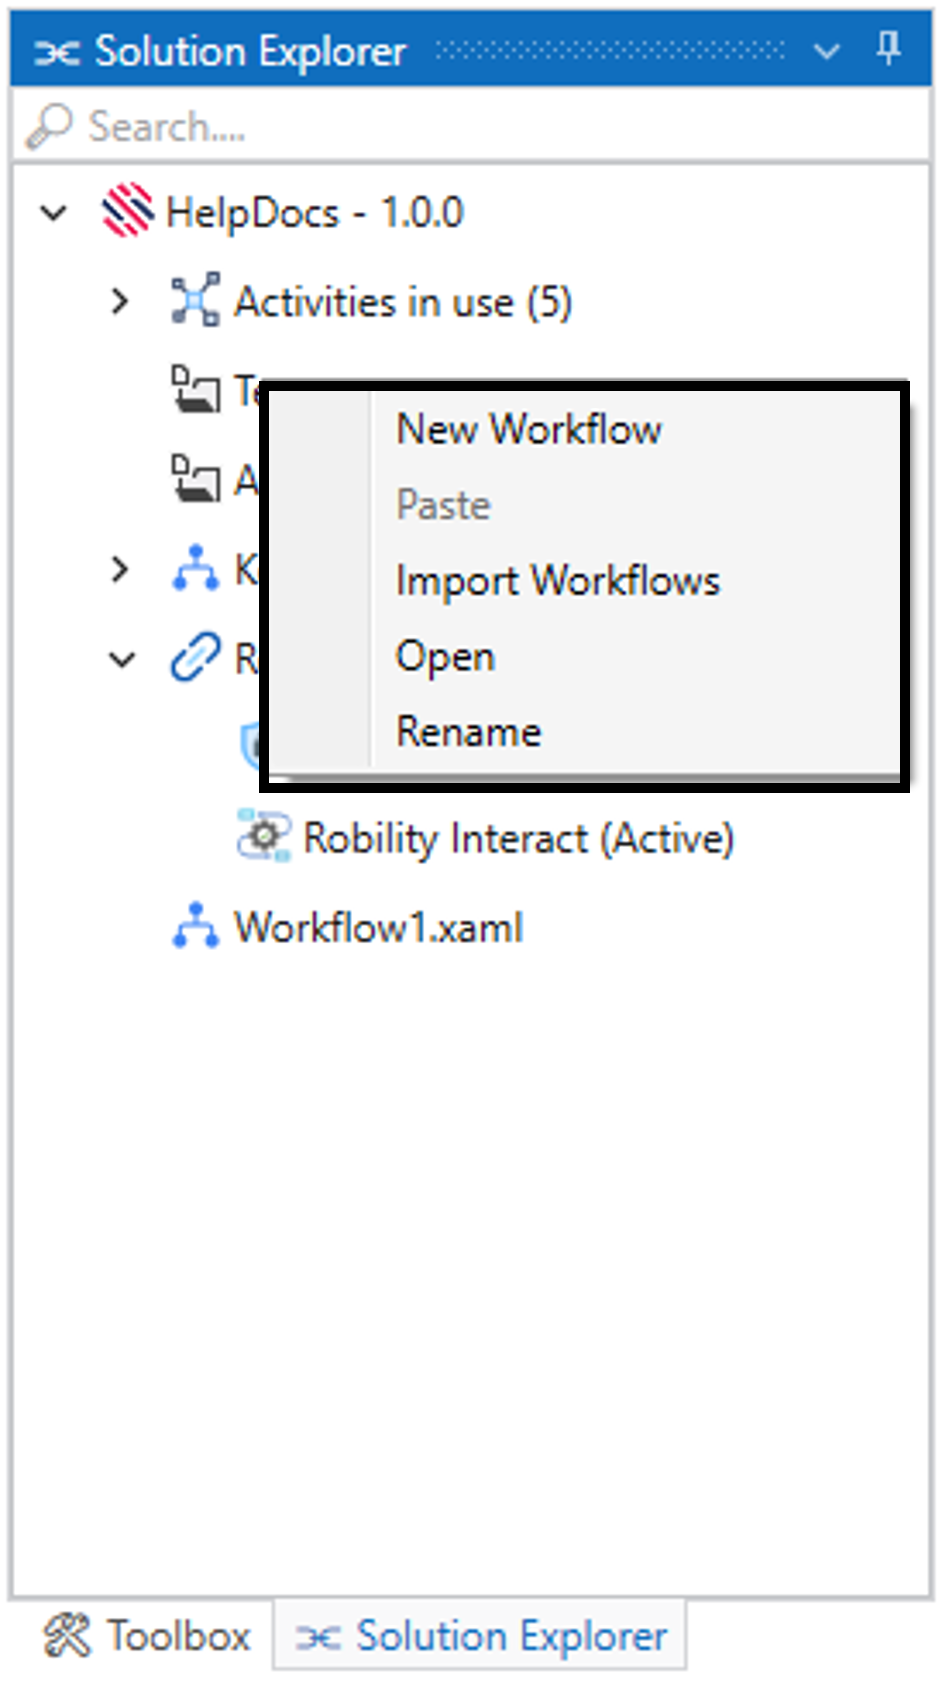
Once the folder is created, it provides a list of options that can function within
the folder. Right click on the folder to view the list of menus.
Follow the below steps to view the detailed explanation on the options.
a. New Workflow: A new workflow can be created within the folder
to organize and categorize the automation process. Click here to
know how to create a workflow.
i. It also helps with quick and ease navigation.
ii. All the references associated with the workflows will be categorized under
the folder.
b. Paste: It enables the user to copy and paste the “Workflows”
within the solution.
i. It helps to take a copy of the workflows and re-use them within the solution.
ii. If the workflow name already exists in the “Solution Explorer” and in the “Folder”,
it will be pasted as another version of the workflow.
(For e.g., “Workflow1 à Workflow1(1)”).
iii. The “Paste” option will be enabled only when the workflows have been copied.
iv. Copy the workflows outside the folder and
paste inside the folder to reuse the workflows.
c. Import Workflows: A workflow can be imported from another solution or within
the solution. Click here to know about workflows importation.
i. The workflows can be imported within the solutions only inside the “Folder”.
ii. It allows you to re-use the workflows from another solution to extend the
process in your automation.
iii. It allows to read, modify, add, and delete the activities and references used in the
workflow after importation.
d. Open: It prompts to open the folder location saved in the local system. Click here to
know about opening the folder.


