
This activity is used to securely set a text in desktop applications during the automation
process. It is used in scenarios where a password has to be entered, to give sensitive
data input, in encrypted communication, in meeting compliance with security standards
and in secure authentication.
Technical Reference
|
|
INPUT |
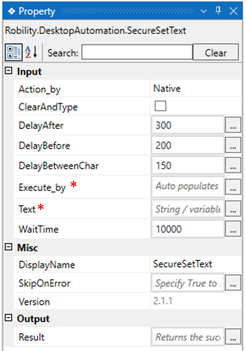
Action_by: Specifies the actions to be performed in the application during the execution. Select the actions from the drop-down. Native: Action is performed by the bot and the details are entered character wise. Human: Action is performed by a human Paste: Action is performed by the bot and the details are entered in a copy paste format. |
|
ClearAndType: Specifies to clear and type the text in the selected application if it already has values. By default, the value is False. |
||
|
DelayAfter: It assists the user to add a delay before initiating subsequent activities. |
||
|
DelayBefore: It assists the user in adding a delay before starting the execution of the activities. |
||
|
DelayBetweenChar: It helps the user to add a delay between the characters. The delay duration here is in milliseconds. By default, it is set to "150" milliseconds. |
||
|
ExecuteBy: Gets auto filled, once the element is indicated on the web page using Robility Spy. This contains the set of attributes for the specific spied element. |
||
|
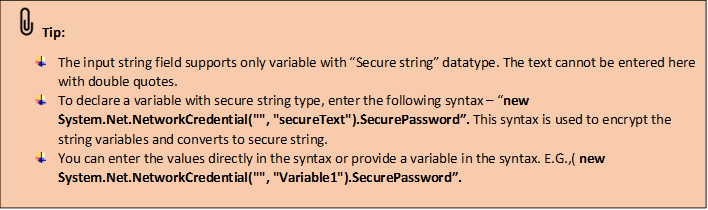
Text: Specify the “Input” variable” which has stored the input values to be provided in the “SecureString”value. This field accepts only the variables in “SecureString” format. |
||
|
WaitTime: It helps the user to add a delay to start the execution of the further activity. The format of the delay here is milliseconds. By default, it will be set to 30000. When the option is left blank, no delay is considered. |
||
|
MISC |
Display Name: Displays the name of the activity. The activity name can be customized which will help in troubleshooting. |
|
|
SkipOnError: Specify the Boolean value as “True or False.” |
||
|
Version: It specifies the version of the Desktop Automation feature in use. |
||
|
OUTPUT |
Result: It helps to view the execution state of the activity. It returns the values in Boolean format. |
* Represents Mandatory fields to execute the workflow.
Here’s an example of how the activity works –
In the following example, I am going to login to the “Webex” application using the
credentials configured in the “CredentialManagement”. To get detailed information,
click here.
Here I have already added the credentials as “Webex” in the vault to automate.
1. Install the “Manager” feature from the “Manage features”.
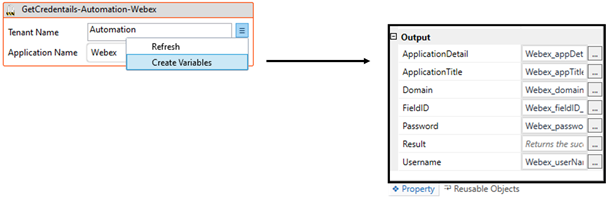
2. Drag and drop the “GetCredential” activity from the “Manager” feature.
a. It helps to extract the “Application details” and “Lock” the application during
the execution process.
b. Double click on the activity and the “Application” details will be binded to the
activity from the “Vault key” configured. (Click here to get detailed information)
c. Choose the “Application name” from the drop-down.
i. Here we are using the “Webex” as the “Application Name” created in the
“Credential Vault”.

d. Navigate to the “TenantName” and choose the “Three lines” adjacent to it.
i. Select the “Create Variables” option to create the variables against each field in
the output properties of the activity.
ii. The variables has been created automatically against each field binded along
with the “Application name” except the “Result” field. You can create a variable
here to know the execution status of the activity.
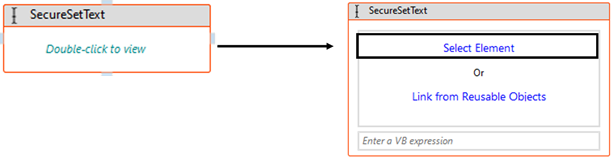
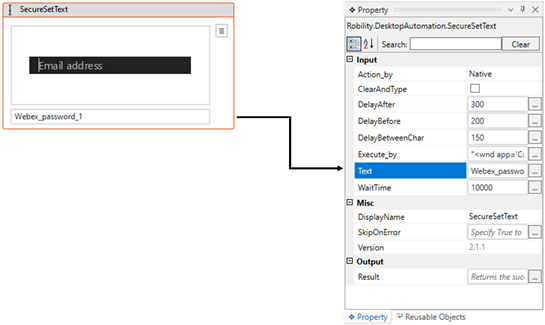
3. Drag and drop the “SecureSetText” activity from the “DesktopAutomation” feature
and place it next to the “GetCredentials” activity.
a. It helps to set the text as “SecureString” variables to the application.
b. In this case, we are utilizing the “SecureString” datatype as “Password” extracted
from the “GetCredentials” activity to login to the website.
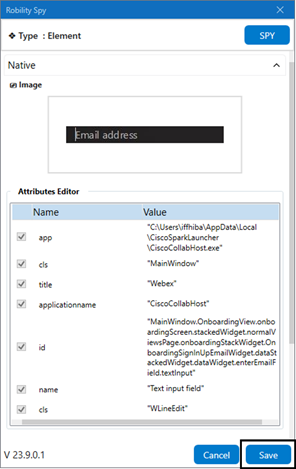
c. Double click on the activity and click on the “Select Element” hyperlink option.
i. It navigates to the “Webex” application and detect over the “Password” field on it.
d. Once you have chosen the "Element," the attributes will be stored in the "Spy"
window, along with an "image" of the element.
e. If you wish to add or remove any attributes, you can edit the "Attributes Editor."
In this case, we are not making any changes in the “Editor.”
f. Once you click on the "Save" button, the elements will be stored in the activity
window.
g. Then we need to specify the input to the field in “SecureString” datatype.
i. Here we are using the variable “webex_password1” which has been extracted as
output from the “GetCredentials” activity.
h. Now, execute the workflow.