
This activity helps to extract the “Table” from the desktop applications. The extracted
“Table” can then be manipulated and used in a variety of ways, such as data analysis
or creating reports. This makes it easier for users to work with and access data
stored in desktop applications.
Technical Reference
|
|
Input |
DelayAfter: It assists the user to add a delay before initiating subsequent activities. |
|
DelayBefore: It assists the user in adding a delay before starting the execution of the activities. |
||
|
ExecuteBy: Gets auto filled once the "Active Application" is selected. This contains the set of attributes for the specific spied element. |
||
|
WaitTime: It helps the user to add a delay to start the execution of the further activity. The format of the delay here is milliseconds. By default, it will be set to 10000. When the option is left blank, no delay is considered. |
||
|
Misc |
DisplayName: Displays the name of the activity. The activity name can be customized, which aids in troubleshooting. |
|
|
SkipOnError: Specify the "Boolean" value as "True" or "False."
True: Continue executing the workflow regardless of any errors thrown. False: Halt the workflow if it encounters any errors. None: If the option is left blank, the activity will, by default, behave as if "False" were chosen. |
||
|
Version: It indicates the version of the feature being used. |
||
|
Output |
Datatable: It helps to view the output as extracted range in “Datatable” format. It returns values in “Datatable” datatype. |
|
|
Result: It provides the ability to view the execution status of the activity. It returns values in "Boolean."
True: Indicates that the activity has been executed successfully without any errors. False: Indicates that the activity has been unsuccessful due to an unexpected error being thrown. |
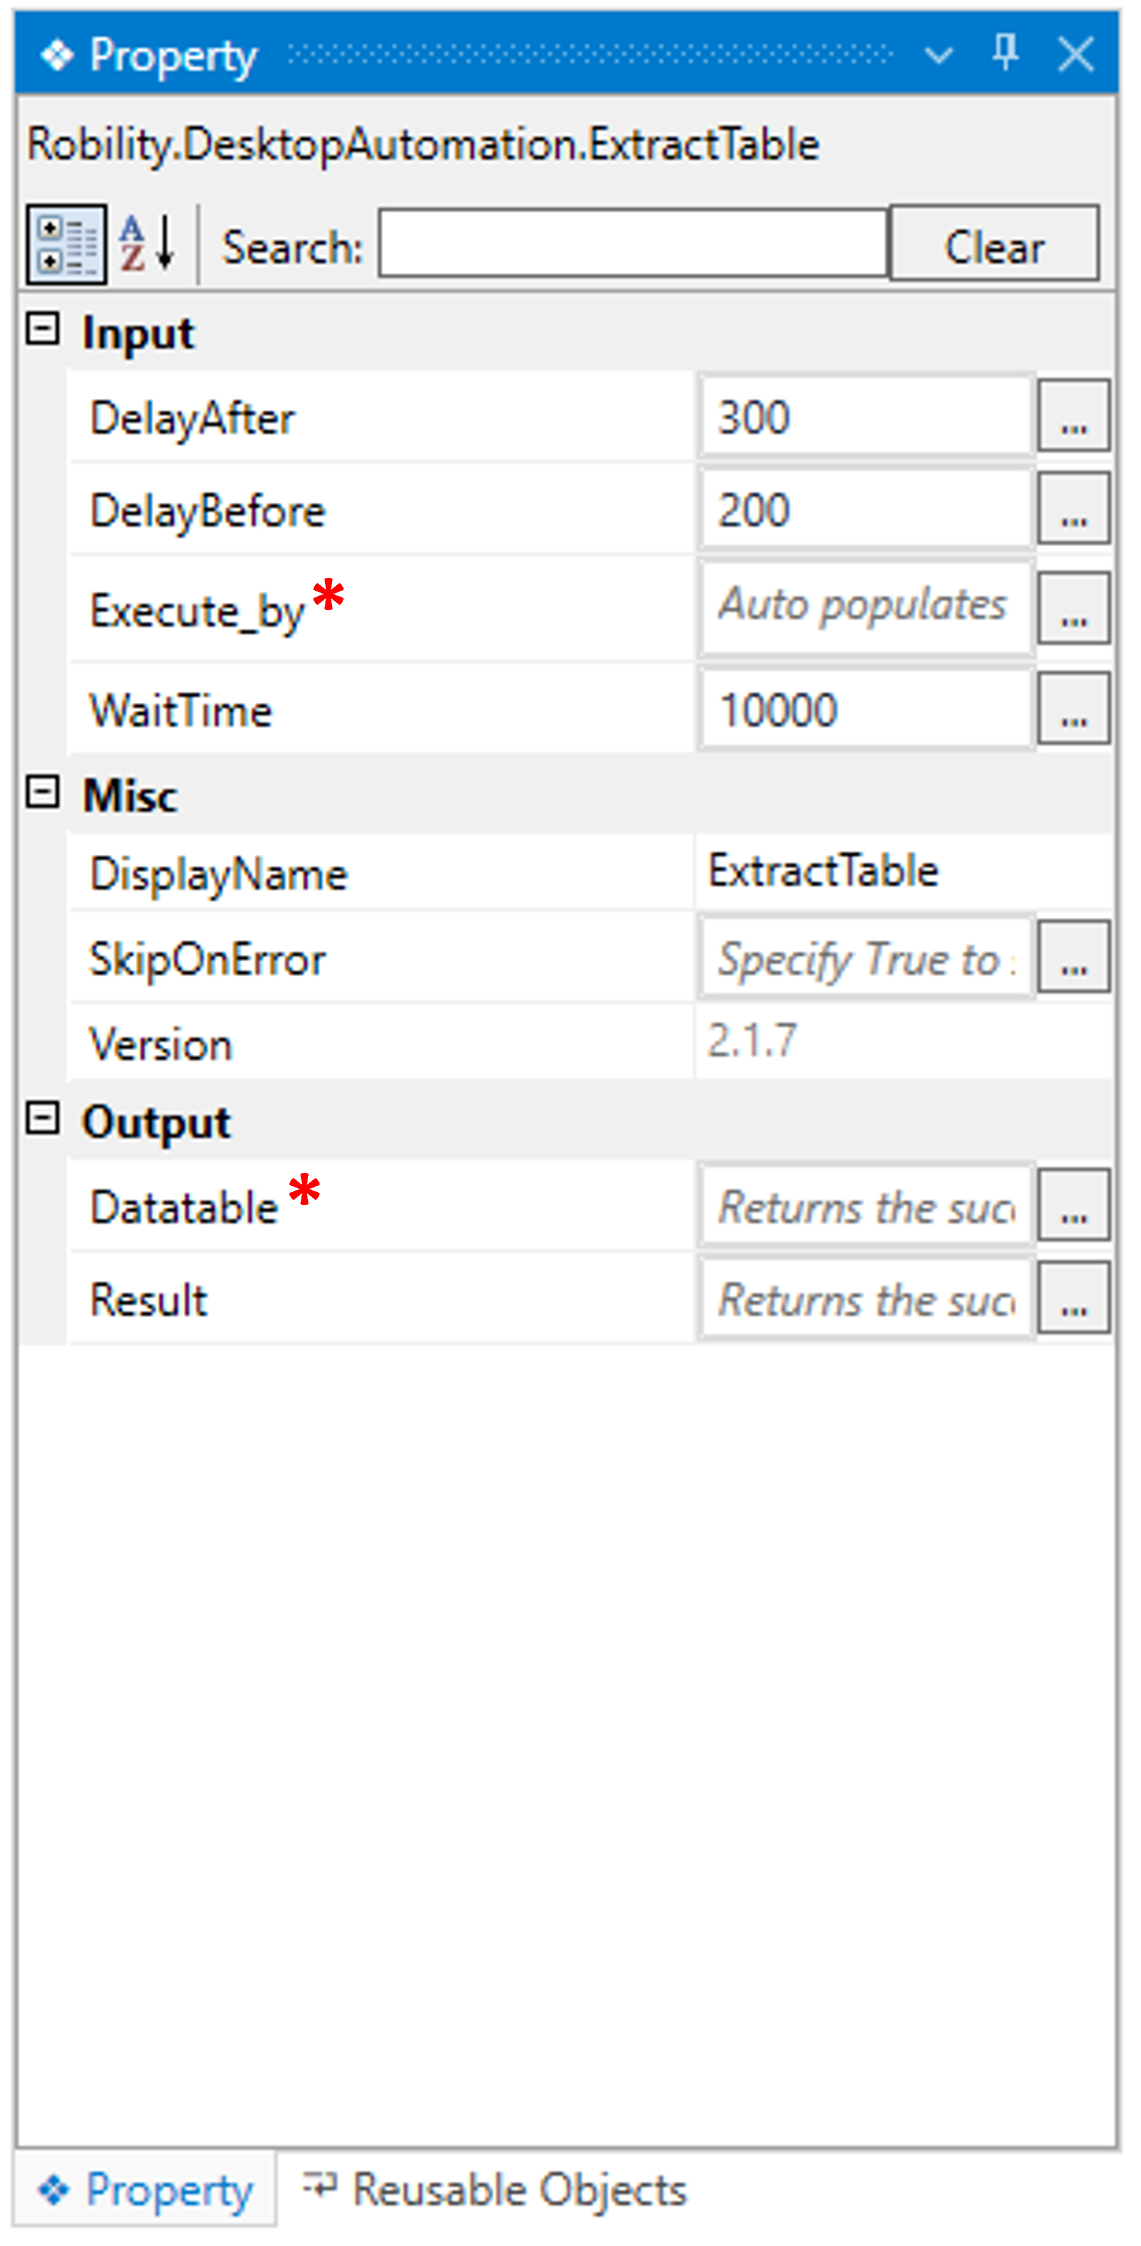
* Represents mandatory fields to execute the workflow
Here's an example of how the “ExtractTable” function works in the workflow –
In the following , I am using a Form which is available on the desktop that contains
“Table” in it. Using the “ExtractTable” activity I am going to extract that table that
contains customer details.
1. Drag and drop the "Drop-down" activity onto the designer pane and set it as
the “Start Node.”
a. Double-click the activity.
b. Here we are choosing the "Select Element" option.
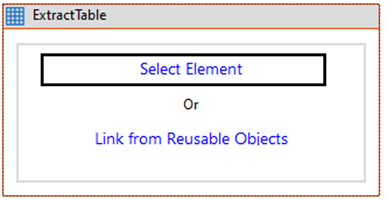
c. Click here to know “Link from Reusable Objects.”
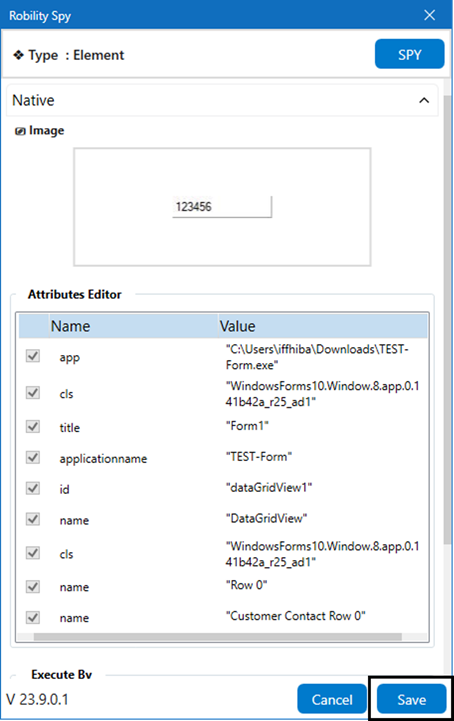
d. Select the element where we need to extract the values from the table. Here,
I am selecting the element “table” from the “Form” app.
e. Once you have chosen the "Element," the attributes will be stored in the
"Spy" window, along with an "image" of the element.
f. If you wish to add or remove any attributes, you can edit the "Attributes Editor."
In this case, we are not making any changes in the “Editor.”
g. Once you click on the "Save" button, the elements will be stored in the activity
window.
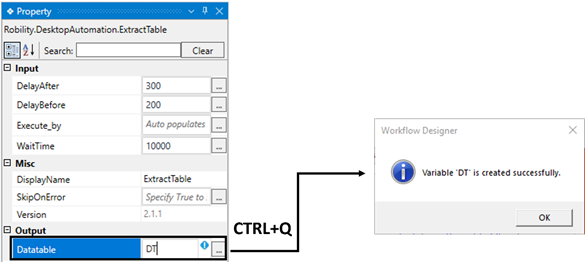
h. Now, the “Data_table” property is a mandatory property in the activity.
i. It helps to view the “extracted details” in a table format.
ii. Now, I am going to declare a variable here to view it in a table format.
iii. There are two ways to create a variable-
iv. Method 1 – Click on the "Data_Table" property within the "ExtractTable" activity
and enter the variable name. In this case, we are using " DT." Then, press
"Ctrl+Q," which is a shortcut key to create a variable.
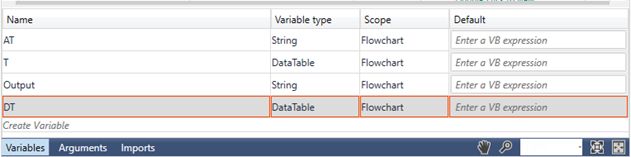
i. Method 2 - Click on the Variables pane and enter the name "DT" Then, in the
"Variable Types" column, select "Browse for Types" from the dropdown menu.
ii. The .Net window for data types will appear on the screen, enter the type name
as “System.Data.Datatable” and then click on “OK” button.
Now, execute the workflow.