This activity helps to extract the specified “Attribute’s value” from the detected UI
element from the desktop applications. It provides a list of “Attributes” options
for the detected element to choose from.
The extracted attributes can be used in subsequent activities for further processing.
It also helps to validate the UI element before performing any action.
Technical Reference
|
|
Input |
DelayAfter: It assists the user to add a delay before initiating subsequent activities. |
|
DelayBefore: It assists the user in adding a delay before starting the execution of the activities. |
||
|
ExecuteBy: Gets auto filled once the "Active Application" is selected. This contains the set of attributes for the specific detected element. |
||
|
WaitTime: It helps the user to add a delay to start the execution of the further activity. The format of the delay here is milliseconds. By default, it will be set to 10000. When the option is left blank, no delay is considered. |
||
|
Misc |
DisplayName: Displays the name of the activity. The activity name can also be customized to help in troubleshooting. |
|
|
SkipOnError: Specify the "Boolean" value as "True" or "False."
True: Continue executing the workflow regardless of any errors thrown. False: Halt the workflow if it encounters any errors. None: If the option is left blank, the activity will, by default, behave as if "False" were chosen. |
||
|
Version: It indicates the version of the feature being used. |
||
|
Output |
Attributes: This parameter helps to view the output of the activity, displaying all “Attributes” with their corresponding values for the spied element. It returns the values in a “Datatable” data type. |
|
|
AttributeValue: It helps to view the output of the activity, displaying the specified “Attribute’s value” for the spied element. It returns the values in a “String” data type. |
||
|
Result: It provides the ability to view the execution status of the activity. It returns values in "Boolean."
True: Indicates that the activity has been executed successfully without any errors. False: Indicates that the activity has been unsuccessful due to an unexpected error being thrown. |

* Represents mandatory fields to execute the workflow
List of Attributes
The following are the list of attributes that are available in the “GetAttributes” activity.
The following attributes and it values can only be extracted from the “detected element”.
· Accelerator key: It refers to the “Keyboard” shortcut keys or the modifiers(CTRL,
SHIFT AND ALT) available for the “spied element.” if any key is enabled for the
element, it will be returned as output. When there is no accelerator key, it will be
returned as null value.
· Access key: It refers to shortcut key configured along with the “Spied element”
and returns the output of the activity as a single character that is available, if any.
When there is no accelerator key, it will be returned as null value.
· AutomationID: It indicates the unique identification for the detected element to
identify it and making easier to interact with it. It returns the “AutomationID” as
output. When there is no AutomationID, it will be returned as null value.
· ClassName: It indicates the “Class” of the detected element and returns the
output. When there is no ClassName available, it will be returned as null value.
· ControlType: It refers to the “Input” type of the “detected element” and returns
the output of the activity.
· Framework ID: Indicates the “Framework” of the application that is suitable for
the detected element and returns the output.
· HasKeyboardFocus: Indicates whether the “KeyboardFocus” is enabled is for
the detected element. It helps to validate before providing the “keyboard” input
to the detected element. It returns the output in “Boolean Format”.
i. True: Indicates that the “Detected element” is enabled for providing “Keyboard”
inputs.
ii. False: Indicates that the “Detected element” is not enabled for providing the
“keyboard” inputs.
· HelpText: It provides the “text” or “information” that provides the explanations for
the “detected element.” It returns the output as the text. When there is no “HelpText”
available, it will be returned as null value.
· IsContentElement: Provides whether the “detected element” is content of user
interface or non-content or decorative element. It returns the “Boolean” datatype.
i. True: Specifies the “detected element” is a content of user interface that contains
text, form fields , buttons etc.,
ii. False: Specifies the “detected element” is a non-content or decorative element
such as images used for styling or spacing.
· IsControlElement: Provides whether the “detected element” is the control type
element. It returns the output as “Boolean” datatype.
i. True: Specifies the “detected element” is a control element .
ii. False: Specifies that the “detected element” is not a control element.
· IsEnabled: indicates that the “detected element” is enabled or disabled during the
execution of the bot. it returns the values in “Boolean” datatype.
i. True: Indicates the “detected element” is enabled to perform action during the
execution of the bot.
ii. False: Indicates the “detected element” is disabled to perform action during
the execution of the bot.
· IsKeyboardFocusable: Indicates whether the “detected element” is keyboard
focusable. It returns the value in “Boolean” datatype.
i. True: Specifies that the “detected element” is keyboard focusable.
ii. False: Specifies that the “detected element” is not keyboard focusable.
· IsOffScreen: It facilitates to provide whether the “detected element" is visible
on the screen during the execution of the bot. It returns the value in “Boolean”
datatype.
i. True: Specifies that the “detected element” is visible.
ii. False: Specifies that the “detected element” is not visible.
· IsPassword: indicates that the “Detected element” is a password type control or
not during the execution of the bot. It returns the value in “boolean” datatype.
i. True: Specifies that the “detected element” is password type.
ii. False: Specifies that the “detected element” is not password type.
· LocalizedControlType: It facilitates to provide the “text” or “description” of the
detected element’s control type.
· Name: Provides the “name” of the detected element during the execution of the bot.
· Orientation: It facilitates to provide the “orientation” format of the detected element.
It returns the value as “Horizontal” or “Vertical” format.
· ProcessID: It facilitates to retrieve the “Process ID” of the “Application or Process”
that is detected for automation. The “Process ID” can be seen in the “Task Manager”
as “PID” column against the processes. It returns the value in “Integer” datatype.
· ExpandCollapsePattern.ExpandCollapseState: It refers that the “detected element”
have “expandable or collapsible” elements such as tree views, menu’s section or
sections either visible or hidden. It returns the output of the activity as,
i. Expanded: Indicates that the “detected element” is expandable and visible.
ii. Collapsed: Indicates that the “detected element” is collapsed and hidden.
Here’s an example of “GetAttributes” activity works –
In the following example, I am going to automate with the “Microsoft Word” application to
detect the “disabled” element and extract the “Attribute’s value” to proceed with subsequent
activities in the workflow.
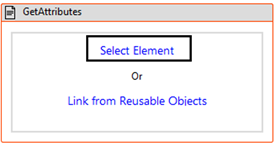
1. Drag and drop the “GetAttributes” activity to the workflow.
2. This helps to retrieve the attribute’s value for chosen attribute from the list that is available
for the detected element.
a. Here I am using this activity to get the attributes of the “ disabled” menu from the
“Microsoft Word” application.
b. Now, double clicking on the activity to choose the “Select Element” hyperlink to detect the
element.
c. Navigating to the “Microsoft Word” application which has already been kept opened
on the desktop.
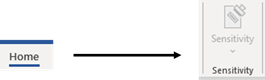
d. Moving over to the “Sensitivity” menu option on the “Home” menu.
e. Clicking on it to select the element to automate.
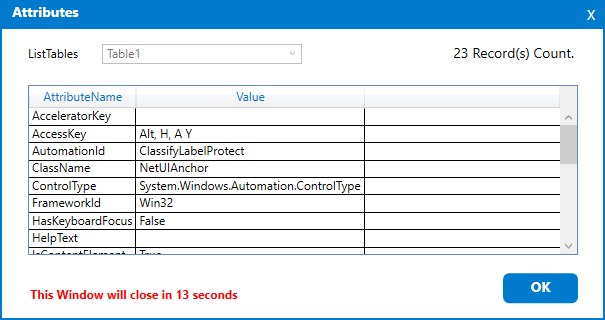
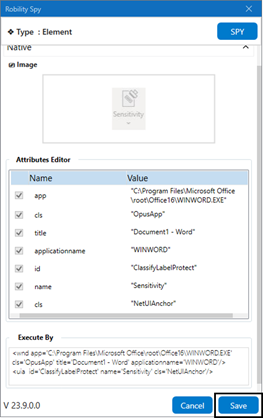
f. Now, the “Robility Spy” window appears on the screen to choose the “attributes” from
the element editor window.
g. Here, by default all the attributes will be chosen, and we will only be able to edit the
values from the chosen attribute.
h. Clicking on the “Save button” to save the detected element and its attributes to the
activity.
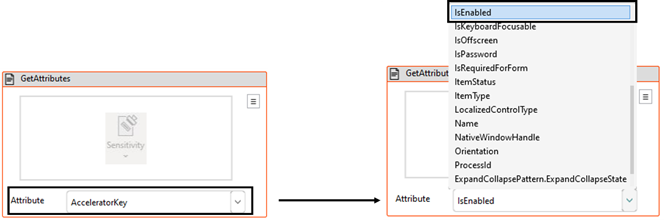
i. Navigating to the “Attributes” list in the activity.
i. Here I am choosing the attribute as “IsEnabled” from the list to know whether
the “Menu” detected has been enabled or disabled to automate in subsequent
activities.
ii. Choosing the “IsEnabled” from the drop-down. (Refer the list of attributes to
get detailed information).
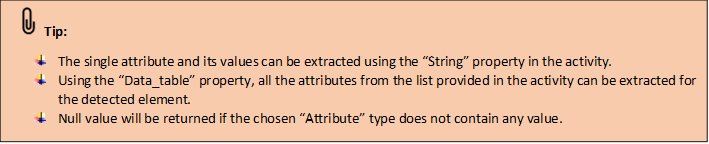
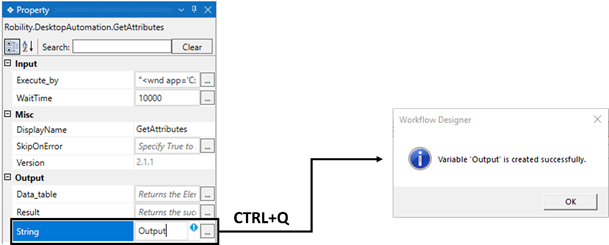
j. Next, moving to the “String” property in the output section of the activity.
i. Here I am using this property to declare a variable to view the output of the single
“attribute” chosen.
ii. There are two ways to create a variable-
iii. Method 1 – Click on the "String" property within the "GetAttributes" activity and
enter the variable name. In this case, we are using " Output." Then, press "Ctrl+Q,"
which is a shortcut key to create a variable.
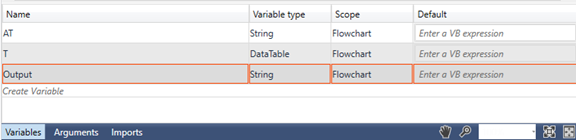
iv. Method 2 - Click on the Variables pane and enter the name "Output" Then, in the
"Variable Types" column, select "Browse for Types" from the dropdown menu and
choose the “String” datatype.
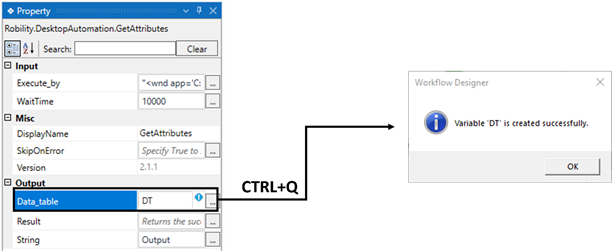
k. Now, the “Data_table” property is a mandatory property in the activity.
i. It helps to view the “list of attributes” available in the activity in a table format.
ii. Now, I am going to declare a variable here to view it in a table format.
iii. There are two ways to create a variable-
iv. Method 1 – Click on the "Data_Table" property within the "GetAttributes" activity and
enter the variable name. In this case, we are using " DT." Then, press "Ctrl+Q," which
is a shortcut key to create a variable.
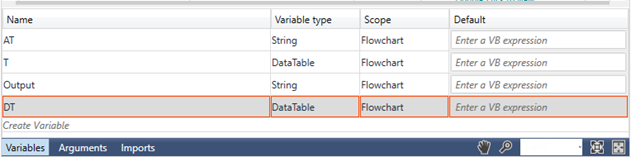
v. Method 2 - Click on the Variables pane and enter the name "DT" Then, in the "Variable
Types" column, select "Browse for Types" from the dropdown menu.
vi. The .Net window for data types will appear on the screen, enter the type name as
“System.Data.Datatable” and then click on “OK” button.
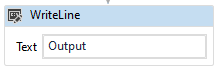
l. Next, I am placing the “Writeline” activity next to the “GetAttributes” activity.
i. Here I am using this activity to view the output from the variable declared in the
“String” property of the “GetAttributes” activity.
ii. Specifying the “Output” in the “Text” property of the “Writeline” activity.
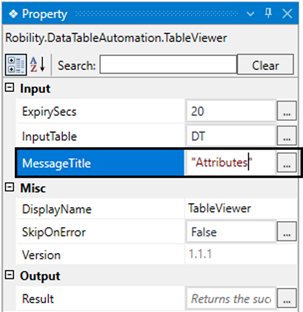
m. Finally, placing the “Table viewer” activity next to the “Writeline” activity.
i. Here I am using this activity to view the output from the variable declared in the
“Data_table” property in the “GetAttributes” activity. It helps to view the output
in a table format.
1. Navigating to the “ InputTable” property in the “Table viewer” activity.
2. Here I am providing the input table as “ DT” declared in the output of the
“GetAttributes” activity.

ii. Moving to the “MessageTitle” property to set the title for the table.
1. Here I am specifying the title as “Attributes”.
n. Now, I have executed the workflow to view the output.