
The click event allows users to interact with applications by clicking on specified
target elements.
Technical Reference
|
|
Input |
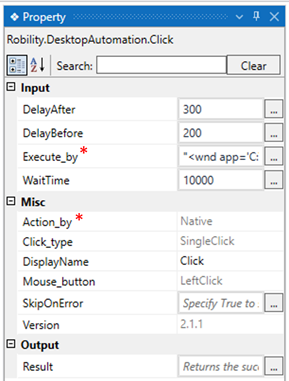
DelayAfter: It assists the user to add a delay before initiating subsequent activities. |
|
DelayBefore: It assists the user in adding a delay before starting the execution of the activities. |
||
|
Execute_by: Gets auto filled once the "Active Application" is selected. This contains the set of attributes for the specific spied element. |
||
|
WaitTime: It enables the user to introduce a delay before initiating subsequent activities. The delay is specified in milliseconds.
By default, it is set to 10000 milliseconds. Leaving the option blank will result in no delay being applied. |
||
|
Misc |
Action_by: This parameter helps you trigger the action that needs to be performed. It has two options:
Native: Once the action is captured in the spy window, it is executed in the background of the code. Human: Once the element is found, the trigger's action will be performed as per the 'Human' option. By default, 'Native' will be chosen. |
|
|
Click_type: When the 'Native' option is chosen, the default action of the trigger will be selected, and it will not be enabled for editing. The click type will be enabled when we choose the 'Human' option from the 'ActionBy' parameter. It has two options: Single Click – Allows you to perform a single-click action. Double Click – Allows you to perform a double-click action." |
||
|
DisplayName: Displays the name of the activity. The activity name can be customized, which aids in troubleshooting. |
||
|
Mouse_button: When the 'Native' option is chosen, the default action of the trigger will be selected, and it will not be enabled for editing. The click type will be enabled when we choose the 'Human' option from the 'ActionBy' parameter. It has two options: LeftClick: Allows you to perform a left-click action as on the mouse button. |
||
|
SkipOnError: Specify the "Boolean" value as "True" or "False."
True: Continue executing the workflow regardless of any errors thrown. False: Halt the workflow if it encounters any errors. None: If the option is left blank, the activity will, by default, behave as if "False" were chosen. |
||
|
Version: It indicates the version of the feature being used. |
||
|
Output |
Result: It provides the ability to view the execution status of the activity. It returns values in "Boolean."
True: Indicates that the activity has been executed successfully without any errors. False: Indicates that the activity has been unsuccessful due to an unexpected error being thrown. |
* Represents mandatory fields to execute the workflow

The following is a simple example that demonstrates how to use a calculator to find
the result of “7/8.”
1. Create a solution for building a workflow.
2. Install the "Desktop Automation" feature from the "Manage Features" menu.
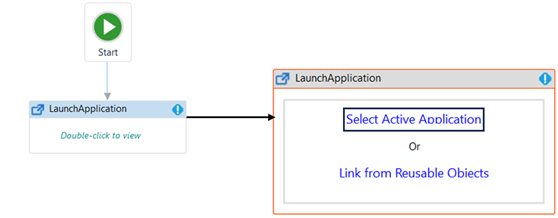
3. Drag and drop the "LaunchApplication" activity onto the designer pane and set it
as the “Start Node.”
a. Double-click the activity.
b. Here, choose the "Select Active Application" option.
c. Click here to learn more about “Linking from Reusable Objects.”
d. Choose the application you want to launch; in this case, we selected the "Calculator"
app.
e. Once you have chosen the "Active Application," the application's elements will be
stored in the "Spy" window, along with an "image" of the application.
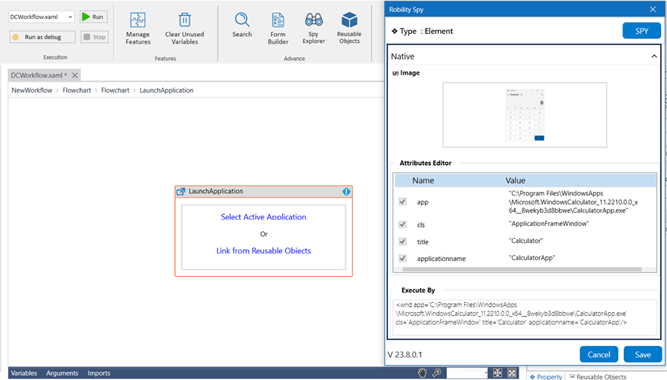
f. If you wish to add or remove any attributes, you can edit the "Attributes Editor."
In this case, we are not making any changes in the “Editor.”
i. Once you click on the "Save" button, the application's element will be stored in the
activity window.
4. Drag and drop the "Application Action" activity next to the "Launch Application"
activity onto the designer pane. This activity assists in maximizing the application.
a. Double-click on the activity and choose the "Select Active Application" option.
b. Choose the application you want to launch; in this case, we selected the "Calculator"
app.
c. Once you have chosen the "Active Application," the application's elements will be
stored in the "Spy" window, along with an "image" of the application.
d. If you wish to add or remove any attributes, you can edit the "Attributes Editor." In
this case, we are not making any changes in the “Editor.”
i. Once you click on the "Save" button, the application's element will be stored in the
activity window.
ii. Choose the preferred "Action Type"; in this case, we are selecting the "Maximize"
option.
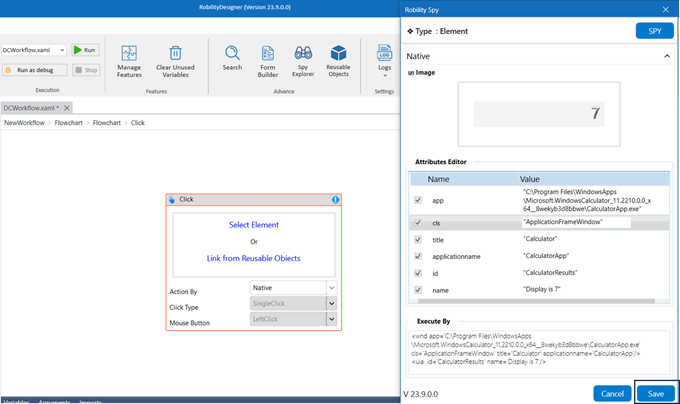
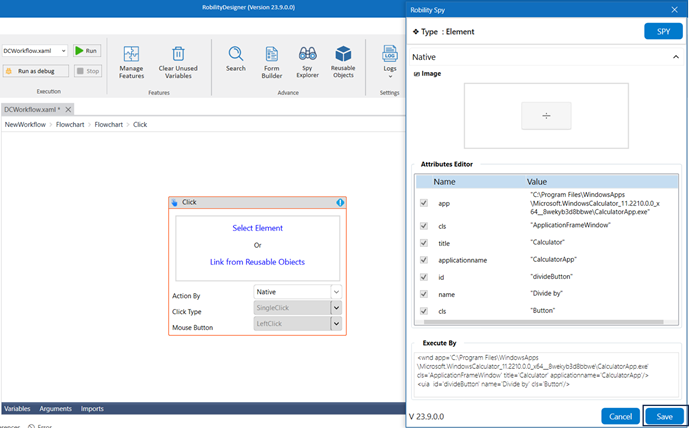
5. Drag and drop the 'Click' activity next to the 'Application Action' activity.
a. Double-click on the activity and choose the element where you want to perform the click,
then proceed to the next step. In this case, we are clicking the numeric value "7" from the
'Calculator' app.
i. Once you have chosen the "Element," the attributes will be stored in the "Spy" window,
along with an "image" of the element.
ii. If you wish to add or remove any attributes, you can edit the "Attributes Editor." In this
case, we are not making any changes in the “Editor.”
iii. Once you click on the "Save" button, the elements will be stored in the activity window.
b. Drag and drop the 'Click' activity to select the division symbol next to the existing
'Click' activity.
i. Once you have chosen the "Element," the attributes will be stored in the "Spy"
window, along with an "image" of the element.
ii. If you wish to add or remove any attributes, you can edit the "Attributes Editor."
In this case, we are not making any changes in the “Editor.”
iii. Once you click on the "Save" button, the elements will be stored in the activity window.
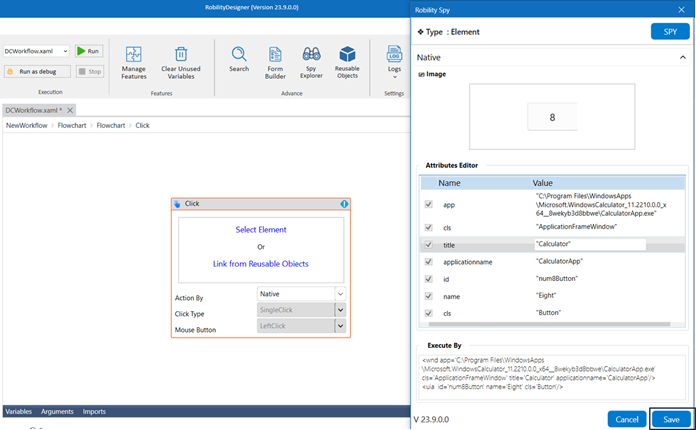
c. Drag and drop the 'Click' activity next to the existing 'Click' activity and select
the numeric value "8."
i. Once you have chosen the "Element," the attributes will be stored in the "Spy"
window, along with an "image" of the element.
ii. If you wish to add or remove any attributes, you can edit the "Attributes Editor."
In this case, we are not making any changes in the “Editor.”
iii. Once you click on the "Save" button, the elements will be stored in the activity
window.
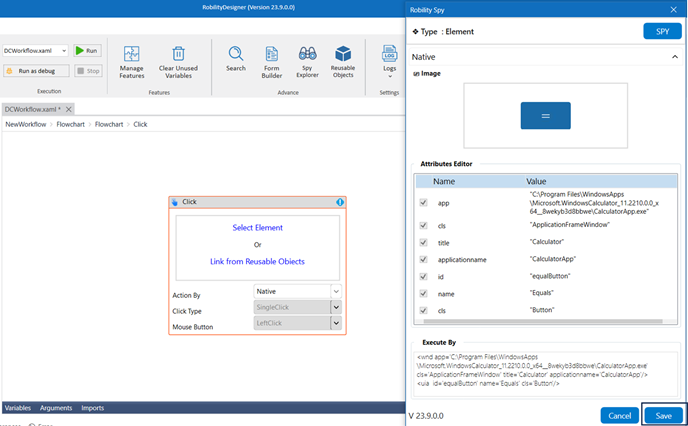
d. Drag and drop the 'Click' activity next to the existing 'Click' activity and select
the equal symbol to obtain the result of "7/8."
i. Once you have chosen the "Element," the attributes will be stored in the "Spy"
window, along with an "image" of the element.
ii. If you wish to add or remove any attributes, you can edit the "Attributes Editor."
In this case, we are not making any changes in the “Editor.”
iii. Once you click on the "Save" button, the elements will be stored in the activity
window.
6. Drag and drop the “GetText” activity next to the “Click” activity to obtain the
result of “7/8.”
a. Double click on the activity and click on the “Select Element.”
b. Select the result value of “7/8.”
c. Once you have chosen the "Element," the attributes will be stored in the "Spy"
window, along with an "image" of the element.
d. If you wish to add or remove any attributes, you can edit the "Attributes Editor."
In this case, we are not making any changes in the “Editor.”
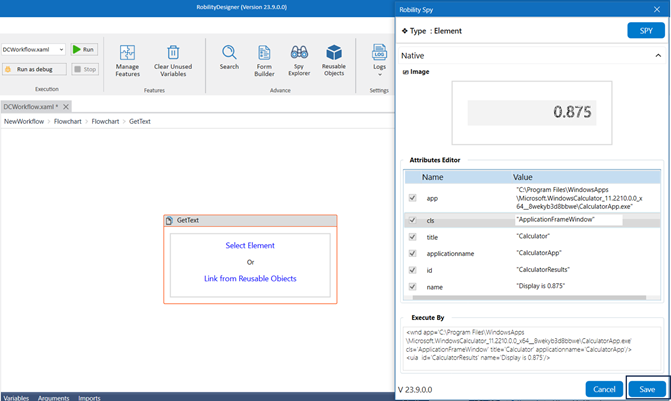
e. Once you click on the "Save" button, the elements will be stored in the activity
window.
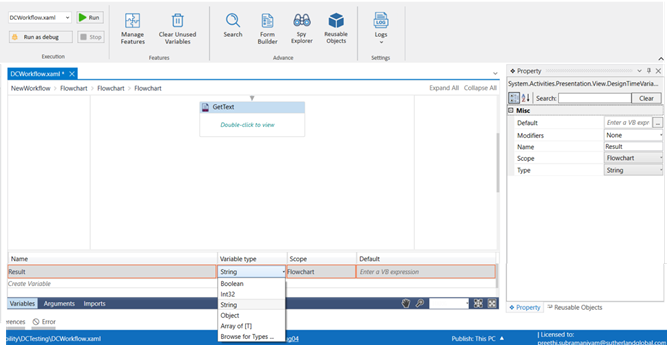
f. Declare a variable to store the spied value in the “Output” window.
i. There are two methods to store the spied value in the variable.
Method 1: Double-click on the variable parameter in the “Output” section and enter a
name that helps you easily identify it in the flow. Here, I'm using the name "Result"
and using the shortcut key "Ctrl+Q" to create the variable.

Method 2: Click on the variable pane, enter your preferred name (here, I'm using
"Result"), and choose the data type as "String" since the output value accepts the
string data type.
7. Drag and drop the “WriteLine” activity next to the “GetText” activity to view the
return output of the “GetText” activity.
a. Enter the variable you declared in the “GetText” activity into the “Text” field.
Here, I’m entering the value as “Result.”
b. Now, execute the workflow to see how it works.