
In this scenario, we have set the condition in the 'Parallel' activity to 'True' and
executed it with a set of sequences to obtain the output. Here, we are using the
'WebAutomation' activities to launch the 'Google' website and provide text in the
search bar.
1. Create a solution named “SampleRPA” or open an existing solution.
2. Install the latest feature of “WebAutomation” from the “Manage feature”.
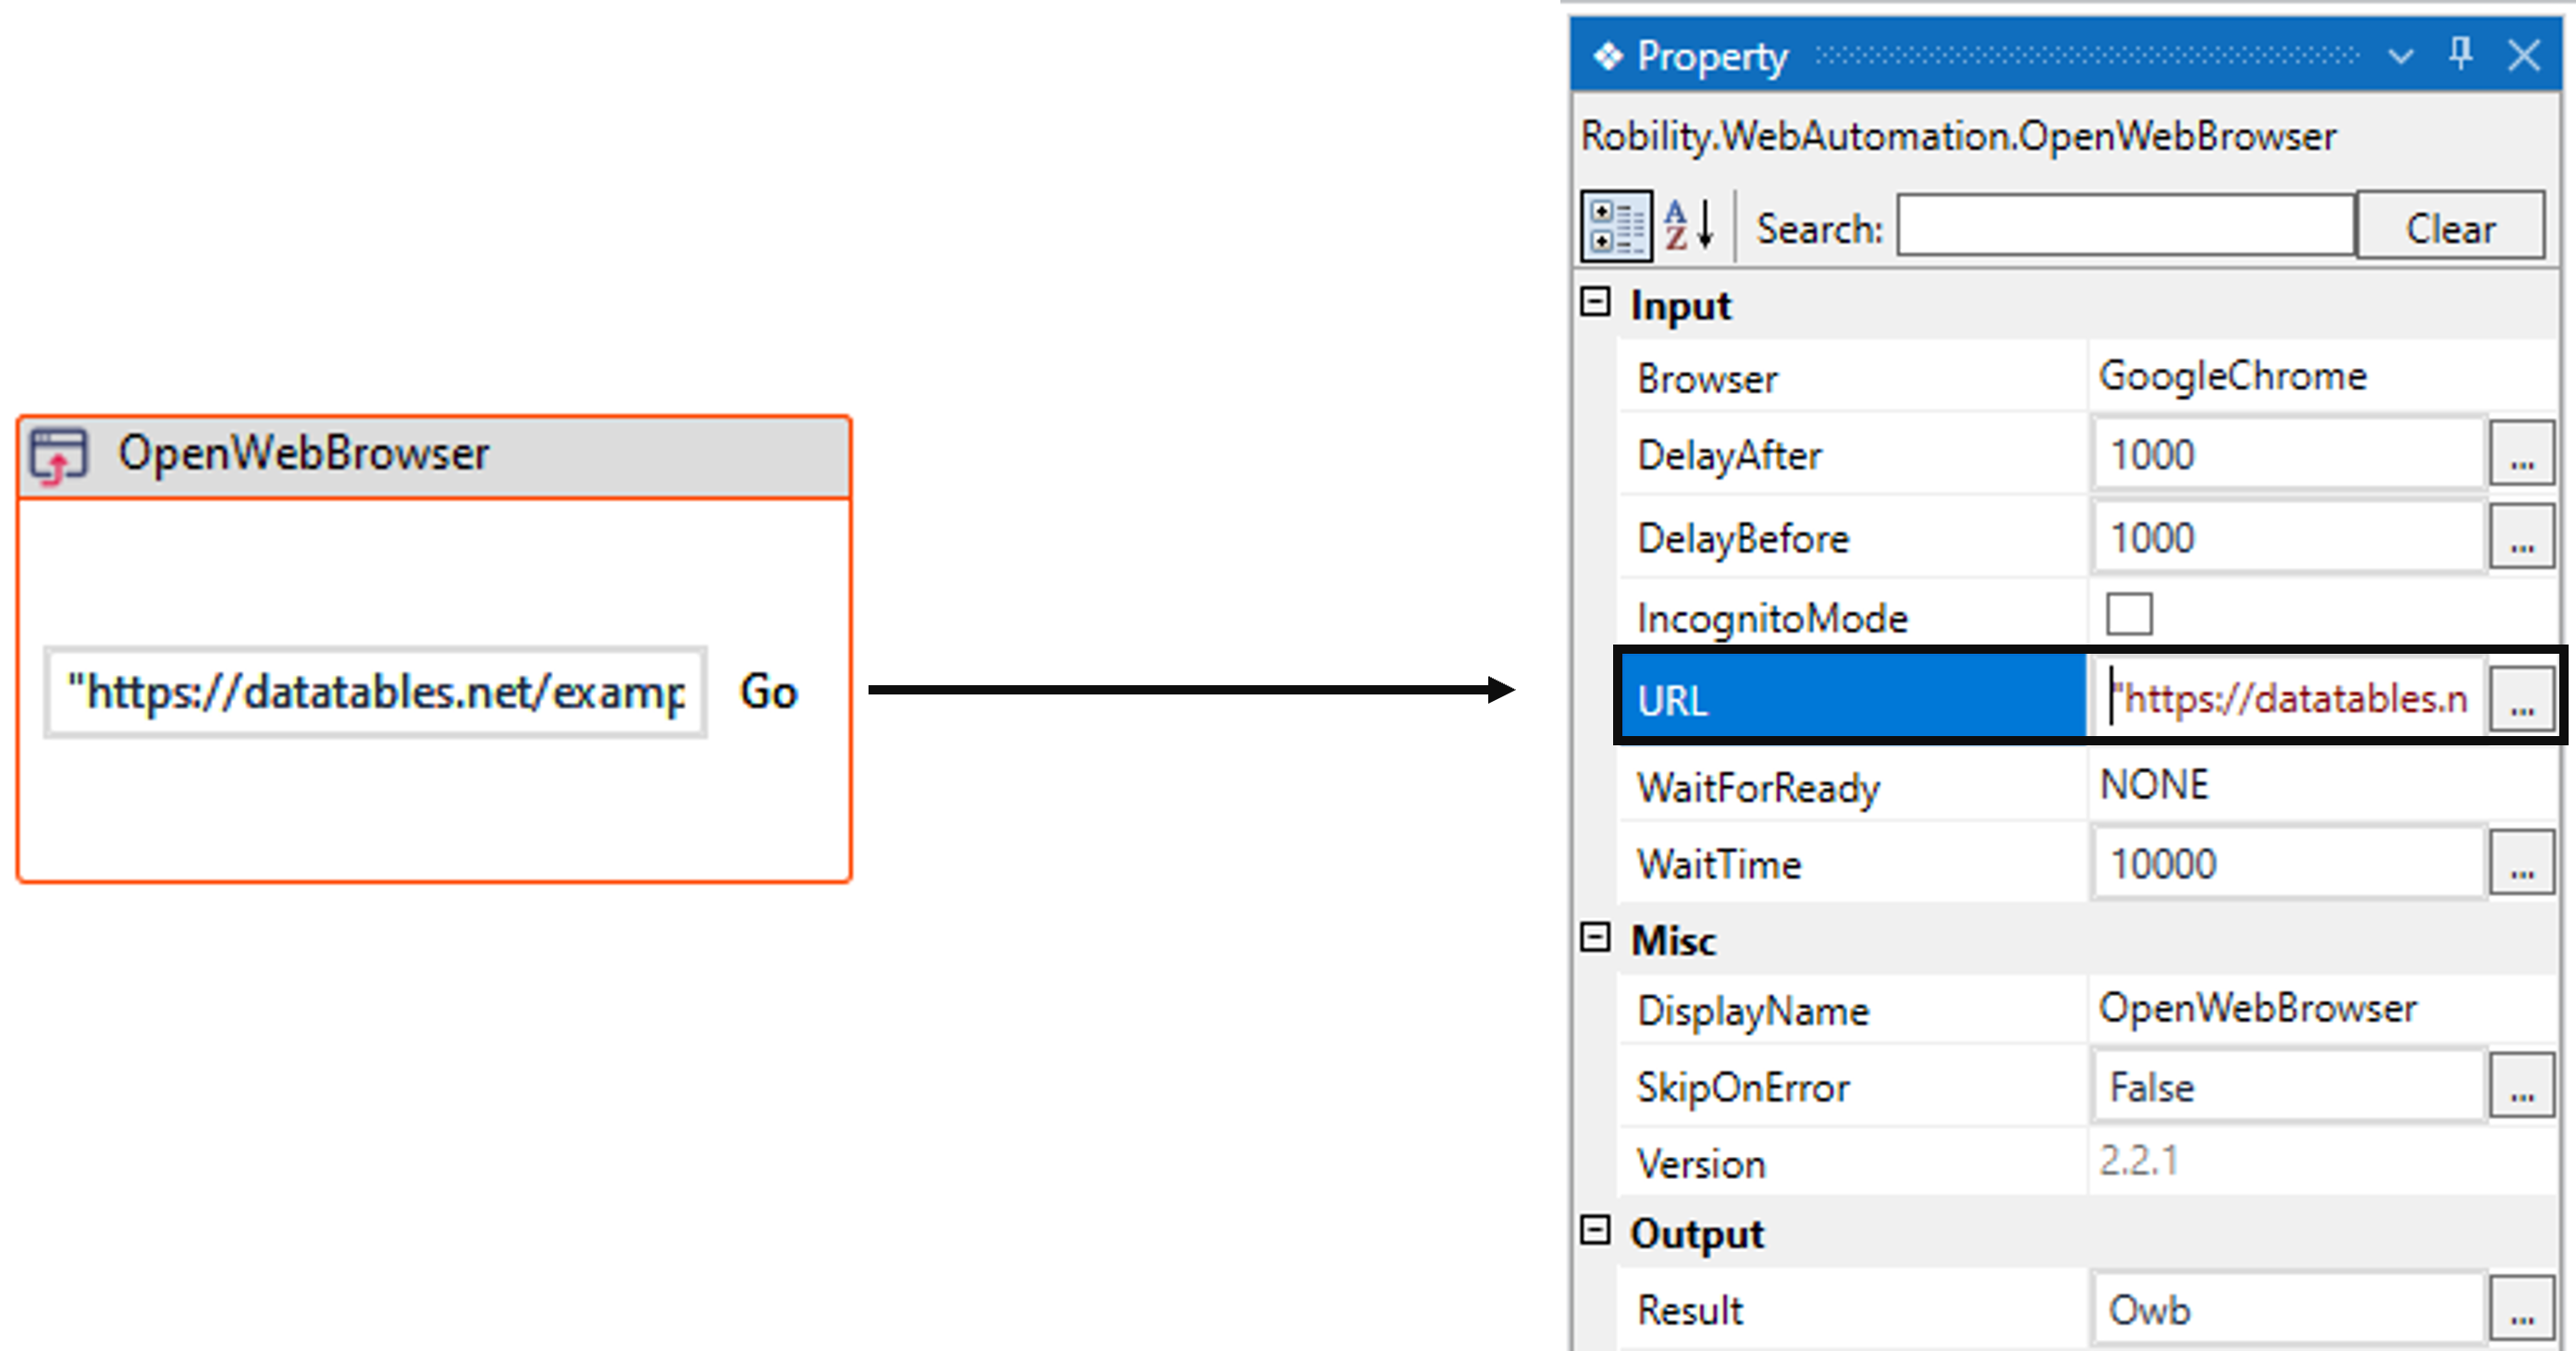
3. Drag and drop the “OpenWebBrowser” activity to the workflow to launch the
“Google” website.
a. Double click on the activity to provide the “URL” in the box.
b. Here I am entering the URL as “https://www.google.com/”.
4. Next, the 'Microsoft' activities will be available by default in the Designer.
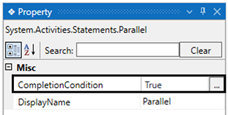
5. Drag and drop the "Parallel" activity from the "Control Flow" feature.
a. The purpose of using this activity is to execute the activities concurrently
based on a condition.
b. Navigate to the “CompleteCondition” property of the parallel activity and
specify it as "True" in the box.
c. Double click on the activity.
d. Drag and drop the "Sequence" activity inside the parallel activity.
i. In this case, it is used to perform a set of “WebAutomation” activities
inside it.
ii. The “ElementExist” and “SetText” activities from the WebAutomation are
used within this sequence.

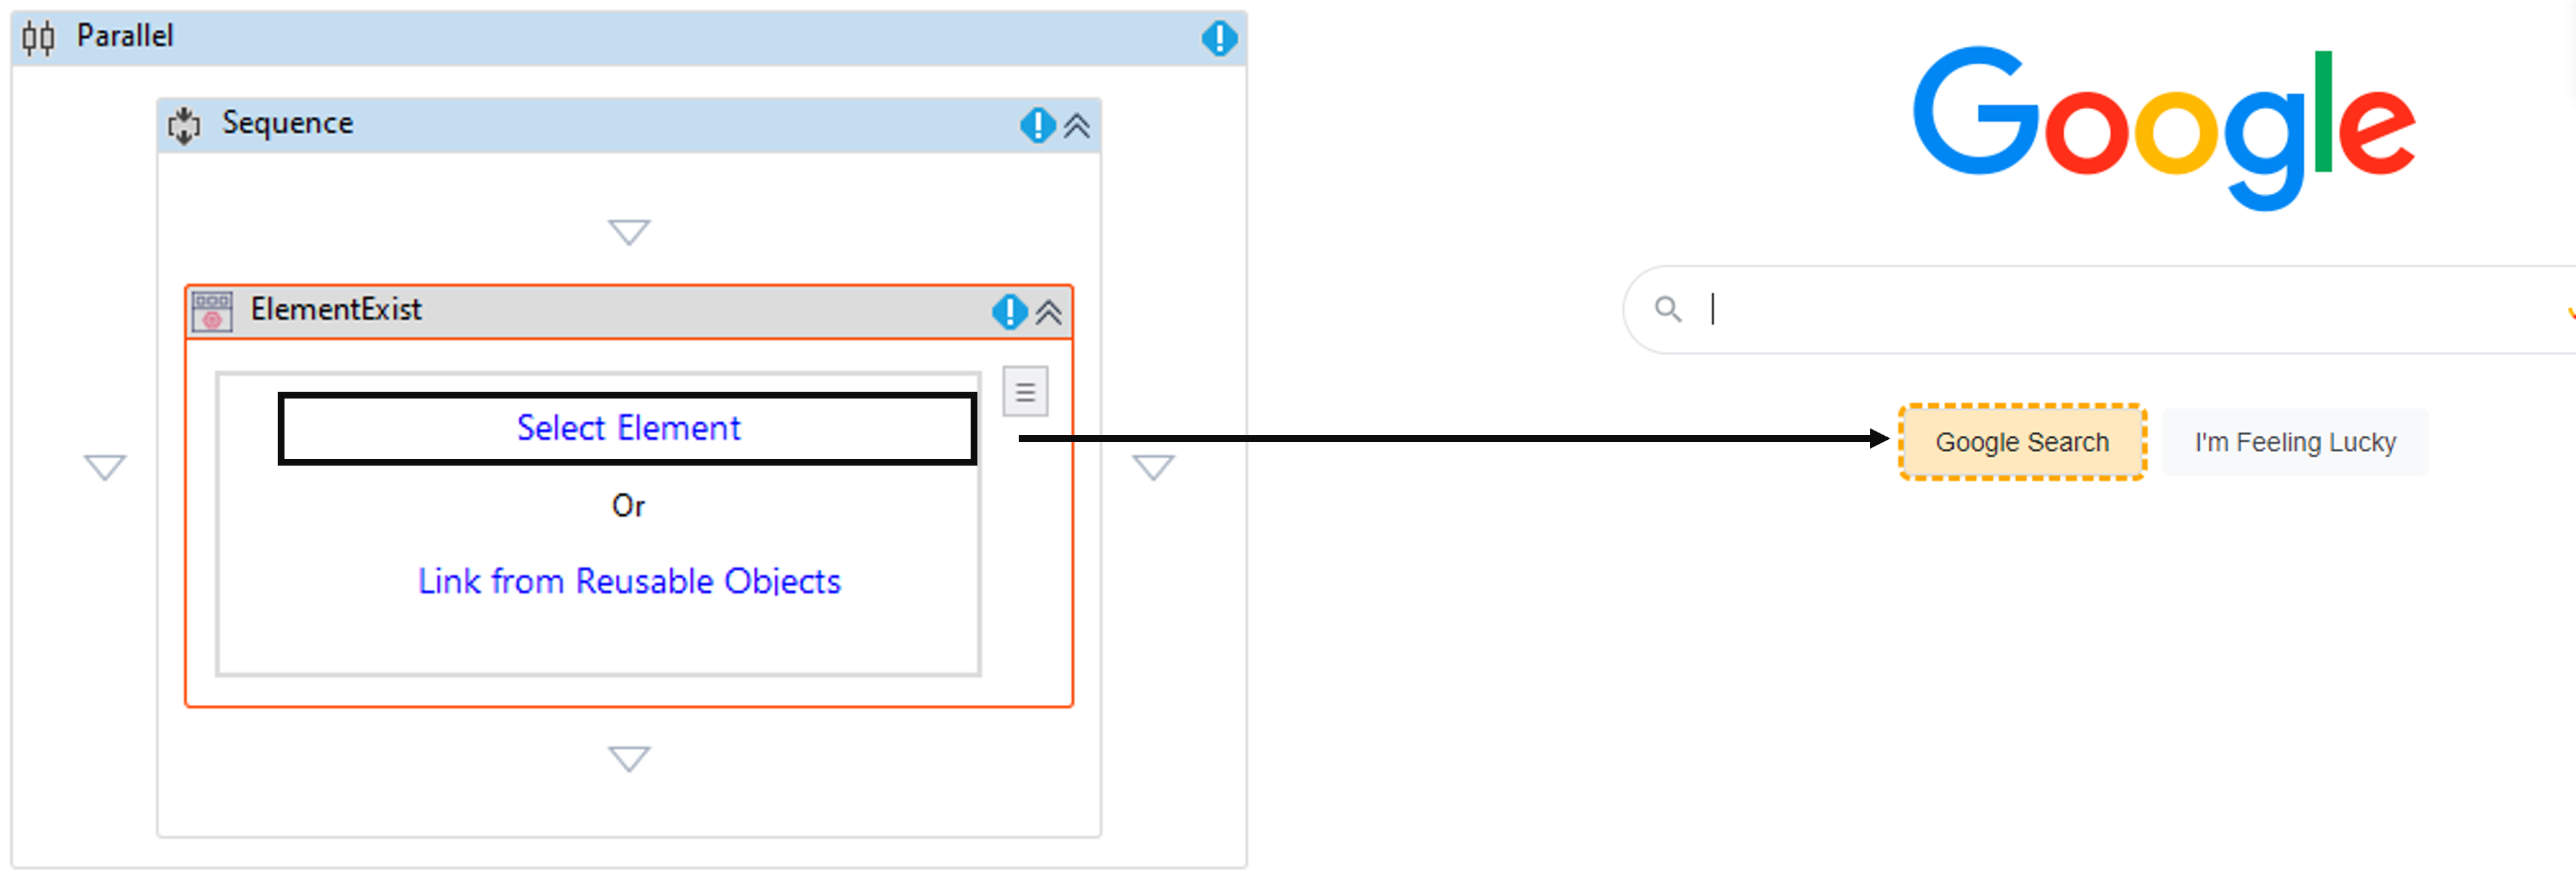
e. Drag and drop the “ElementExist” activity from the “WebAutomation” feature
inside the “Sequence” activity.
i. It is used to validate the “GoogleSearch” button on the website. Based on the
element exist status, it will move to further activity in the flow.
ii. Double click on it and choose the “Select Element” option to detect the “Google
Search” button.
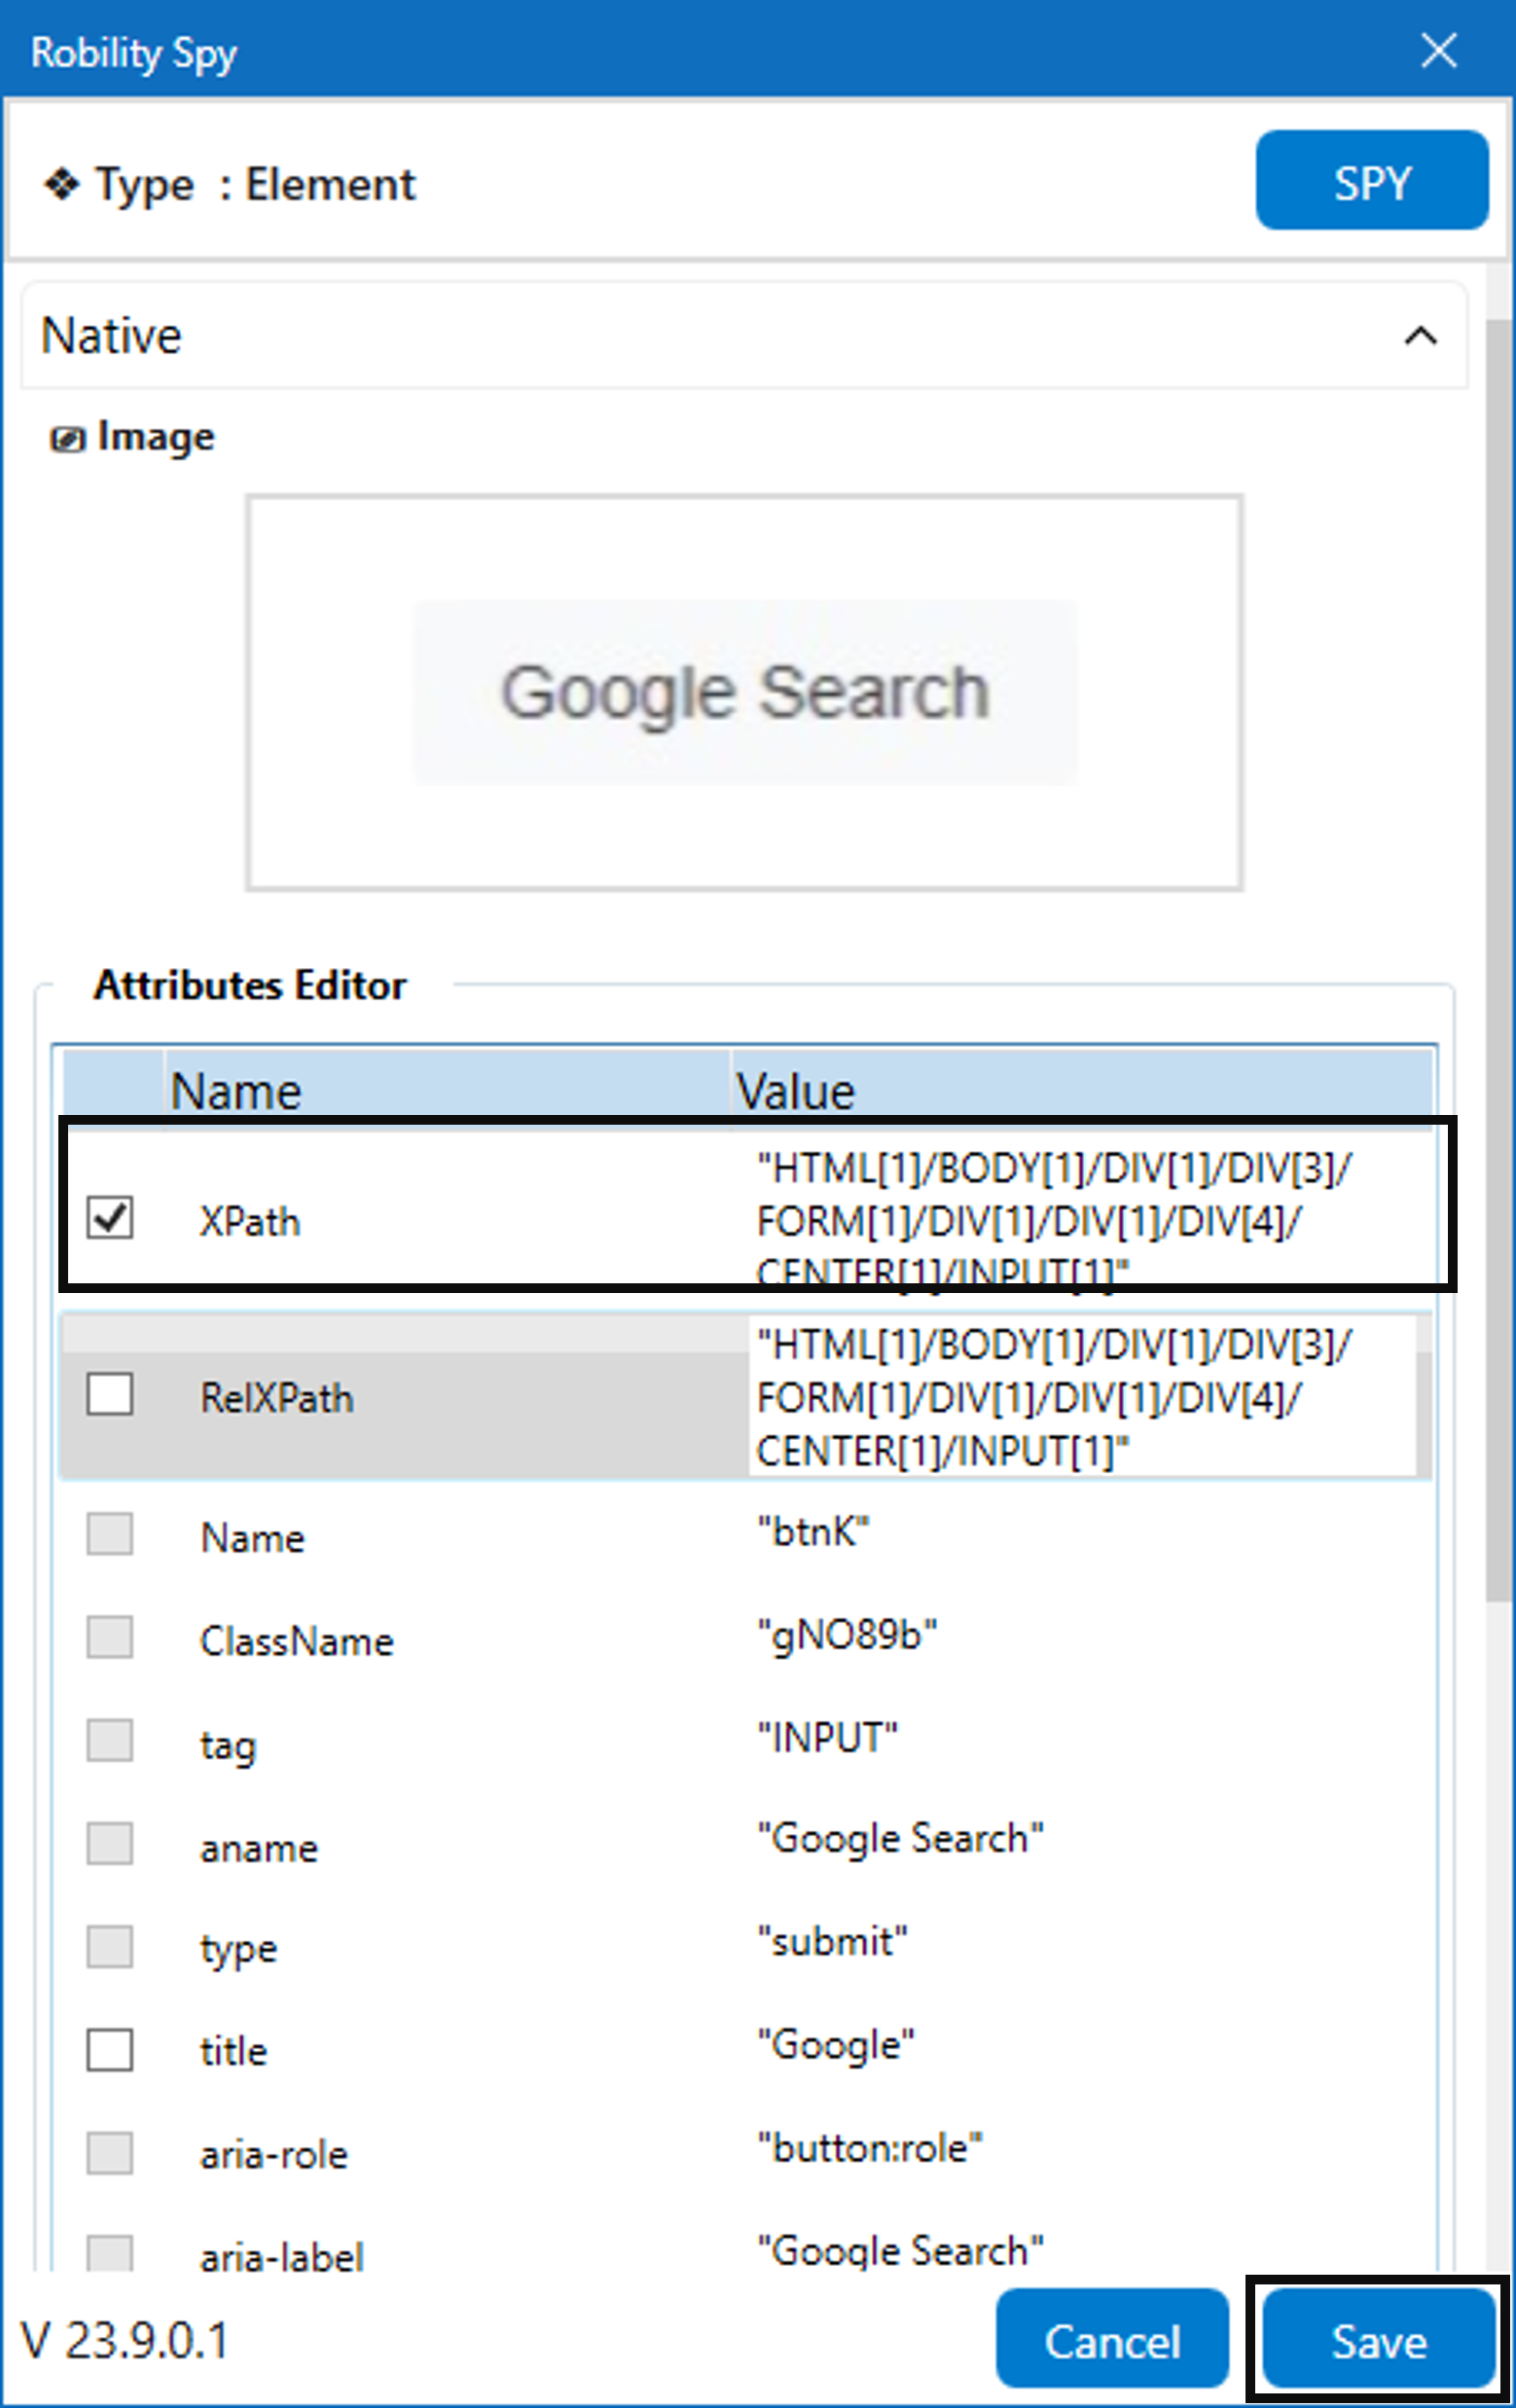
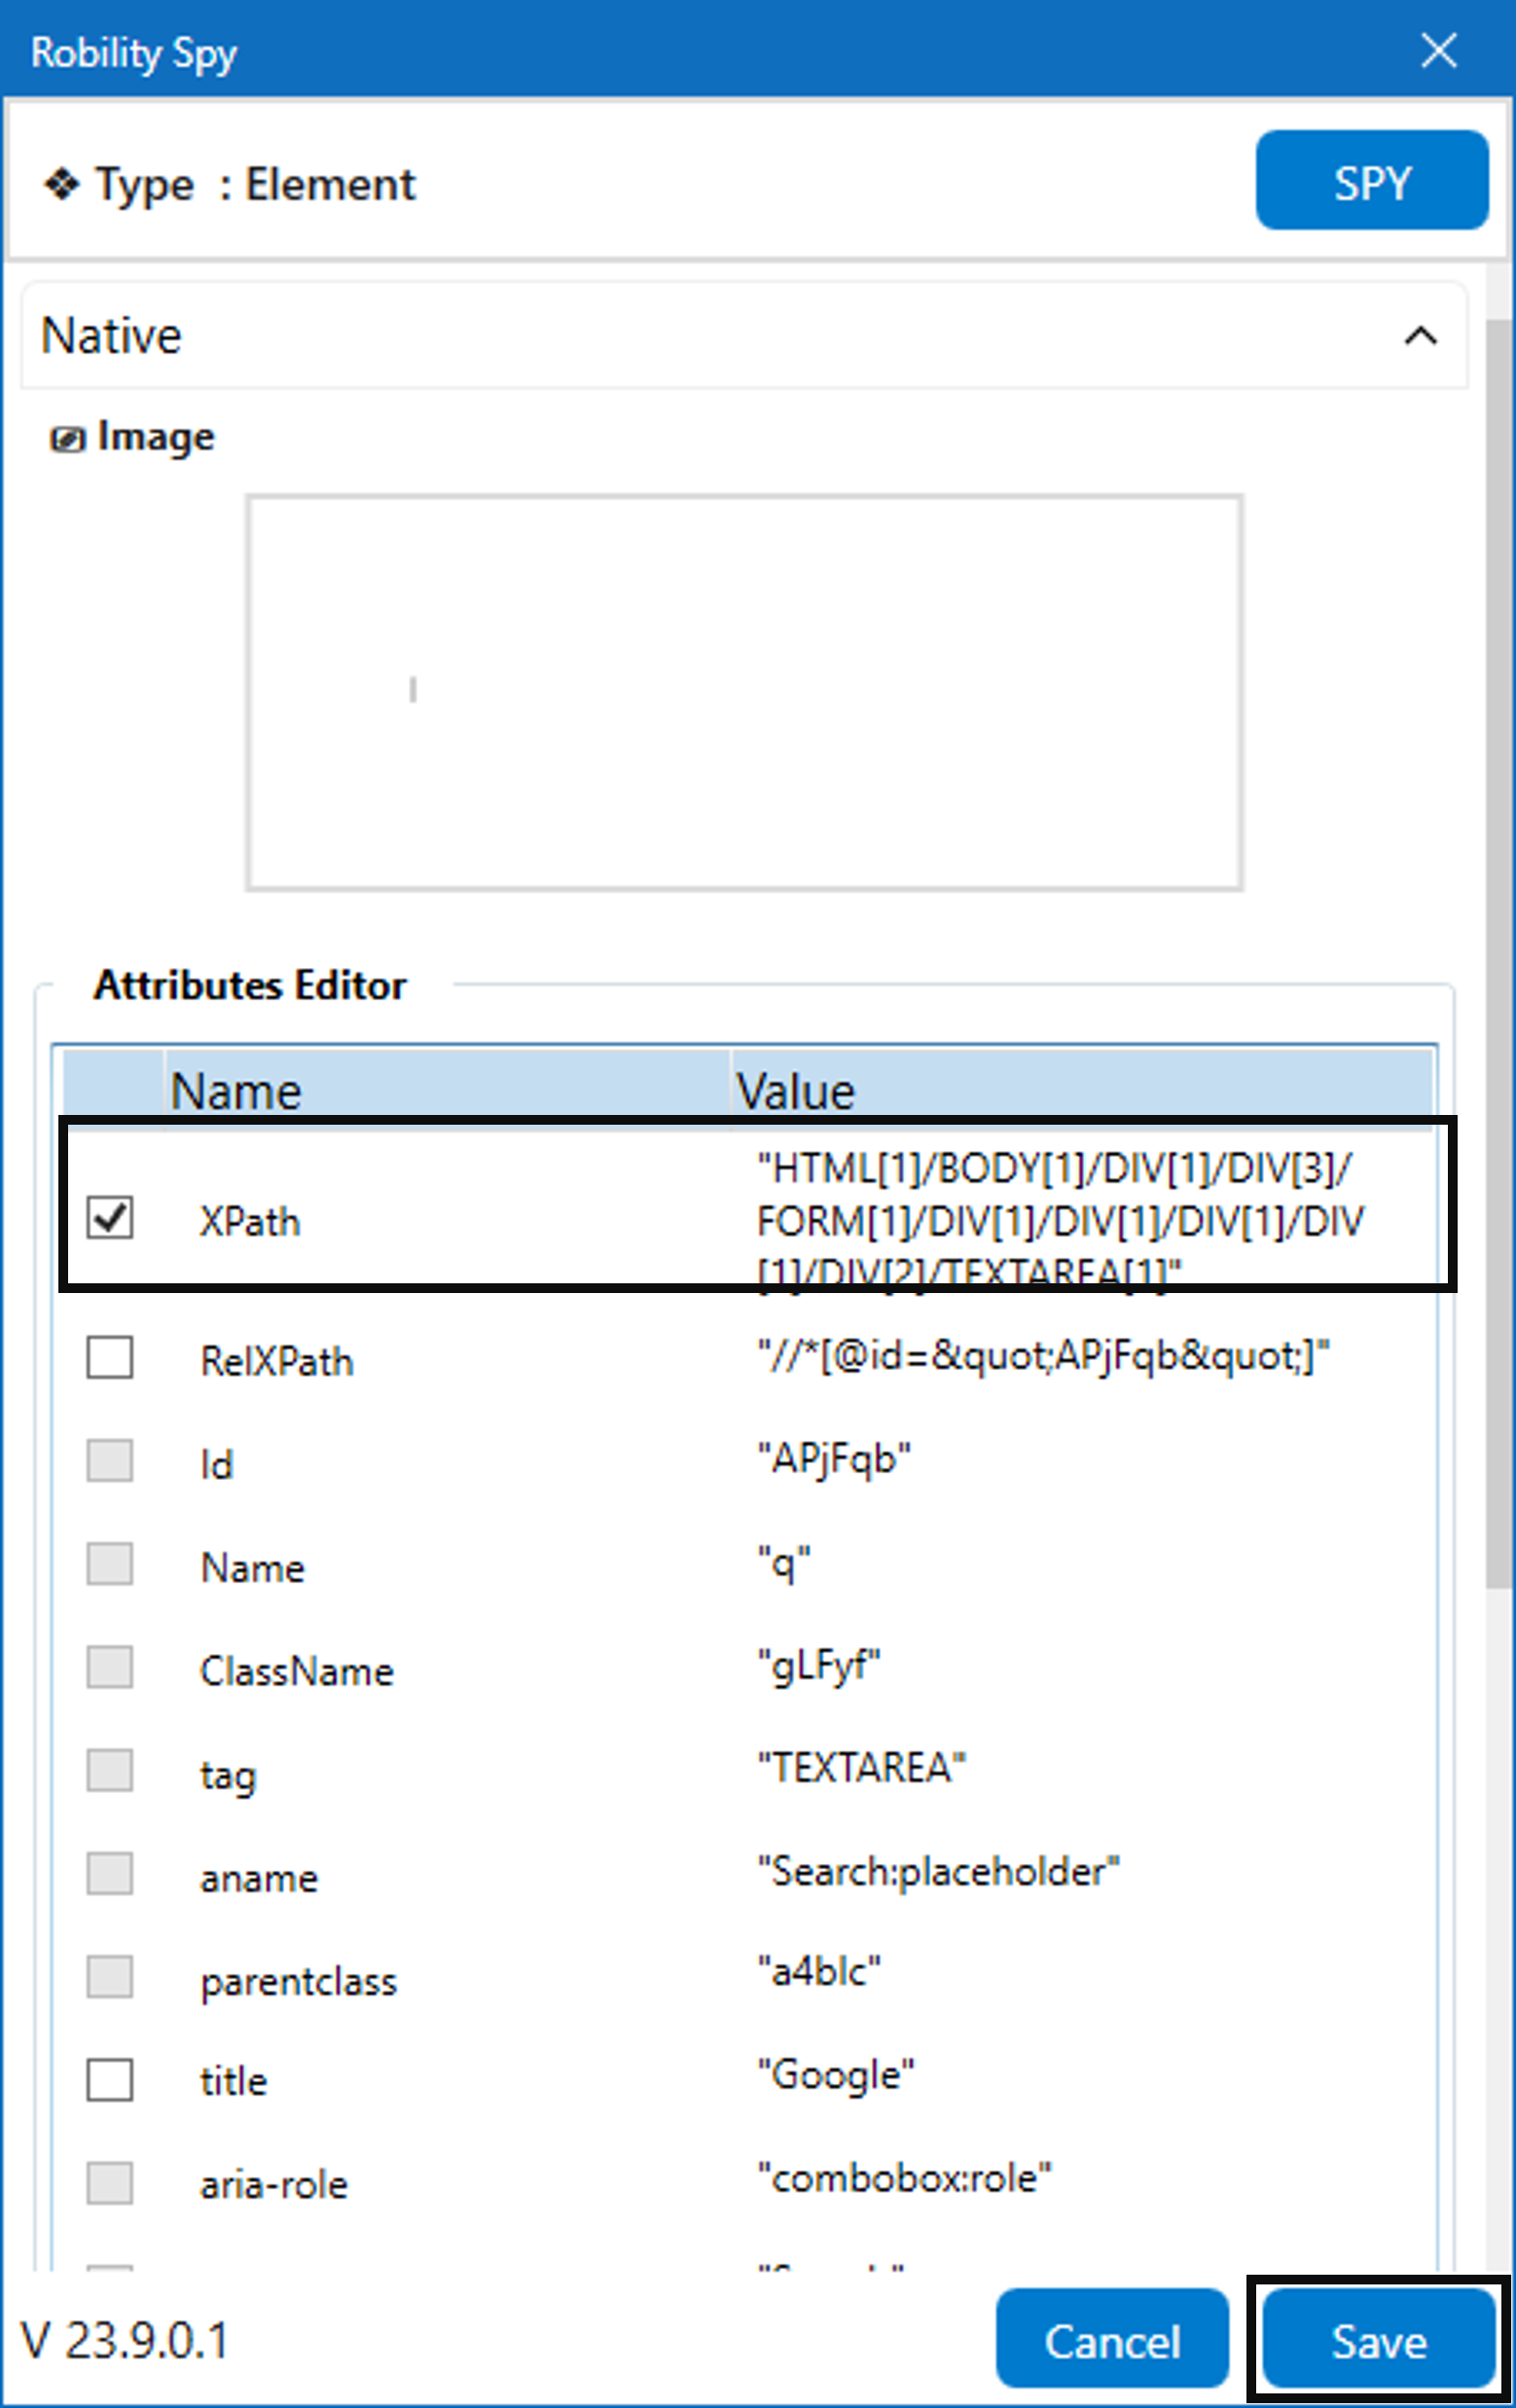
iii. Once you have chosen the "Element," the attributes will be stored in the "Spy"
window, along with an "image" of the element.
iv. If you wish to add or remove any attributes, you can edit the "Attributes Editor."
In this case, we are not making any changes in the “Editor.”
v. Once you click on the "Save" button, the elements will be stored in the activity
window.
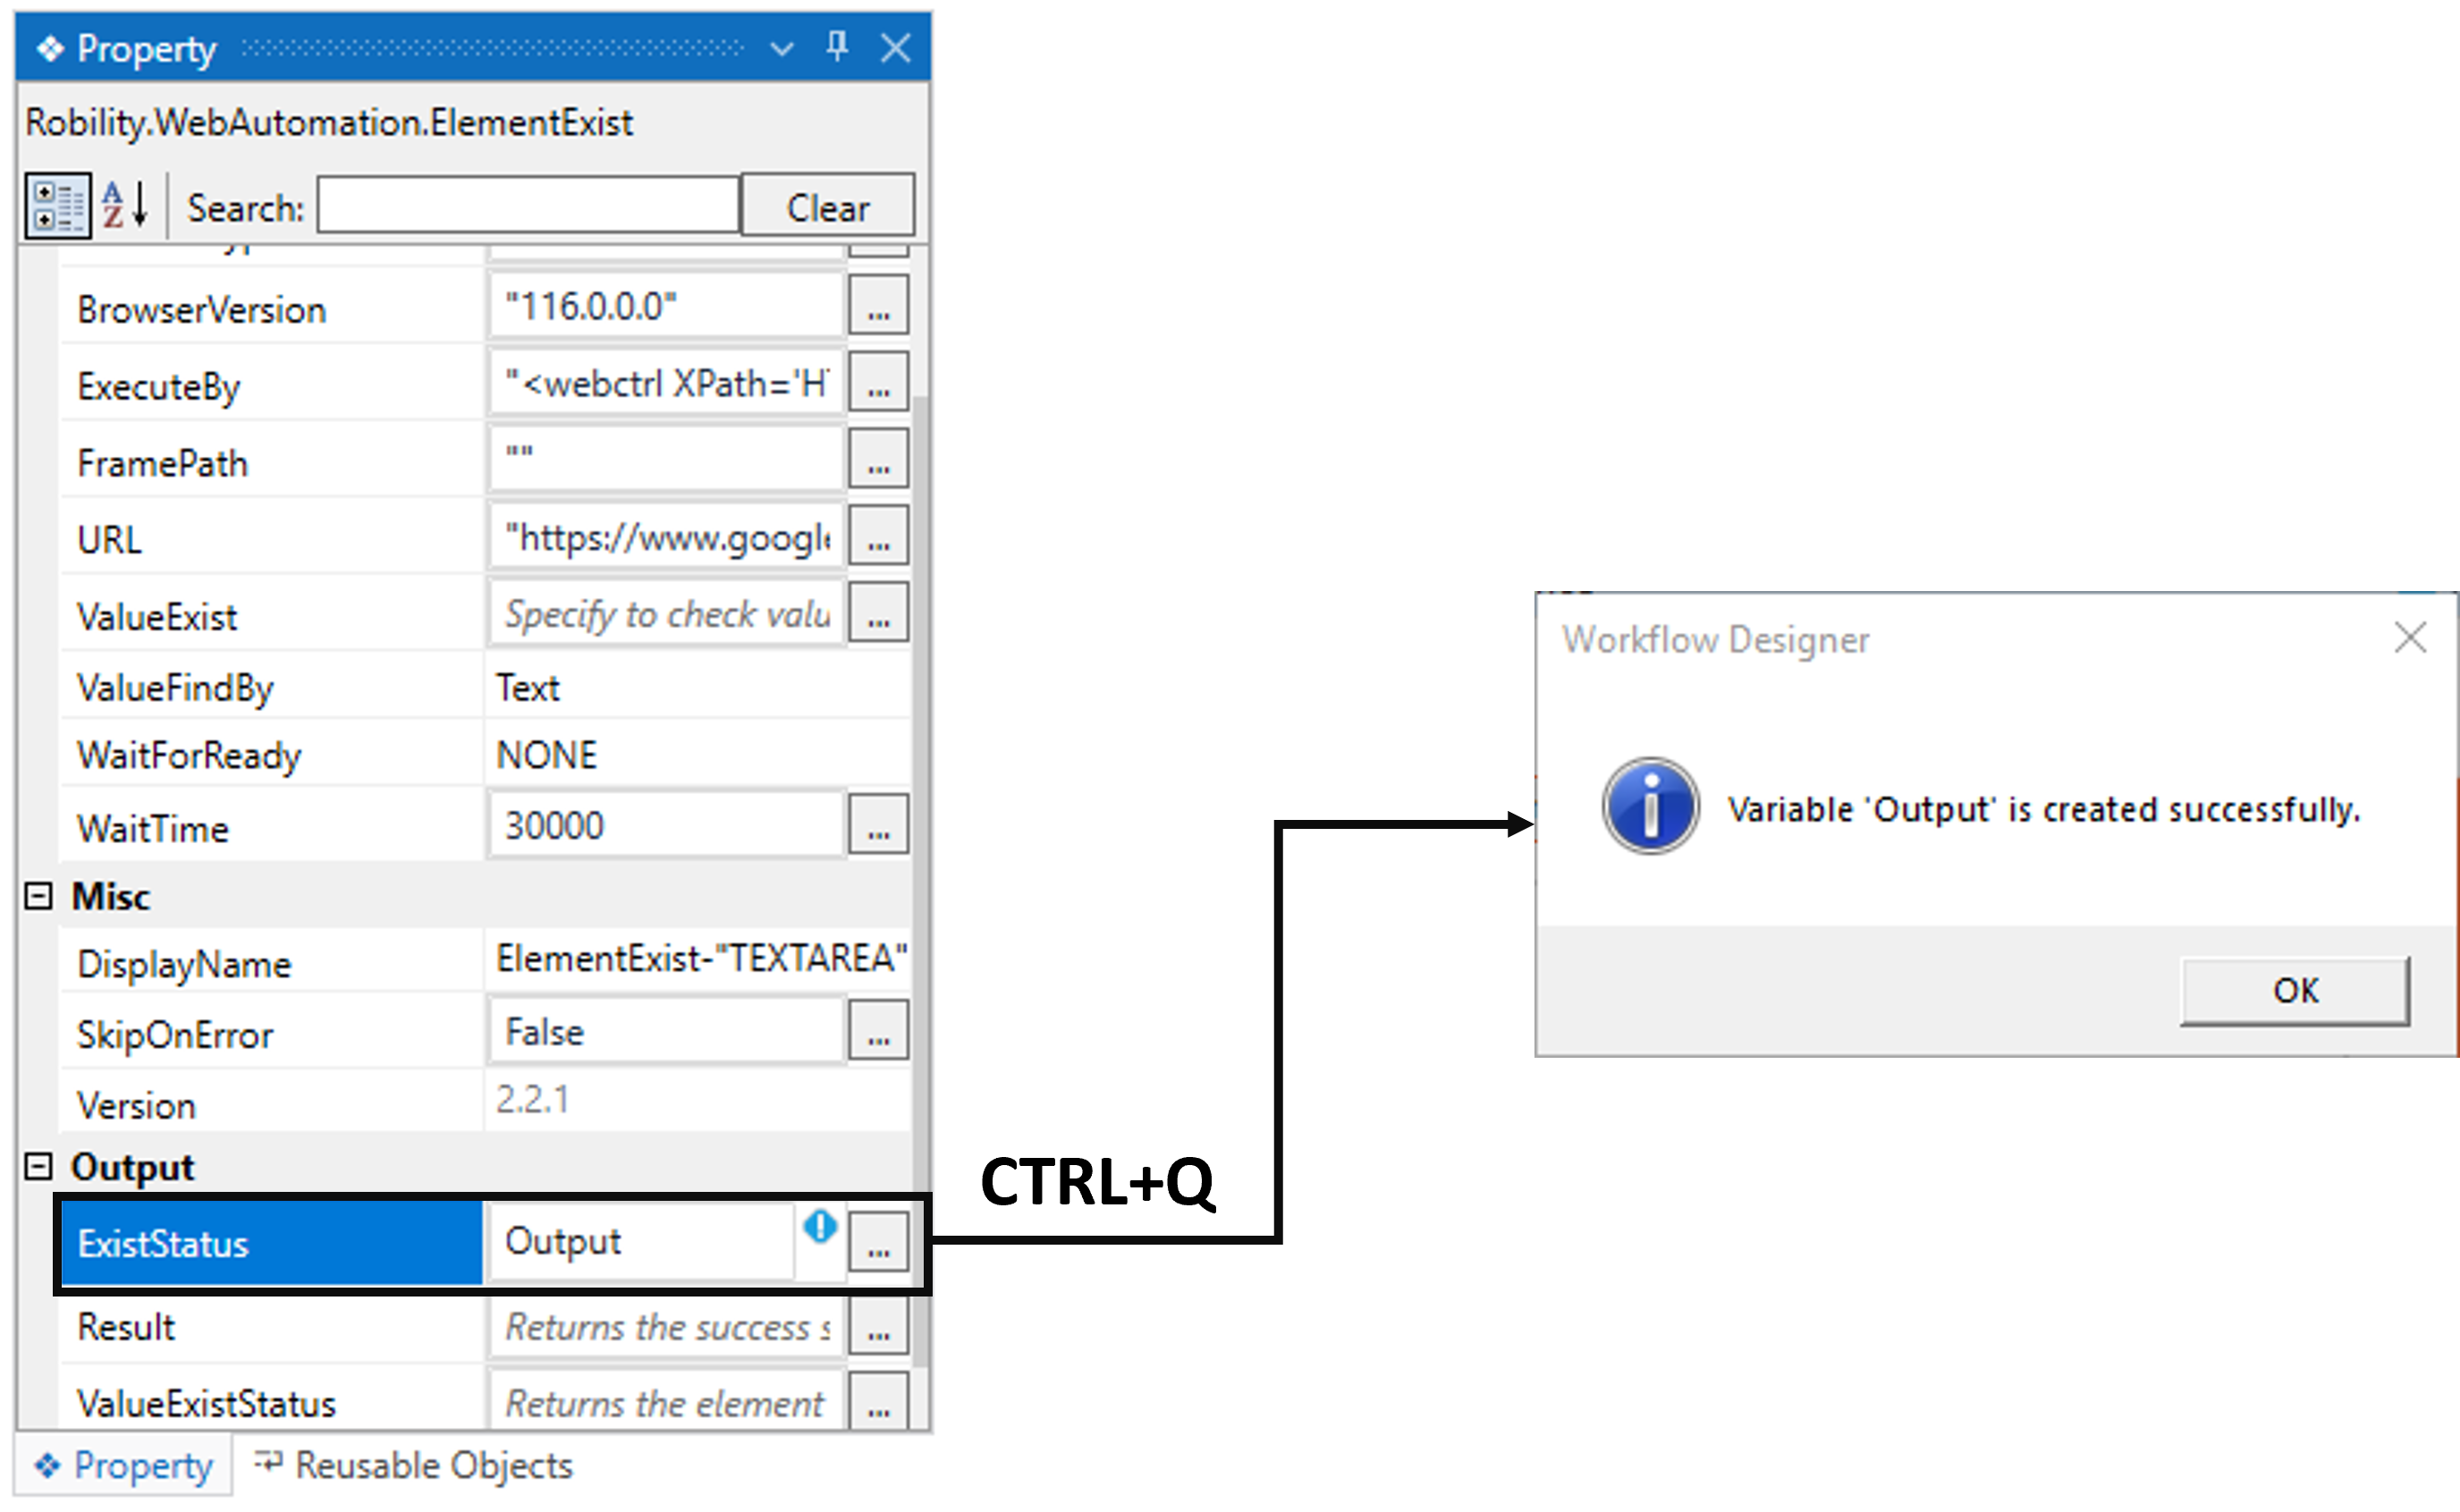
f. Next, navigating to declare a variable to store the “Existstatus” of “Element exist,”
activity. This only accepts the “boolean” data type. Here, I am using the variable
name “Output”.
i. There are two ways to declare a variable,
ii. Method 1 – Click on the "ExistStatus" property within the "ElementExist" activity and
enter the variable name. In this case, we are using " Output." Then, press "Ctrl+Q,"
which is a shortcut key to create a variable.
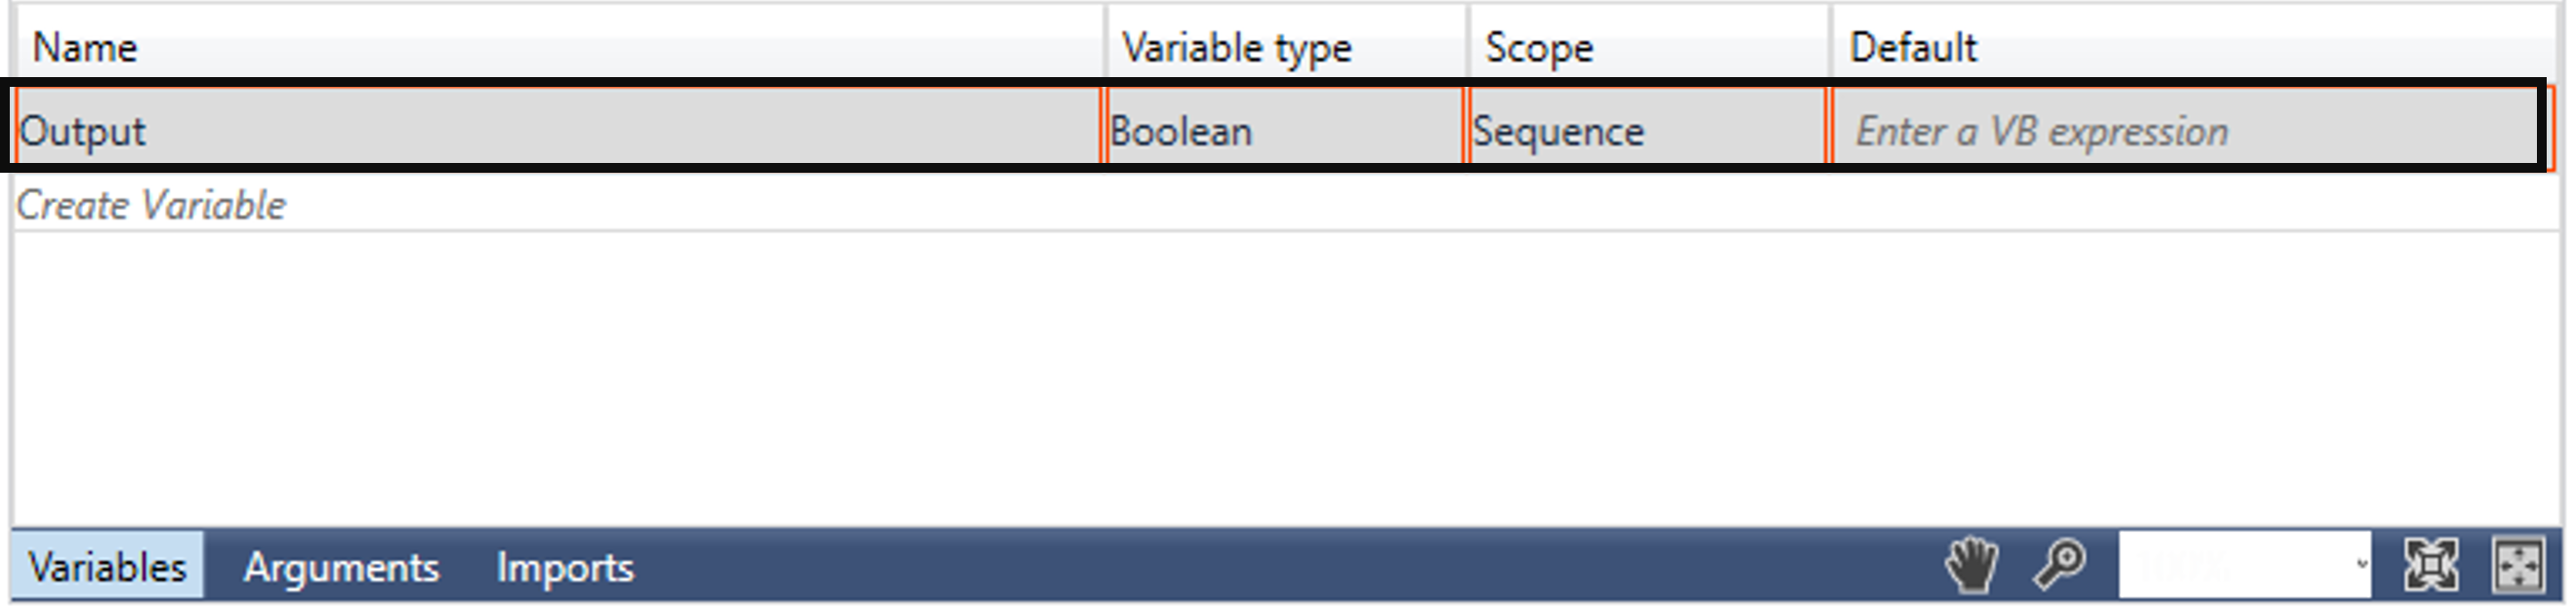
iii. Method 2 - Click on the Variables pane and enter the name "Output" Then, in the
"Variable Types" column, select "Browse for Types" from the dropdown menu
and choose the “boolean” datatype.
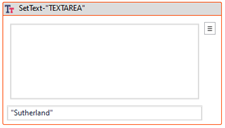
g. Next, Placing the “SetText” activity next to the “ElementExist” activity in the
workflow.
i. The purpose of using it is to provide text once the 'ElementExist' activity validates
the element.
ii. Double click on the “SetText” activity and choose the “Select Element” option to
detect the “Search” bar on the website.
iii. Once you have chosen the "Element," the attributes will be stored in the "Spy"
window, along with an "image" of the element.
iv. If you wish to add or remove any attributes, you can edit the "Attributes Editor."
In this case, we are not making any changes in the “Editor.”
v. Once you click on the "Save" button, the elements will be stored in the activity
window.
vi. Next, navigate to the “Text” parameter on the Settext activity. Set the value to be
entered in the Search bar. Here, I am setting the value as "Sutherland".
Now that the first set of flows has been completed, we will move on to the next set of
flows that need to be executed concurrently. This flow will execute when the element
is not found in the 'first' flow.
Here we are extracting the attribute value of the “GoogleSearch” element.
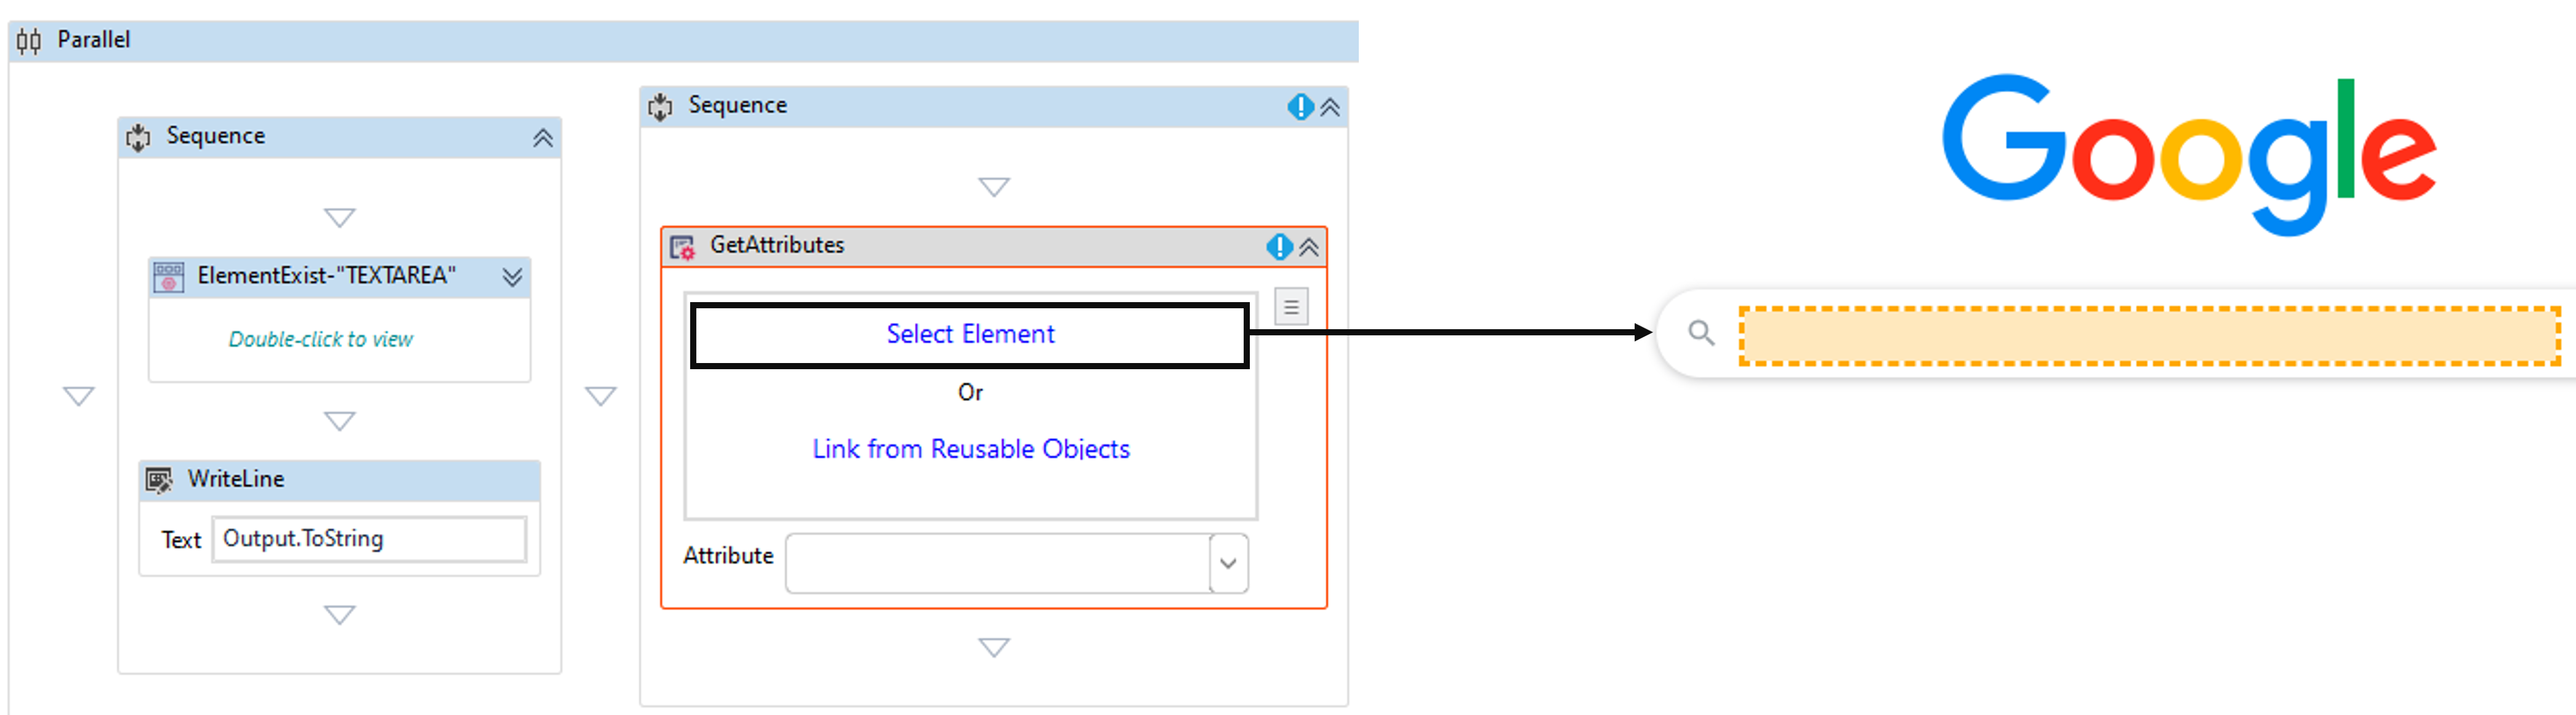
1. Drag and drop the “Sequence” activity inside the parallel activity adjacent to the
first one.
a. In this case, it is used to execute the 'GetAttributes' and 'Writeline' activities within
it.
2. Drag and drop the “GetAttributes” activity inside the “Sequence” activity.
a. This helps to extract the attribute value of the “GoogleSearch” element from the
website.
i. Double-click on it and choose the 'Select Element' option to detect the 'Search' bar
on the website.
ii. Once you have chosen the "Element," the attributes will be stored in the "Spy"
window, along with an "image" of the element.
iii. If you wish to add or remove any attributes, you can edit the "Attributes Editor."
In this case, we are not making any changes in the “Editor.”
iv. Once you click on the "Save" button, the elements will be stored in the activity
window.
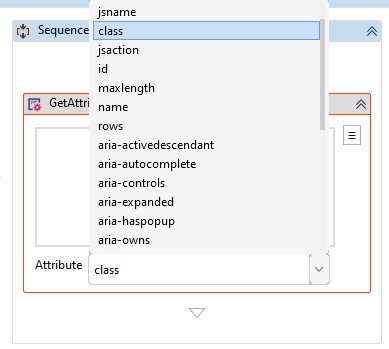
b. Now, I am choosing the attribute as “Class” from the drop-down to extract the
value from the Search bar element.
c. Next, navigating to declare a variable to store the “AttributeValue” of “GetAttribute”
activity. This only accepts the “String” data type. Here, I am using the variable name
“Test”.
i. There are two ways to declare a variable, click here to refer.
3. Next, I am placing the “Writeline” activity next to the “GetAttributes” activity.
a. The purpose of using it is to view the output from the variable declared in the
“GetAttribute” activity.
4. Now, execute the workflow.
5. The activity's output will be determined by the sequence that executes first and aborts
the other set of sequences. Below is a sample of 'Scenario 1.' It executed the second
set of flows and aborted the first flow to complete the sequence.

Click here to view the "Scenario2" execution.