This activity is used to securely set a text in web applications during the automation process.
It is used in scenarios where a password has to be entered, to give sensitive data input, in
encrypted communication, in meeting compliance with security standards and in secure
authentication.
Technical Reference
|
|
INPUT |
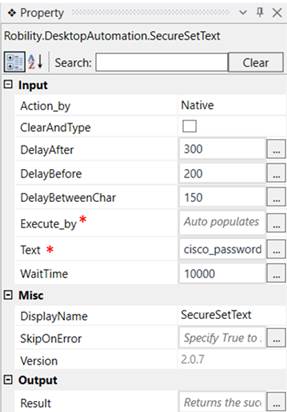
Action_by: This specifies the actions to be performed in the application during the execution. Select the actions from the drop-down. Native: Action is performed by the bot and the details are entered character wise. Human: Action is performed by a human Paste: Action is performed by the bot and the details are entered in a copy paste format. |
|
ClearAndType: By default, the value is True. |
||
|
DelayAfter: It helps the user to add a delay to start the execution of the further activity. The format of the delay here is milliseconds. By default, it will be set to 300. When the option is left blank, no delay is considered. |
||
|
DelayBefore: It helps the user to add a delay to before the execution of the activities. The format of the delay here is milliseconds. By default, it will be set to 200. When the option is left blank, no delay is considered. |
||
|
DelayBetweenChar: It helps the user to add a delay between the characters. The format of the delay here is milliseconds. By default, it will be set to 100. When the option is left blank, no delay is considered. |
||
|
ExecuteBy: Gets auto filled, once the element is indicated on the web page using Robility Spy. This contains the set of attributes for the specific spied element. |
||
|
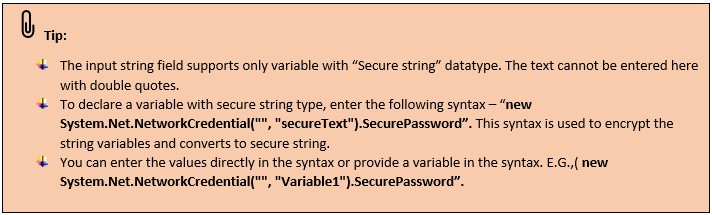
Text: Specify the input variable here.(The input will be the get credential activity output.)This field accepts only the variables in secured string format. |
||
|
WaitTime: It helps the user to add a delay to start the execution of the further activity. The format of the delay here is milliseconds. By default, it will be set to 30000. When the option is left blank, no delay is considered. |
||
|
MISC |
Display Name: Displays the name of the activity. The activity name can be customized which will help in troubleshooting. |
|
|
SkipOnError: Specify the Boolean value as “True or False.” |
||
|
Version: It specifies the version of the Desktop Automation feature in use. |
||
|
OUTPUT |
Result: It helps to view the execution state of the activity. It returns the values in Boolean format. |
* Represents Mandatory fields to execute the workflow.
Steps to execute the bot
Before we use this activity, we must make sure that the credentials are entered in
the credential vault of the specific project in Robility Manager.
Steps to follow in Robility Manager
1. Navigate to the projects section in Robility Manager. Here I am
navigating to the “booking” project.
2. Click on Go against the project.
3. Navigate to credential manager inside the project.
4. Once the credential manager page opens, click on add to configure
the vault key.
Click here to see how to configure a vault key.
Once we configure the vault key, open Robility designer to design your workflow.
1. Create a new solution in the designer.
2. In the task bar below, see that we are choosing the right project into
which the credentials have been created.

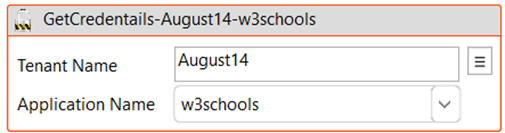
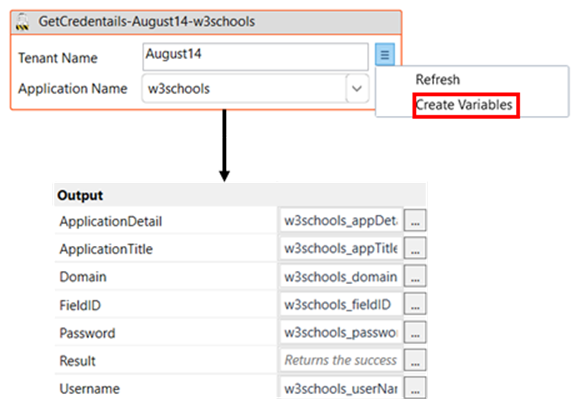
3. Once we choose the right project, drag and drop a get credentials activity to the
workflow. Double click on the activity.
a. Choose the tenant name and the application name from which we need to get the
credentials to use in the secure set text activity.
b. Once selected, click on the three horizontal lines, and click on create variables, to
create the variables for all the output values automatically.
4. Now drag and drop an open browser activity and enter the URL
https://www.w3schools.com/
5. Drag and drop a click activity and spy the login button in the webpage.
6. Connect a set text activity to the workflow.
a. Double click on the activity and click on select element.
b. Spy the box in which the “Username” has to be entered.
c. Enter the variable for “Username”, from the “Get credential activity” in the input
string which is “w3schools_userName”.
7. Now drag and drop a secure set text activity.
a. Double click on the activity and spy the “Password” box.
b. Enter the input string as “w3schools_password” which is in the secure string
format.
8. Drop a click event and spy the login button to click on it.

Here the W3 schools webpage keeps changing dynamically, so we use the “Get
attributes activity” and then use that to find if the element exists or not to proceed
further.The purpose of using the get attribute is, when the page changes dynamically
and we are not able to find the element, the attributes taken from the get attribute
activity helps us to get all attributes of the element and find it .
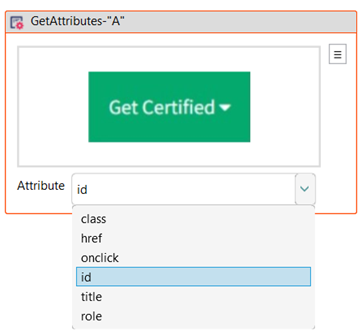
9. Drag and drop a “Get attributes” activity.
a. Double click on the activity.
b. Click on select element and spy the “Get Certified” button as that is the element that
we are going to find using the element exist or not.
c. Here we are going to use the “id” attribute for the next activity. So, choose id from the
drop down.
d. Click here to see how to declare a variable.

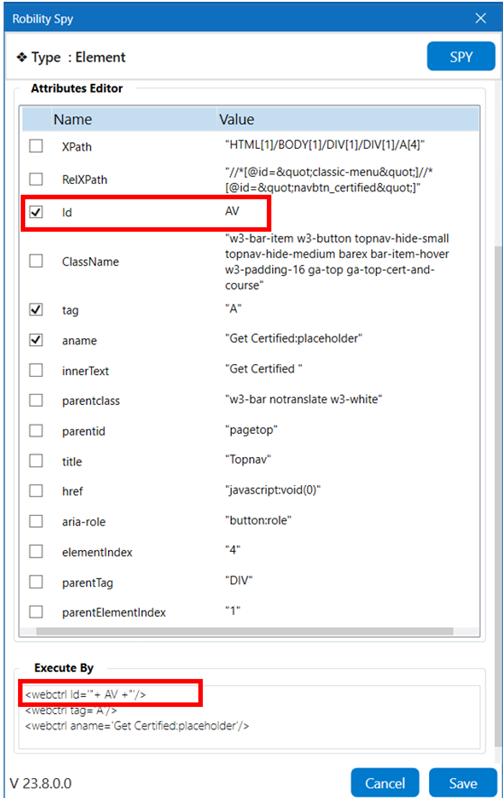
10. Now to see if the “Element exists”, we have to drag and drop an element exist
activity to the workflow. Double click on the activity and click on select element.
a. Spy the “ Get Certified” button as this is the element that we have to find.
b. Once the element is spied, click on “id” from the element editor window. Delete
the existing data in the id field and enter the variable entered in the attribute value
field of get attributes activity.(The purpose of assigning the get attribute value here
is mentioned in point number 8.)
c. Entering this variable here, will check if the attribute in the “Get Certified” button is
present and if the element exists or not.
d. Declare a variable in the exist status which is a Boolean value. Here it is “ES”. This
shows if the element is present or not.
11. Now, drag and drop a “Flow decision” activity. This activity helps to decide how the
activity should proceed next based on the element exist status.
a. Double click on the flow decision activity and navigate to the property section.
b. Enter the condition as “ES” in which the exist status for the spied element is stored.
c. The flow decision leads to two paths, True and false.
d. If the decision is “False”, we connect the workflow to a refresh activity, which is then
connected the get attributes activity in the workflow.
e. If the decision is “True”, it proceeds to the next set of activities.
12. Drag and drop a “Click event” activity to the workflow. Double click on the activity and
spy the “Get certified” which has to be clicked.
13. Again, drop another “Click event” activity and spy the HTML course in the page which
has to be clicked.
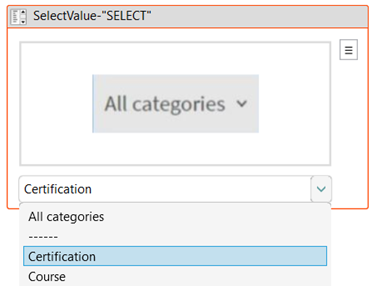
14. Now, drag and drop the “Select value” activity to the workflow.
a. Double click on the activity and click on select element.
b. Spy the category drop down from the webpage.
c. Navigate to the designer screen and choose “certification” from the drop down, which
has to be selected.
15. Drag and drop a “Set text” activity to the workflow.
a. Spy the field in which the text has to be entered.
b. Enter the input string as “HTML” for which we need to search for certification courses.
16. Now drop a “Click event” activity to spy and click on the search button to find the HTML
courses.
17. Finally drag and drop a “Message box” activity and give the input string as "List of HTML
certifications has been found" which shows that the process of searching for the HTML
courses is over. Also give a message title to the message box as “Output.”