This activity facilitates the user in moving files from one location to another
destination by specifying the path. It can also be employed to transfer files from
a shared folder, provided that we have access to it.
Technical Reference
|
INPUT |
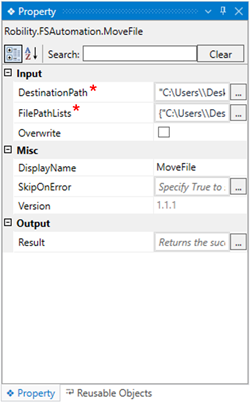
DestinationPath: This parameter indicates to specify the “Path” to where the input files need.
You can either hardcode the values in “String” datatype or can enter the values in “String” format.
This parameter accepts the vales in “String” datatype. |
|
|
FilePathLists: This parameter indicates to specify the “Path” of the input files that needs to be moved.
You can either hardcode the values in “Array of String” datatype or can enter the values in “Array of String” format.
This parameter accepts the vales in “Array of String” datatype.(Refer the tips below) |
||
|
Overwrite: This parameter indicates whether to overwrite the file name and replace the existing file with the new one being moved.
By default, the box will be unchecked.
If it’s not selected, the overwrite option will not be considered. |
||
|
MISC |
Display Name: Displays the name of the activity. The activity name can be customized which will help in troubleshooting. |
|
|
SkipOnError: Specify the Boolean value as “True or False.” |
||
|
Version: It specifies the version of the FS automation feature in use |
||
|
OUTPUT |
Result: It helps to view the execution state of the activity. It returns the values in Boolean format. |
* Represents mandatory Fields to execute the workflow
Let’s see how this activity works,
1. Create a new solution or use this as an existing solution.
2. Drag and drop the “Move file” activity to the workflow.
a. Double click on the activity.
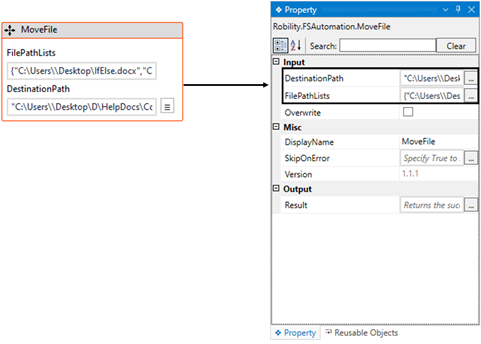
b. Here I am specifying the “FilePathLists” as the path of the files in array
of string.
c. Choose the “DestinationPath” as the folder where you wanted to move
the new files.
3. Here, I am not making any changes in “Overwrite” property.
4. Execute the workflow.
Click here to see how the activity works in a workflow.


