The Robility Designer has now
in our solutions.
allows the user to re-use the elements multiple times which
workflow. This reduces the need to create the same element again and again when it is used
in different places. The re-usable objects feature also makes it simpler to maintain the
automation scripts, making the entire process more efficient and cost-effective.
How does it work?
The elements which has been detected already can be re-used in the workflow and in multiple
activities respective to the feature. The following steps below illustrates how to utilize the
Re-usable object. Here we are adding the application name as “Microsoft Word” to detect the
elements and to automate on it.
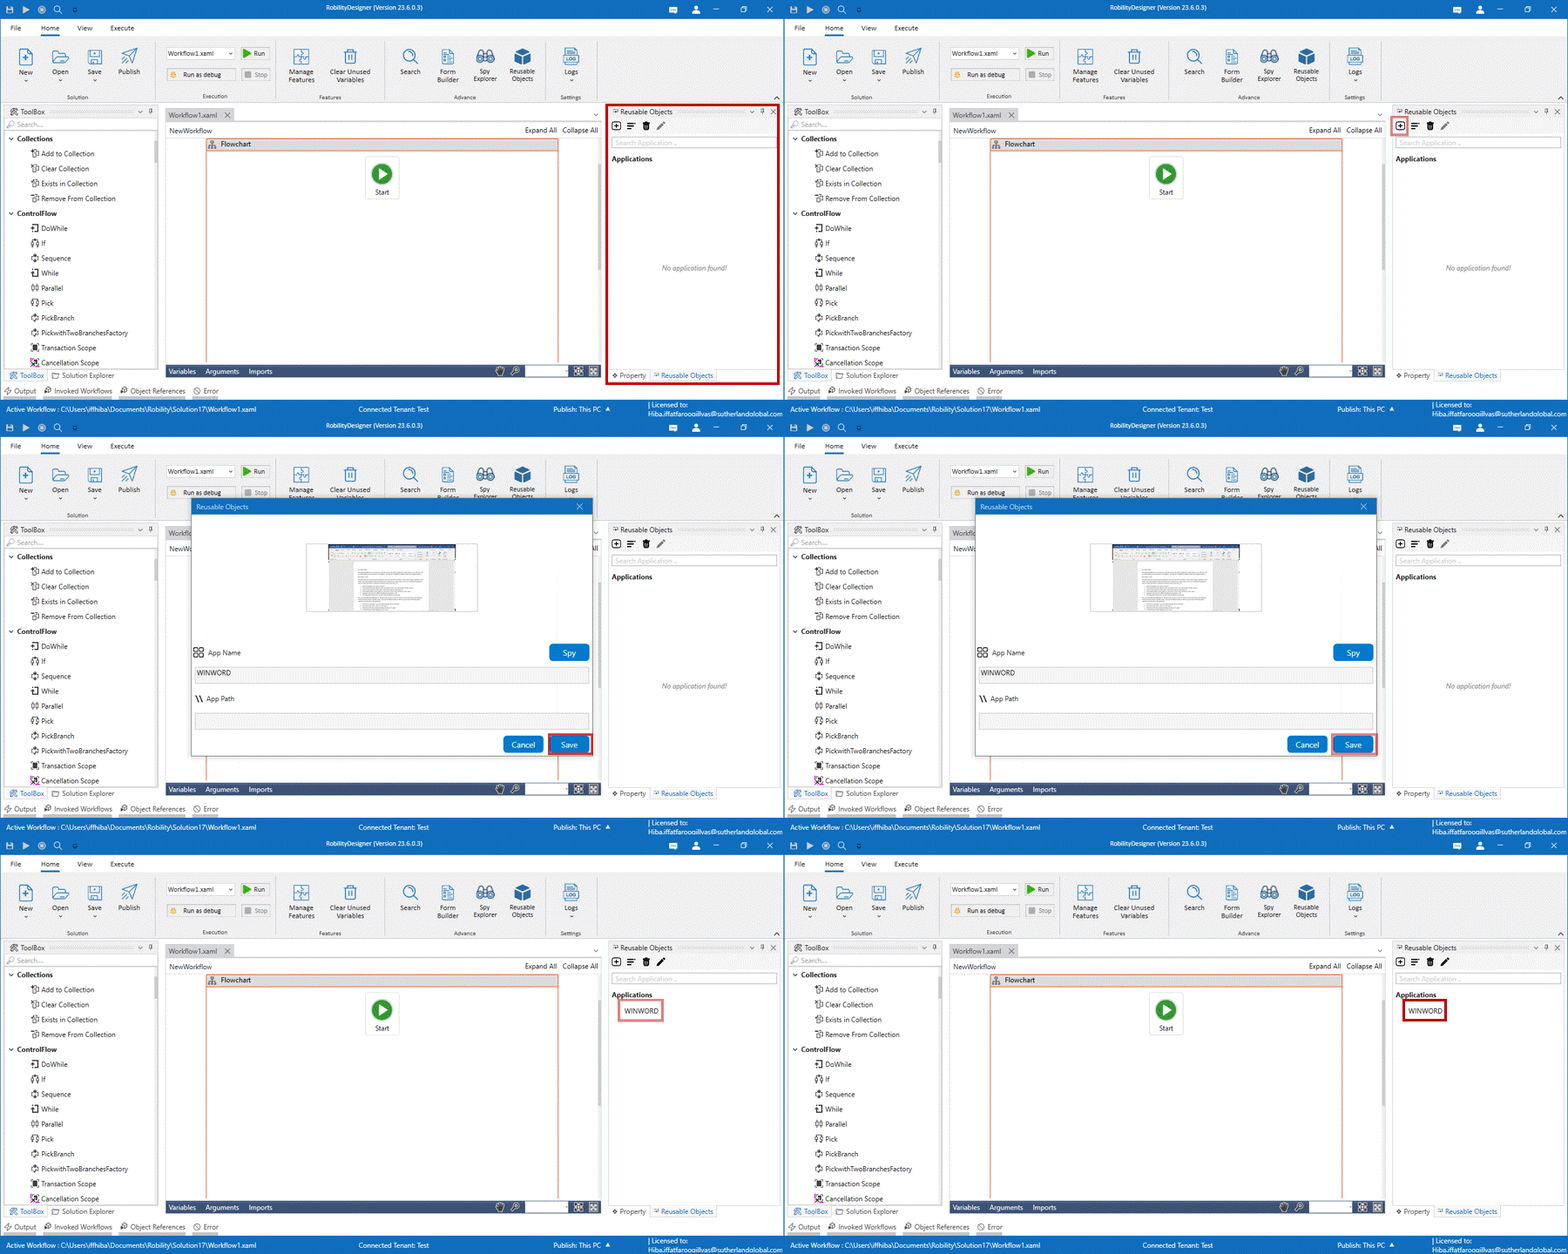
1. Open the designer and create a solution.
2. On the right-hand side, adjacent to the properties section, you will find the Reusable objects.
3. Click on it and select the Add option on the top as shown in the below GIF.
4. The reusable object wizard appears on the screen. Click on the Indicate on screen option.
5. Navigate to the screen to detect the elements and click on “ok”.
6. The Application name and its exe path will be updated automatically.
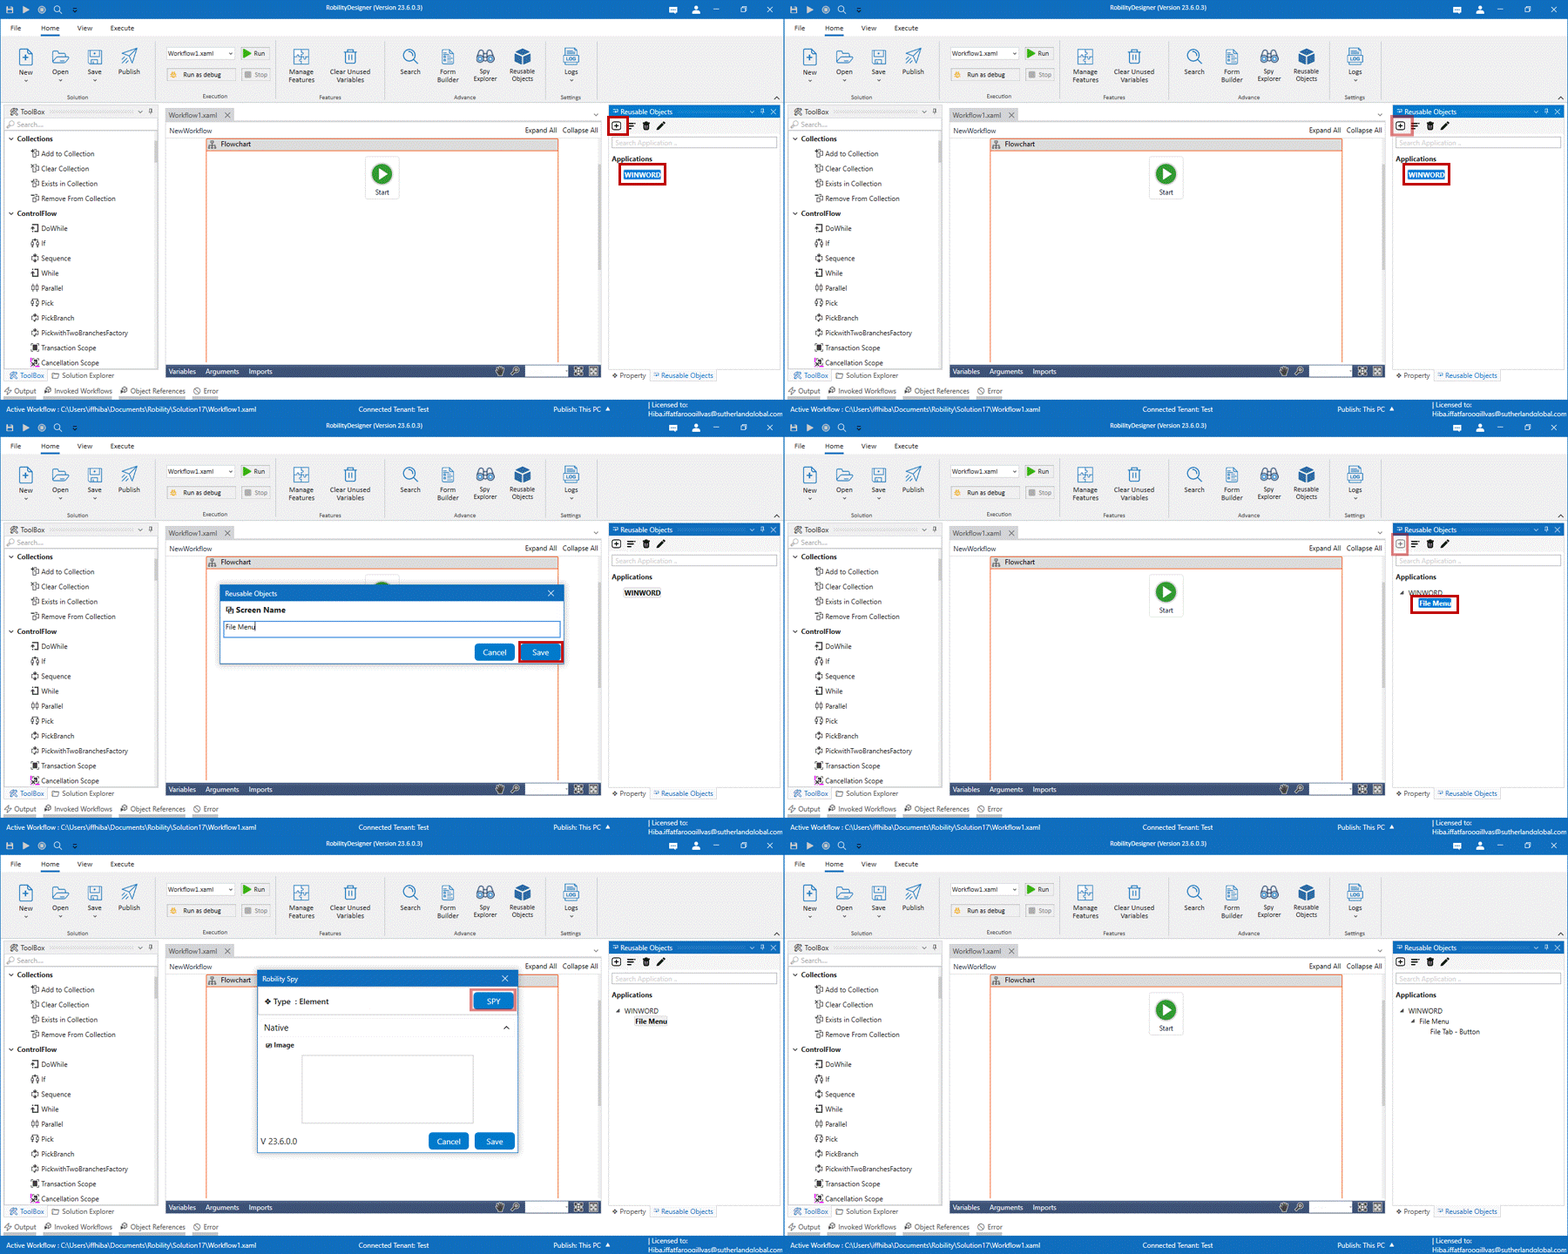
Now we have added the application, to add the screen name on which the action is to be
performed can be detected. Follow the below steps to add the screen. Here we are adding
the Menu option as screen name where the action needs to be performed in the application.
1. Click on the application name and select the Add option at the top.
2. Enter the screen name. Here it as “File menu”.
3. Click on the File menu name and select the Add option again.
4. The Robility spy window appears on the screen.
5. Click on the option “Spy” to detect the elements on the Word page.
6. Here we are navigating to the File menu and spy over the “File” option.
7. Click on the Save button.
8. Now the element has been saved in the Re-usable objects.
9. Then add another 4 elements to spy over the SaveAs, ThisPC, and SAVE button.
Let’s create a workflow and see how the reusable objects work.
In the following example, we are going to Save a word document which is already opened
in the desktop. Here we are using the click and set text activity to click the options and enter
the text to save the file name.
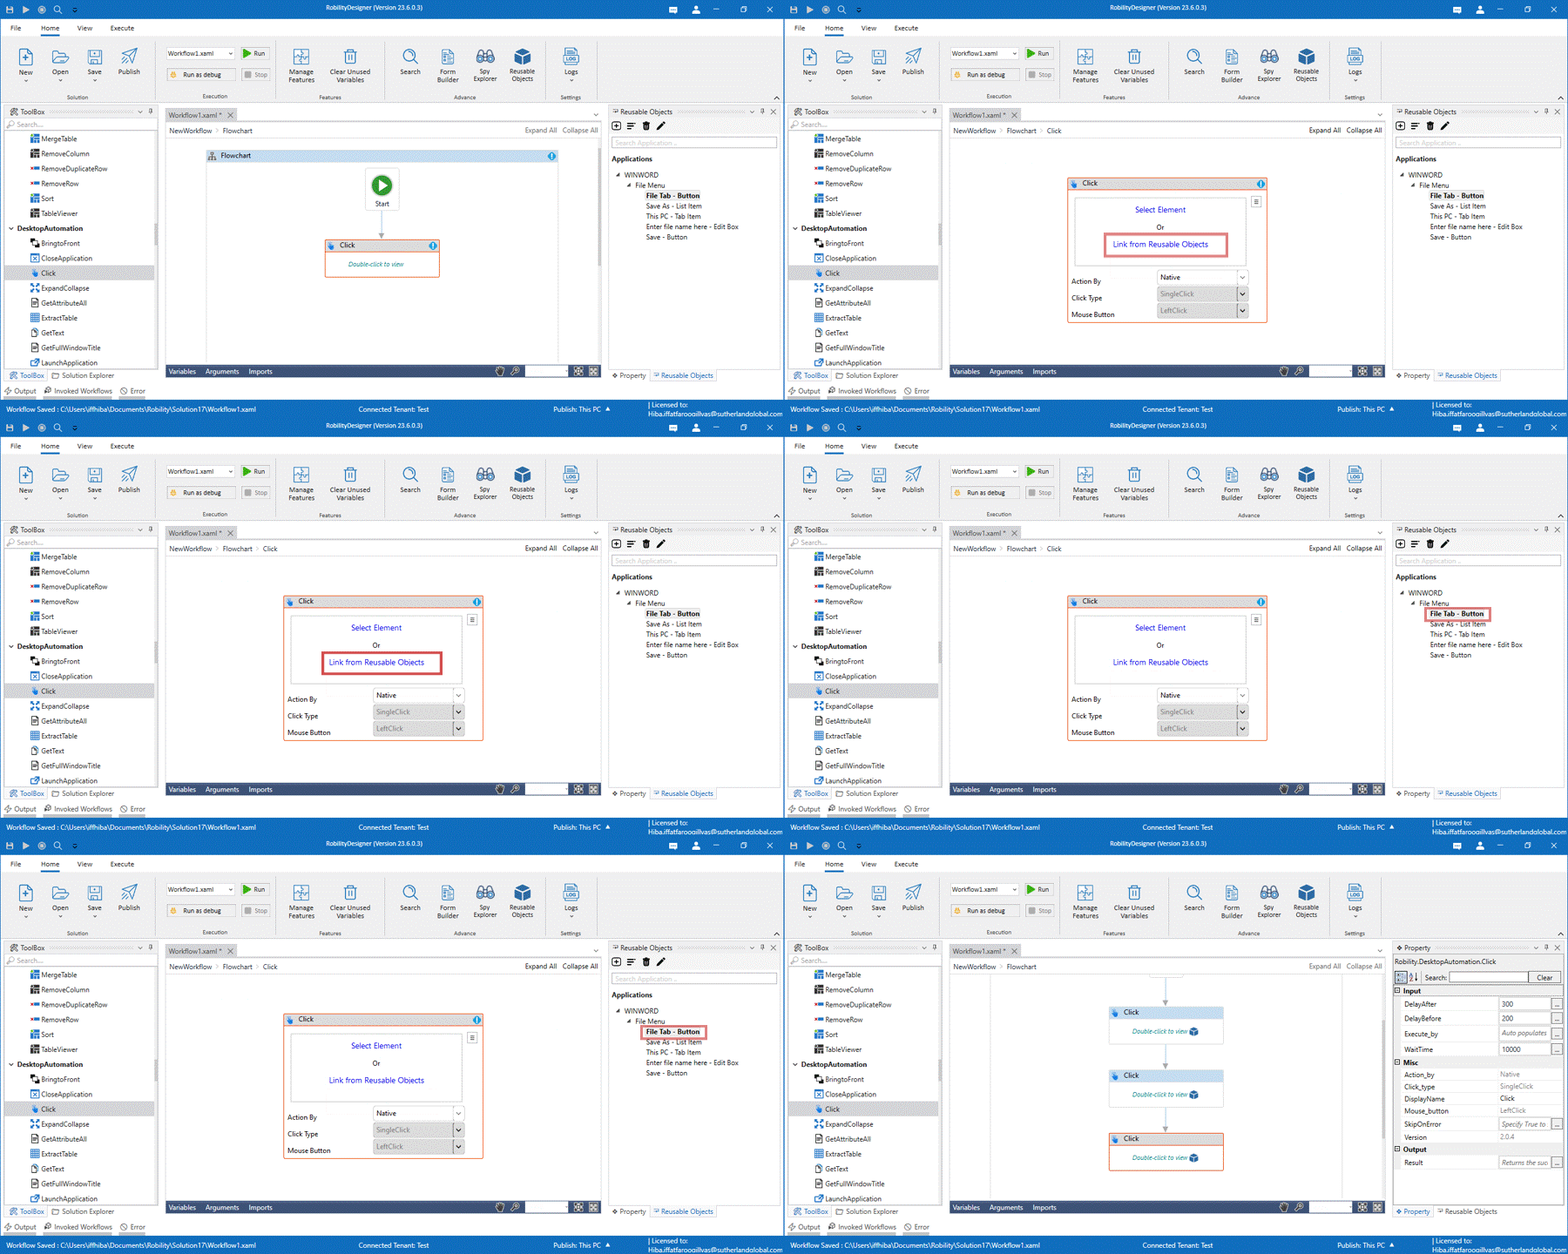
1. Drag and drop the Click activity from the Desktop Automation
2. Double click on it and click on the Link from re-usable object.
3. Now, navigate to the reusable object panel and double click on the element to link it. Here
we are choosing the File tab.
4. Now, the element has been added to the activity.
5. Let’s, continue the same steps for another two-click activity and link the elements form
reusable objects.
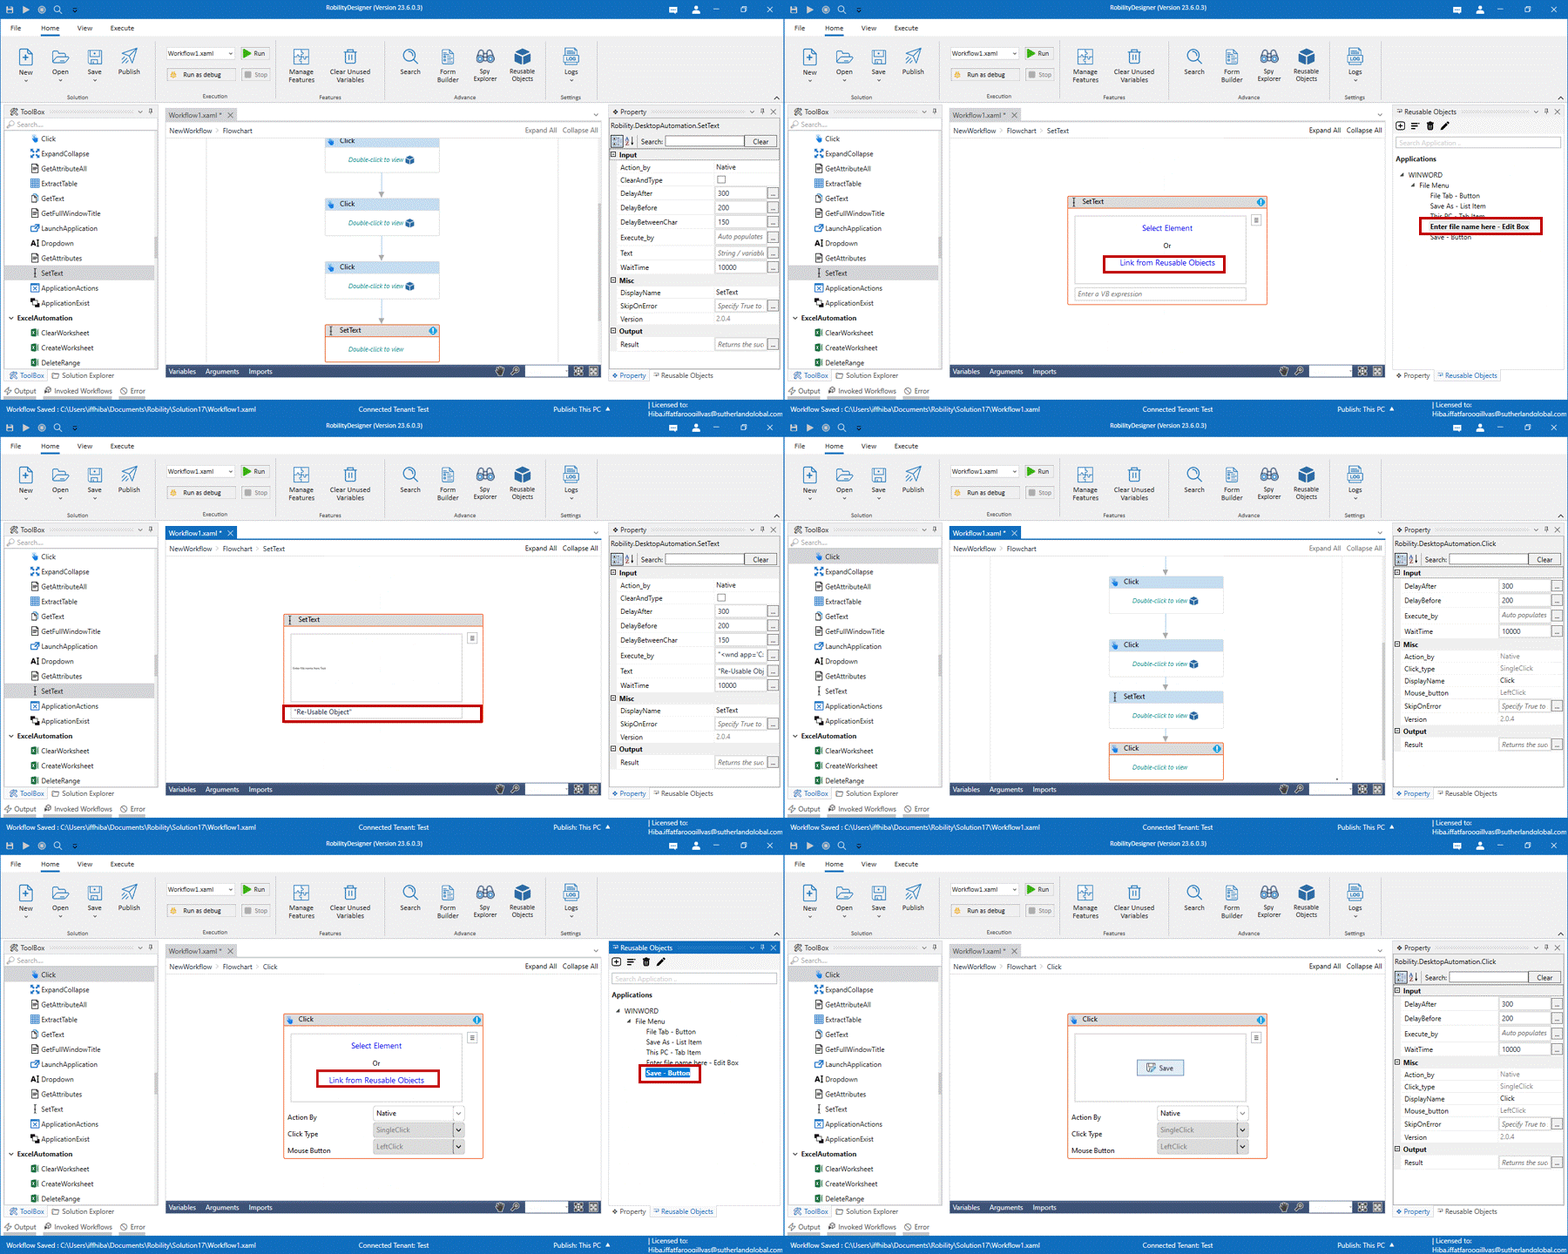
6. Then drag and drop the set text from desktop automation.
7. Double click on it and select the link from reusable object hyperlink.
8. Navigate to the reusable panel and double click on the “Enter the file name” element.
9. Enter the string as “Re-usable object” in the input string.
10. Finally, add another click activity and link the element “Save” from the reusable object.
11. Now, execute the workflow.
The bot executes the workflow and automates on the Word document to save the file in
the specified name.
How to delete, edit and find references in the
Re-usable objects?
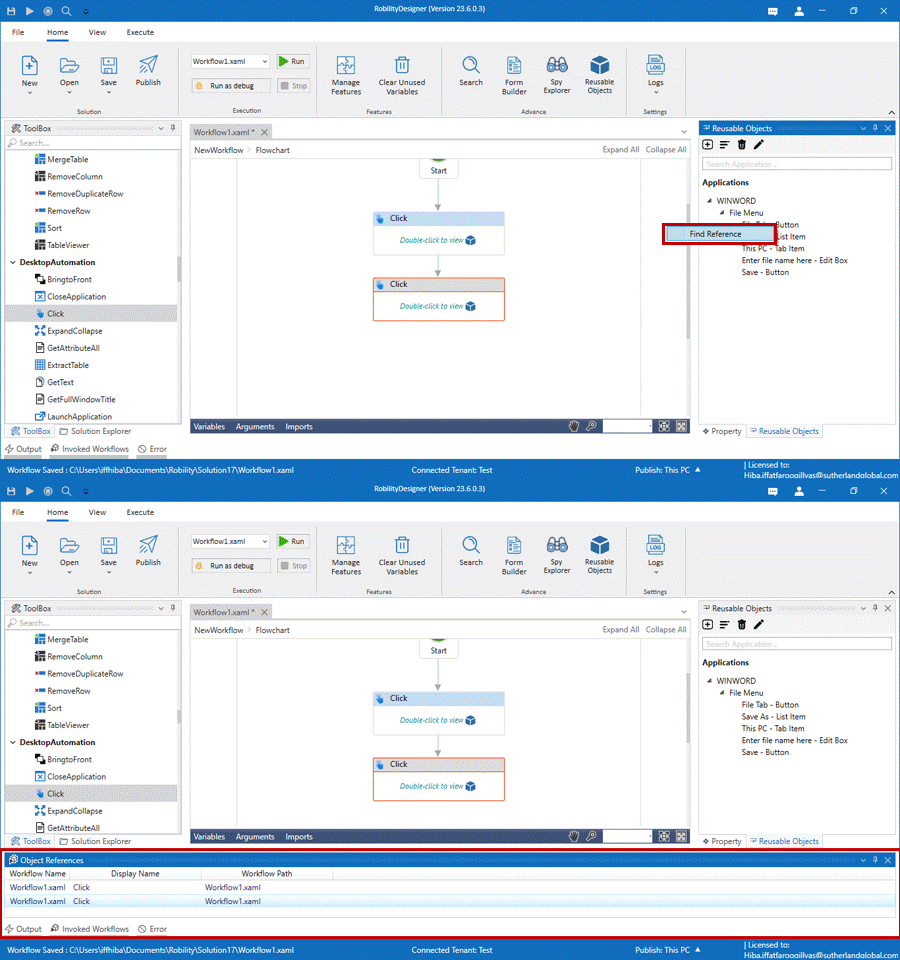
Here, you can also delete o edit the elements spied in the Re-usable object by clicking
on the Delete and Edit option. The elements that has been re-used in the activities can
also be detected by selecting the Find Reference option. Right click on the Element
name and select the find reference option. The Designer will populate the Object reference
window. Here you can find the elements that has been used in the activities.
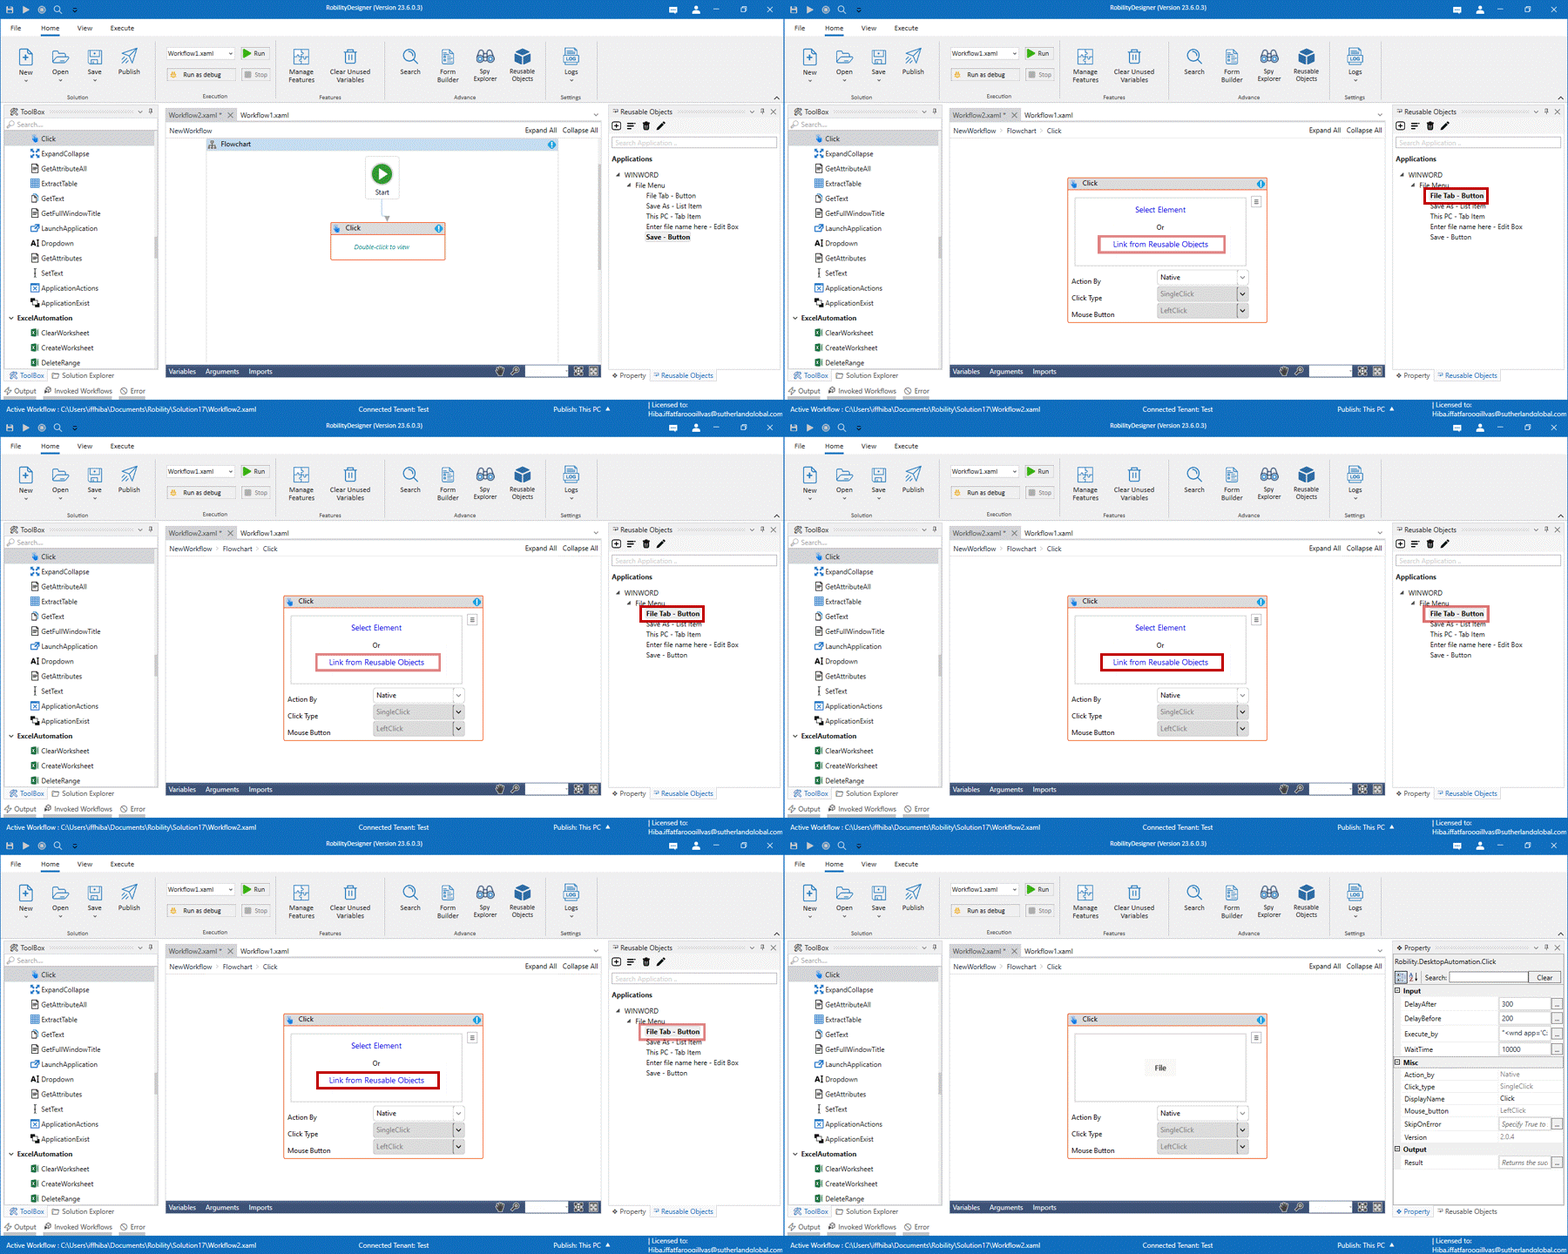
How to re-use the objects in another workflow?
The Reusable object can be used in another workflow within the same solution. Here we
are going to illustrate how to re-use the elements in another workflow. In the following
example, we are saving another word document.
1. Open the same solution and create another workflow.
2. Here, drag and drop the click activity from the desktop automation.
3. Double click on it and select the link from reusable objects.
4. Navigate to the reusable object panel and select the “File Menu” element.
5. Now, execute the workflow.

