
This activity helps the user to access directory information for applications or files
within a machine. It helps retrieve the path of a targeted folder for further action.
Technical Reference
|
|
INPUT |
SystemFolder: This parameter displays the list of directories available in the system folder. You can choose the drop-down to get the special directory.
By default, "Desktop" will be selected. |
|
MISC |
Display Name: Displays the name of the activity. The activity name can also be customized to help in troubleshooting. |
|
|
SkipOnError: Specify the Boolean value as “True or False.” |
||
|
Version: It specifies the version of the FS automation feature in use |
||
|
OUTPUT |
Path: A variable declared here is used to store information about the special directory. It is stored in the "String" data type. |
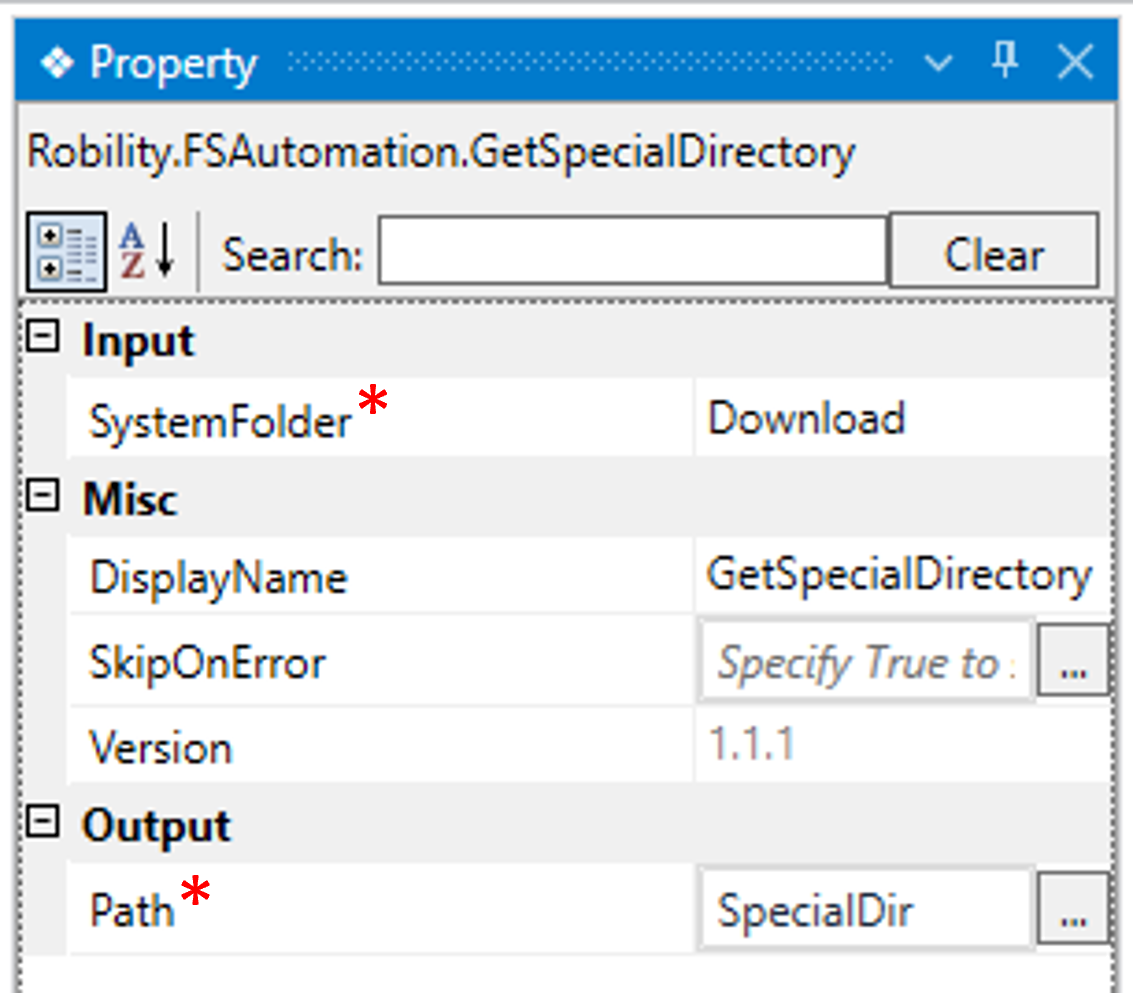
* Represents mandatory fields to execute the workflow.
Here’s an example of the “GetSpecialDirectory” activity works –
The following example illustrates how to retrieve directory information for any
selected folder from the dropdown.
1. Create a new solution or use the existing solution.
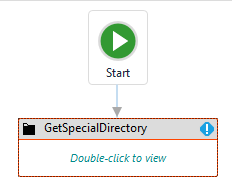
2. Drag and drop the “GetSpecialDirectory” activity and set it as start node.
3. Navigating to the “SystemFolder” in the properties and choosing the value
as “Downloads”.

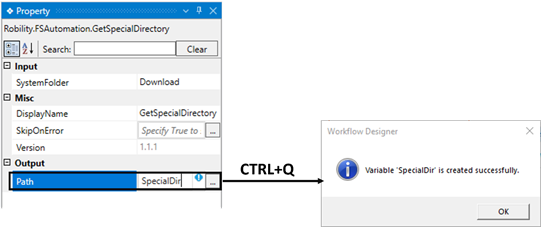
4. Then moving to the “Path” in the output of the properties to declare
the variable.
a. There are 2 methods to create a variable.
b. Method 1: Double-click on the variable parameter “Path” in the “Output”
section and enter a name that helps you easily identify it in the flow.
Here, I'm using the name "SpecialDir" and using the shortcut key "Ctrl+Q"
to create the variable.
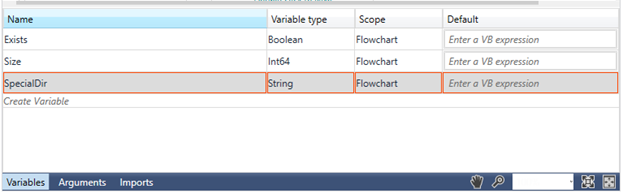
c. Method 2: Click on the variable pane, enter your preferred name (here, I'm using
" SpecialDir "), and choose the data type as "String" since the output value
accepts the String data type.
5. You can add the “Writelog” activity to view the results.
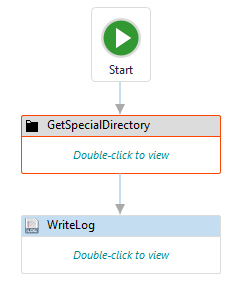
6. Now, save and execute the workflow.
Below is the sample of output of the activity.
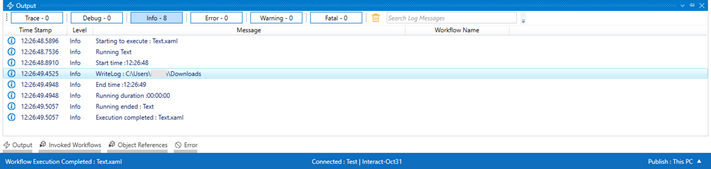
The bot retrieves the directory information of the downloads and
displays it in the output.