The following documentation explains the different field types that are available on
the field configuration page.
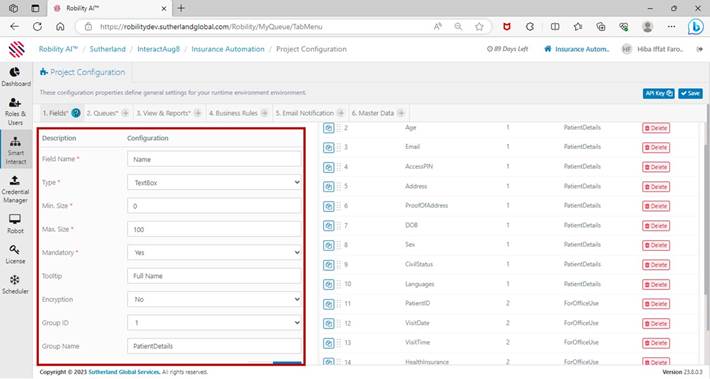
TextBox:
It allows the user to provide the input values only in text/ string format. The available
options for the text type will be minimum and maximum length, mandatory, tooltip,
encryption, Group ID and Group name.
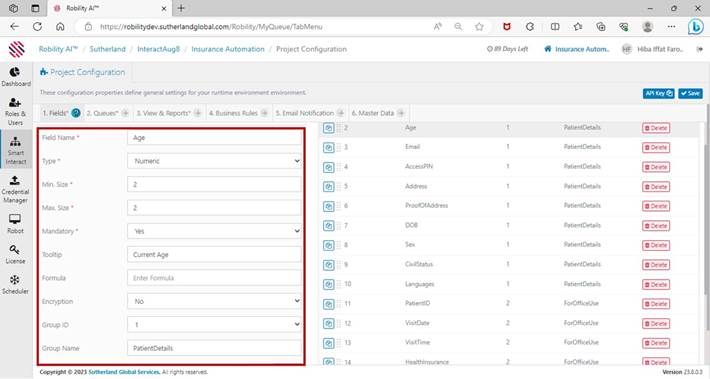
Numeric:
This option allows the user to provide only numeric values to the box. The available
options for the numeric type will be minimum and maximum length, mandatory, tooltip,
encryption, Group ID and Group name. When the user opts for numeric type, an
additional field will be added named as “Formula”. The formula option can be used
to provide an output for the field name using the conditions.
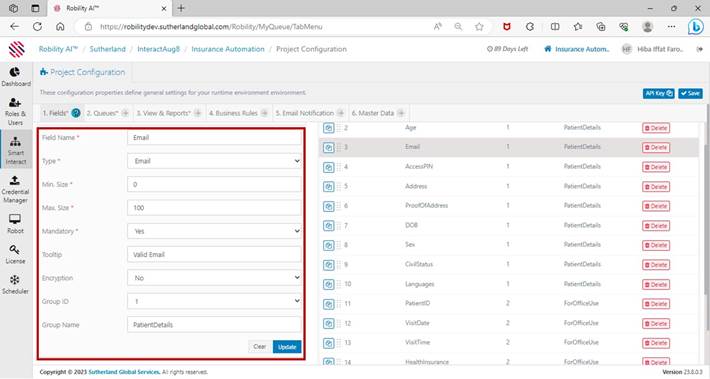
Email:
It enables the user to provide the email address in the fields. The available options
for the email type will be minimum and maximum length, mandatory, tooltip,
encryption, Group ID and Group name.
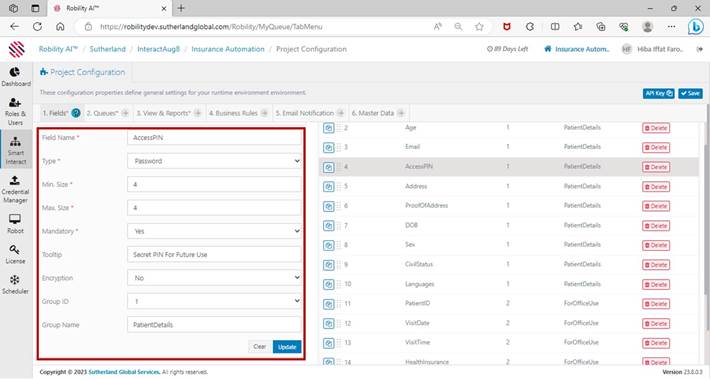
Password:
It enables the user to provide the password for the field. The available options for the
password type will be minimum and maximum length, mandatory, tooltip, encryption,
Group ID and Group name.
Text Area:
This option is used to enable multiple lines option for the inputs. For instance, if one
chooses text area as type, an option containing rows and columns will be populated.
Enter the required number of rows and columns that are to be configured. The
available options for the text area type will be minimum and maximum length, mandatory,
tooltip, encryption, Group ID and Group name.
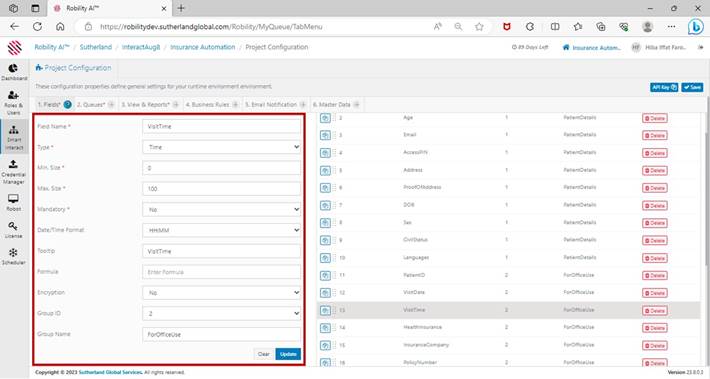
Time:
It enables the user to provide / calculate the time based on the project specifications.
The available options for the time type will be minimum and maximum length,
mandatory, tooltip, encryption, Group ID and Group name. Additionally, “Date/Time
Format” and “Formula” option will be available. The user can set the data/time format
as “HH:MM, HH:MM AM, HH:MM PM”. The formula option can be used to calculate
time based on the input received in another fields.
For e.g., “ Created time + Modified Time”.
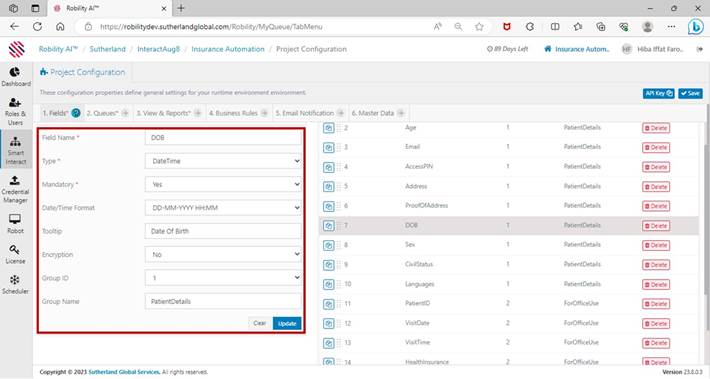
Date:
It enables the user to provide / calculate the date based on the project specifications.
The available options for the Date type will be minimum and maximum length,
mandatory, tooltip, encryption, Group ID and Group name. Additionally,
“Date/Time Format” and “Formula” option will be available. The user can set the
data/time format as “DD-MM-YY, DD-MM-YYYY, MM-DD-YYYY”. The formula option
can be used to calculate time based on the input received in another fields.
For e.g., “ Created date + Modified date” .

DateTime:
It enables the user to provide the input with date and time in the same field. The
available options for the DateTime type will be mandatory, tooltip, encryption,
Group ID and Group name. Additionally, “Date/Time Format” option will be available.
The user can set the data/time format as “DD-MM-YY HH:MM,
DD-MM-YYYY HH:MM, MM-DD-YYYY HH:MM”.
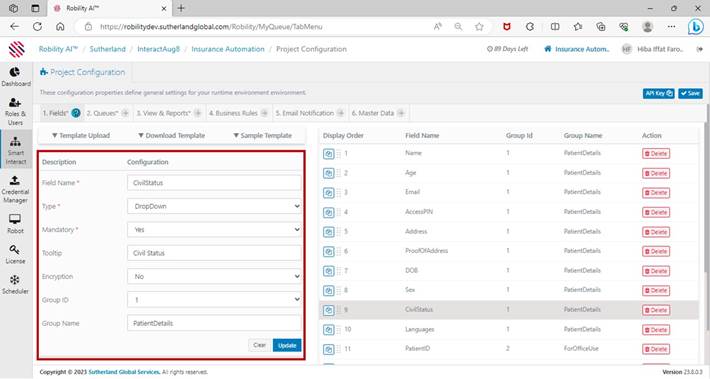
Drop-down:
It enables the user to provide cascading option as input based on the project specification.
If one wants to use the cascading option, one is required to select drop-down for
any one field. The available options for the Drop-down type will be mandatory, tooltip,
encryption, Group ID and Group name.
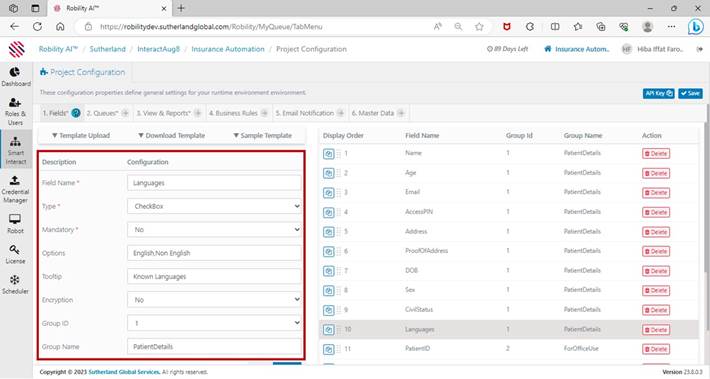
Checkbox:
It enables the user to select the multiple options to provide in this field. The
available options for the checkbox type will be mandatory, tooltip, encryption,
Group ID and Group name. Additionally, “Options” will be available to provide
multiple options as input. For e.g., “Created, Rejected, On hold”.
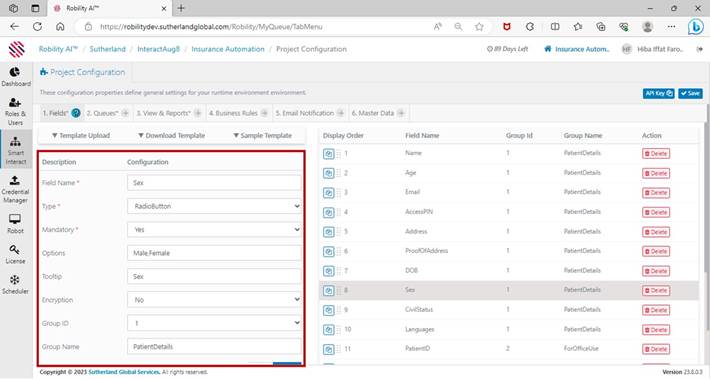
Radio button:
It enables the user to select single input to provide in this field. The available options
for the radio button type will be mandatory, tooltip, encryption, Group ID and Group
name. Additionally, “Options” will be available to provide multiple options as input.
For e.g., “Created, Rejected”.
File upload:
It enables the user to upload file types based on the project specification. The user
will be able to upload any type of files except “.exe” files. The available options for
the file upload type will be mandatory, tooltip, encryption, Group ID and Group name.

Picture box:
It allows the user to provide images as input based on the project specification. The user
will be able to upload images which does not exceed 6 MB. The available options for
the picture box type will be mandatory, tooltip, encryption, Group ID and Group name.
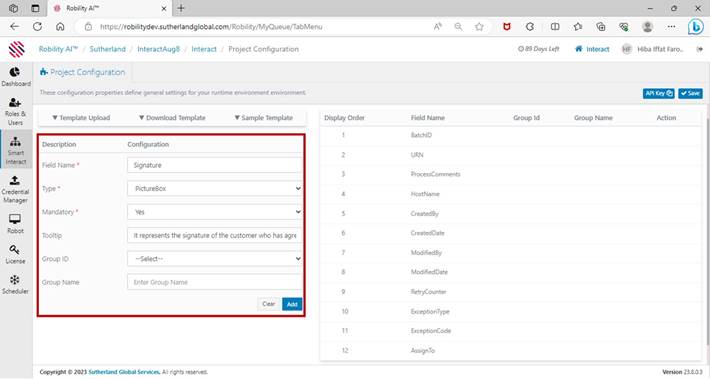
Table:
It allows the user to provide create tables based on the user preferences. The user
can add the fields created already to the table. It also enables the user to view the
fields in a table format and add values to the fields in “Datatable” datatype during
the runtime.
Group:
It allows the user to create groups based on the user preferences. The user can
add the fields created already to the group. It also enables the user to view the
fields in an arranged format during the runtime.
How to add “Table” and “Group” for the fields created?
The user can add the tables and group for the fields created to arrange and view
in a table or group format. Follow the below steps to see how to create the table
and group format.
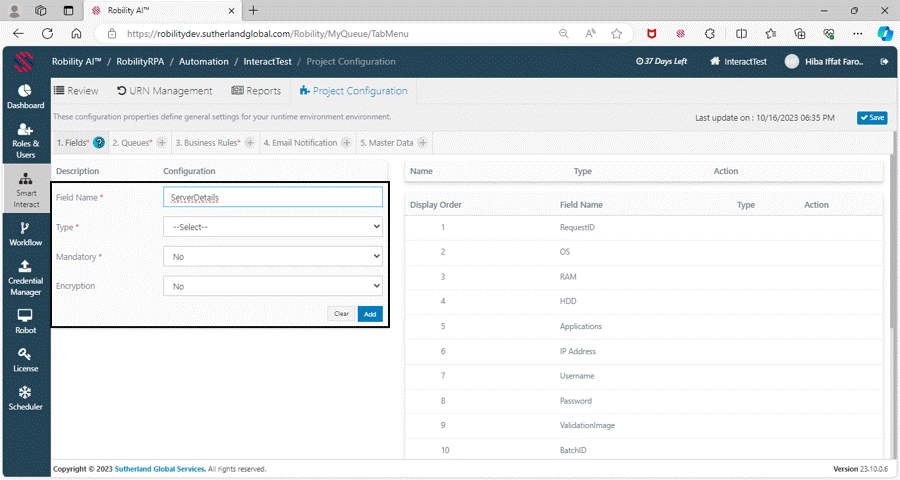
1. Fill in the Field Name as “ServerDetails”.
2. Select the Type from the drop-down as Table.
a. Once you choose the “Table” as option, another window will pop up on
the window.
b. Here on the left-hand side, the fields created will be available; you can
choose the fields to form a table.
c. Then, click on “Add” button to save the table.
3. Mention if the field needs to be Mandatory (it will be displayed with an
asterisk.) It is an optional field.
a. Here we are choosing the option as “Yes” to make it mandatory option.
4. Encryption is used to protect field values such as SSN #, passwords, and
other confidential information.
a. Here I am choosing the option as “NO” to disable the encryption for the “HDD”
field.
5. Click on “Add” button to add the fields, and it will be reflected on the right-hand
side of the page.
6. Now, the fields for the project has been configured, Once you click on the “Save”
option, it will be added to the project.
The same steps will be followed to create “Group”.