The initial step in configuring the project is “Field” Configuration. It enables the user to
set/add fields for the inputs based on the project specifications, which can be used to
validate the inputs and helps to identify data patterns and provides insights into how
the project should be configured.
Categorizing fields into groups facilitates the creation of a well-ordered form,
comprising all related data that is required for processing.
How to configure Interact in your project?
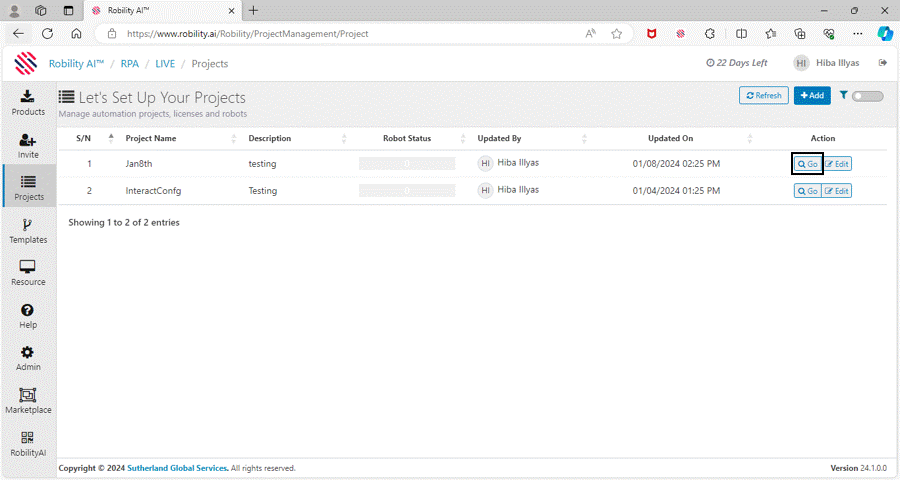
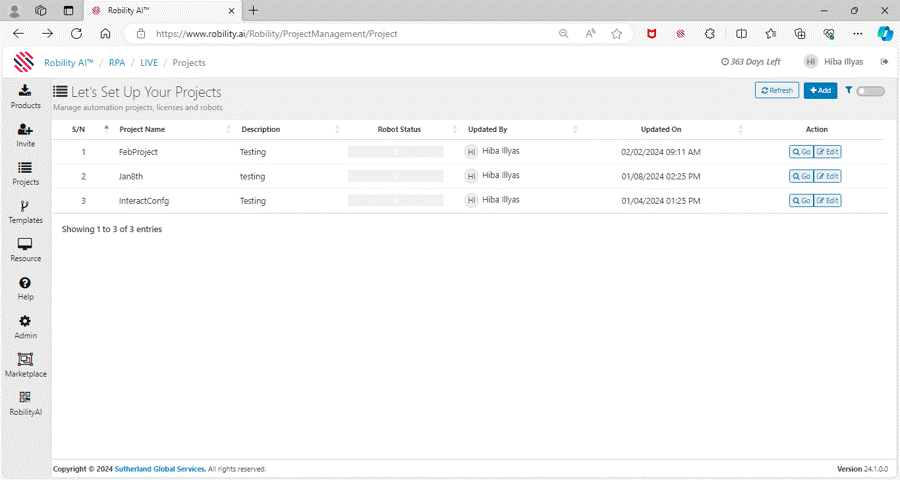
1. Select the project where “Interact” needs to be configured.
2. In this case, we are selecting the "InsuranceAutomation" project and clicking
the "GO" button.
a. You will be directed to the project dashboard.
b. On the left-hand side, you will see the "SmartInteract" option.
c. If your project has not been configured yet, click the "click here"
option.
d. If you have already chosen Smart Interact, the "click here" option
will not be visible; instead, you will be redirected to the project
configuration page.
Use Case
The provided illustration assists in comprehending the process of configuring
fields for the "Project."
In this scenario, the input will be in the form of an Excel file containing a compilation
of OS details. By utilizing the information present in the input file, which includes
OS type, RAM, HDD, and Applications, the creation of a server is to be undertaken.
After the server creation process, specific to the relevant OS, is completed, it
should be logged back into the Excel file.
Here I am going to configure the Fields from the excel sheet to create the transactions.
I have added the sample “Excel sheet” that is utilized in the use case.
The setup of fields and queues can be customized to align with our particular use case.
Now Let’s configure the fields:
According to project specifications, the fields can be configured. Additionally, there are 12
fields that will be preconfigured by default, and these fields are disabled for editing or
making any changes for the configuration.
Default fields
The default fields will be displayed on the right-hand side of the page on the “Field”
configuration page. Users will not have access to edit or delete these fields. This will
be a mandatory requirement for all projects.
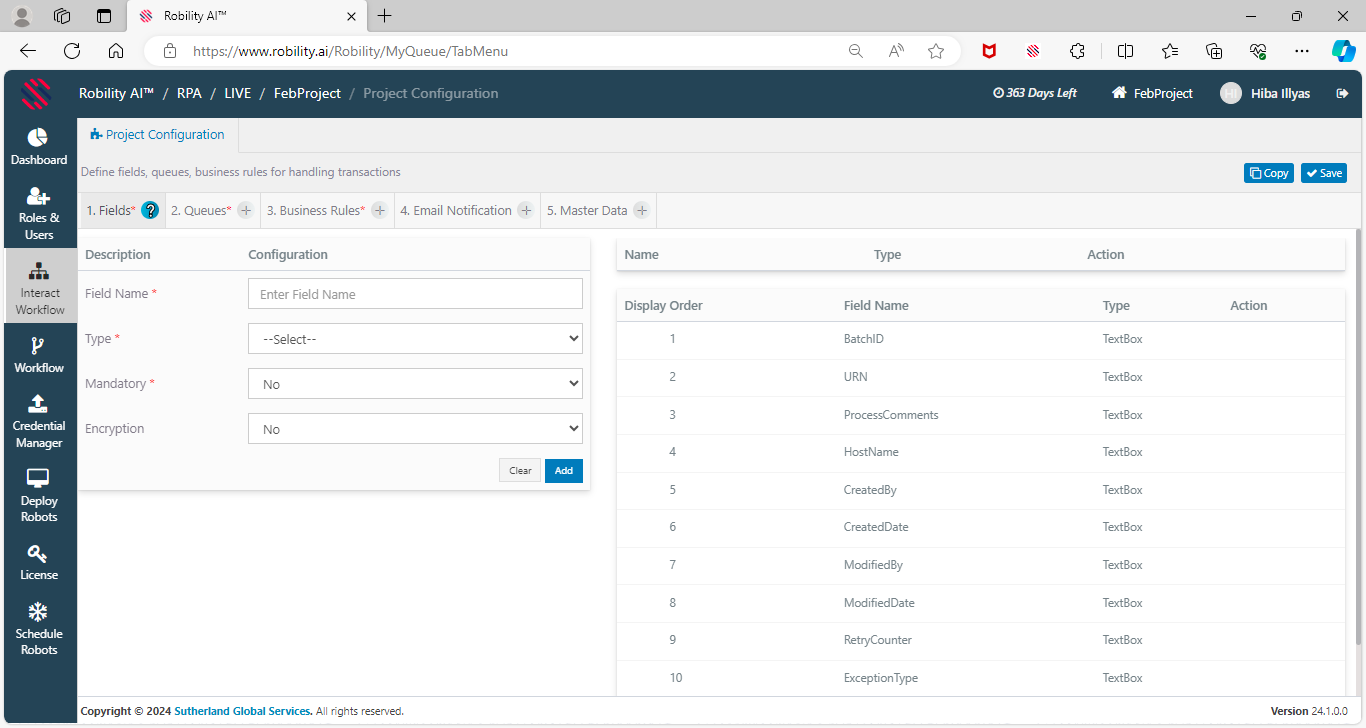
How to set up customized fields ?
The following steps will guide you through the process of setting up fields in the “Project.”
In our specific use case, we need to create 9 fields to be created and configured.
Field 1: Request ID
Here I am going to create a field for the “RequestID” using the “Text” as field types.
As it contains Alphanumeric values returned from the website in the excel sheet.
1. Fill in the Field Name as “Request ID”.
2. Select the Type from the drop-down as text.(Refer Field types to know more)
a. The minimum length of characters to be entered in the Text Box is from 0 to 100.
Here I am setting the minimum characters as 7.
b. The maximum length of characters to be entered in the Text Box is 50000.
Here I am setting the maximum characters as 15.
3. Mention if the field needs to be Mandatory (it will be displayed with an asterisk.)
a. It is an optional field; thus, we are leaving it as blank here. When left blank,
it will not be considered as mandatory field. (Refer Technical reference for field)
4. Encryption is used to protect field values such as SSN #, passwords, and
other confidential information.
a. Use the Yes or No option for this field (Refer technical reference for fields).
b. Here I am choosing the option as “Yes” to encrypt the request ID numbers.
5. Click on “Add” button to add the fields, and it will be reflected on the right-hand
side of the page. Once you click on the “Save” option, it will be added to the project.
Field 2- OS:
Moving onto the next field, here I am using the “Text” as field type to create the
field.
1. Fill in the Field Name as “OS”.
2. Select the Type from the drop-down as text.
a. The text option is used here as the input values loaded to the project will be in
string format.
b. Here I am setting the minimum characters as 25 and maximum characters as
150.
3. Mention if the field needs to be Mandatory (it will be displayed with an asterisk.)
It is an optional field.
a. Here we are choosing the option as “Yes” to make it mandatory option.
4. Encryption is used to protect field values such as SSN #, passwords, and other
confidential information.
a. Choose the option as “Yes” to encrypt the request ID numbers.
5. Click on “Add” button to add the fields, and it will be reflected on the right-hand
side of the page. Once you click on the “Save” option, it will be added to the project.
Field 3 – RAM
Next, in the excel sheet is, “RAM”, here I am using the “Text” as field type to create the
field.
1. Fill in the Field Name as “RAM”.
2. Select the Type from the drop-down as text.
a. The text option is used here as the input values loaded to the project will be in
string format.
b. Here I am setting the minimum characters as 2 and maximum characters as 10.
3. Mention if the field needs to be Mandatory (it will be displayed with an asterisk.)
It is an optional field.
a. Here we are choosing the option as “Yes” to make it mandatory option.
4. Encryption is used to protect field values such as SSN #, passwords, and other
confidential information.
a. Choosing the option as “NO” to disable the encryption for the “RAM” field.
5. Click on “Add” button to add the fields, and it will be reflected on the right-hand
side of the page. Once you click on the “Save” option, it will be added to the project.
Field 4 – HDD
Next, in the excel sheet is, “HDD”, here I am using the “Text” as field type to create
the field.
1. Fill in the Field Name as “HDD”.
2. Select the Type from the drop-down as text.
a. The text option is used here as the input values loaded to the project will be in
string format.
b. Here setting the minimum characters as 5 and maximum characters as 15.
3. Mention if the field needs to be Mandatory (it will be displayed with an asterisk.)
a. Here we are choosing the option as “Yes” to make it mandatory option.
4. Encryption is used to protect field values such as SSN #, passwords, and other
confidential information.
a. Choose the option as “NO” to not to encrypt the HDD.
5. Click on “Add” button to add the fields, and it will be reflected on the right-hand
side of the page. Once you click on the “Save” option, it will be added to the project.
Field 5 – Applications
Next, in the excel sheet is, “Applications”, here I am using the “Text” as field type
to create the field.
1. Fill in the Field Name as “Applications”.
2. Select the Type from the drop-down as text.
a. The text option is used here as the input values loaded to the project will be
in string format.
b. Here I am setting the minimum characters as 10 and maximum characters as
100.
3. Mention if the field needs to be Mandatory (it will be displayed with an asterisk.)
It is an optional field.
a. Here we are choosing the option as “Yes” to make it mandatory option.
4. Encryption is used to protect field values such as SSN #, passwords, and other
confidential information.
a. Here I am choosing the option as “NO” to disable the encryption for the “HDD”
field.
5. Click on “Add” button to add the fields, and it will be reflected on the right-hand
side of the page.
6. Now, the fields for the project has been configured, Once you click on the “Save”
option, it will be added to the project.
Field 6 – IP Address
Next, in the excel sheet is, “IP Address”, here I am using the “Text” as field type to
create the field.
1. Fill in the Field Name as “IP Address”.
2. Select the Type from the drop-down as text.
a. The text option is used here as the input values loaded to the project will be
in string format.
b. Here I am setting the minimum characters as 10 and maximum characters
as 100.
3. Mention if the field needs to be Mandatory (it will be displayed with an asterisk.)
It is an optional field.
a. Here we are choosing the option as “Yes” to make it mandatory option.
4. Encryption is used to protect field values such as SSN #, passwords, and
other confidential information.
a. Here I am choosing the option as “NO” to disable the encryption for the
“HDD” field.
5. Click on “Add” button to add the fields, and it will be reflected on the
right-hand side of the page.
6. Now, the fields for the project has been configured, Once you click on the
“Save” option, it will be added to the project.
Field 7 – Username
Next, in the excel sheet is, “Username”, here I am using the “Text” as field type
to create the field.
1. Fill in the Field Name as “Username”.
2. Select the Type from the drop-down as text.
a. The text option is used here as the input values loaded to the project will be
in string format.
b. Here I am setting the minimum characters as 4 and maximum characters
as 10.
3. Mention if the field needs to be Mandatory (it will be displayed with an asterisk.)
It is an optional field.
a. Here we are choosing the option as “Yes” to make it mandatory option.
4. Encryption is used to protect field values such as SSN #, passwords, and
other confidential information.
a. Here I am choosing the option as “NO” to disable the encryption for the
“HDD” field.
5. Click on “Add” button to add the fields, and it will be reflected on the right-hand
side of the page.
6. Now, the fields for the project has been configured, Once you click on the
“Save” option, it will be added to the project.
Field 8 – Password
Next, in the excel sheet is, “Password”, here I am using the “Password” as field
type to create the field.
1. Fill in the Field Name as “Password”.
2. Select the Type from the drop-down as text.
a. The text option is used here as the input values loaded to the project will be
in string format.
b. Here I am setting the minimum characters as 4 and maximum characters as 10.
3. Mention if the field needs to be Mandatory (it will be displayed with an asterisk.)
It is an optional field.
a. Here we are choosing the option as “Yes” to make it mandatory option.
4. Encryption is used to protect field values such as SSN #, passwords, and other
confidential information.
a. Here I am choosing the option as “NO” to disable the encryption for the “HDD”
field.
5. Click on “Add” button to add the fields, and it will be reflected on the right-hand
side of the page.
6. Now, the fields for the project has been configured, Once you click on the “Save”
option, it will be added to the project.
Field 9 – Proof
Next, in the excel sheet is, “Proof”, here I am using the “FileUpload” as field type
to create the field.
1. Fill in the Field Name as “Password”.
2. Select the Type from the drop-down as “FileUpload.”
3. Mention if the field needs to be Mandatory (it will be displayed with an asterisk.)
It is an optional field.
a. Here we are choosing the option as “No” to make it mandatory option.
4. Next, moving to the “Viewer” option, it enables the user to view the file uploaded
against the field.
a. Here I am choosing the option as “Yes” to enable the file to view.
5. Next, moving to the “Download” option, it enables the user to download the
file uploaded against the field.
a. Here I am choosing the option as “Yes”.
6. Click on “Add” button to add the fields, and it will be reflected on the right-hand
side of the page.
7. Now, the fields for the project has been configured, Once you click on the “Save”
option, it will be added to the project.
Click here to know about the field types and their technical references.
How to delete/ update the fields?
The fields can be updated or modified after saving the project configuration. Follow
the below steps to configure update the fields,
1. Navigate to the SmartInteract option.
2. Click on the fields from the right-hand side display menu.
3. Now, update/ modify the fields as per the requirement.
4. Click on “Update” button to add the changes.
5. Then click on “Save” button to save the modified fields.

To delete the fields, click on the field name form the right-hand side display menu and
choose “Delete” button. The changes will be reflected when the project configuration
is saved.
How to “Copy” interact configuration from
another Project?
You can copy and add the configuration from another project in "Interact" by replicating
similar fields and queues in the new project. This streamlined approach ensures that
you can easily replicate configurations from one project to another, promoting
consistency and efficiency in your "Interact" setup.
To copy the Interact configuration from another project, follow the below steps,
1. Select the required project where Interact needs to configured.
2. You will be navigated to the project dashboard.
3. On the left-hand side, you will find the “SmartInteract” option.
4. If your project is yet to be configured, select the click here option.
5. If you already opted for Smart Interact, the click here option will not appear, and
it will redirect to the project configuration page.
6. Now, select the “Copy” option from the top - right corner of the “Project configuration”
page.
7. Choose the “Project” from the drop-down to select from where the Interact configuration
needs to be copied.
8. A confirmation message will appear on the screen, click on “Yes” option to proceed.
9. Now, configurations will be copied to this project, click on “Save” option.