Reports in Robility involve extracting pertinent data and presenting it in a structured
format. You have the flexibility to customize your reports based on your preferences.
Additionally, reports can be generated for each queue separately, facilitating easy
tracking and management of transactions.
Key points of Interact Report page
· Tailored Customization: Customize reports according to specific preferences
and requirements, allowing users to focus on the key metrics and details relevant
to their workflow.
· Queue-Specific Insights: Generate reports against each queue individually,
providing a granular view of transactions associated with that queue. This targeted
approach enhances precision in tracking and managing transactions within distinct
operational areas.
· Efficient Tracking and Management: The structured format of the reports
ensures easy tracking of transactional activities. Management becomes more
efficient as users can swiftly navigate and analyze relevant data for informed
decision-making.
· User-Friendly Interface: Robility's reporting feature offers a user-friendly interface,
enhancing accessibility and usability for individuals across various roles within the
system.
· Enhanced Decision-Making: Empower users to make informed decisions by
presenting transactional data in a comprehensible and organized manner.
The reports act as a valuable tool for strategic planning and process optimization.
How to create a Report and download?
1. Login to the Robility Manager and navigate to the respective project where
Interact is configured.
2. Click on “Report” page.
a. Only the users who have access to the “Report” page can modify or create
the reports.
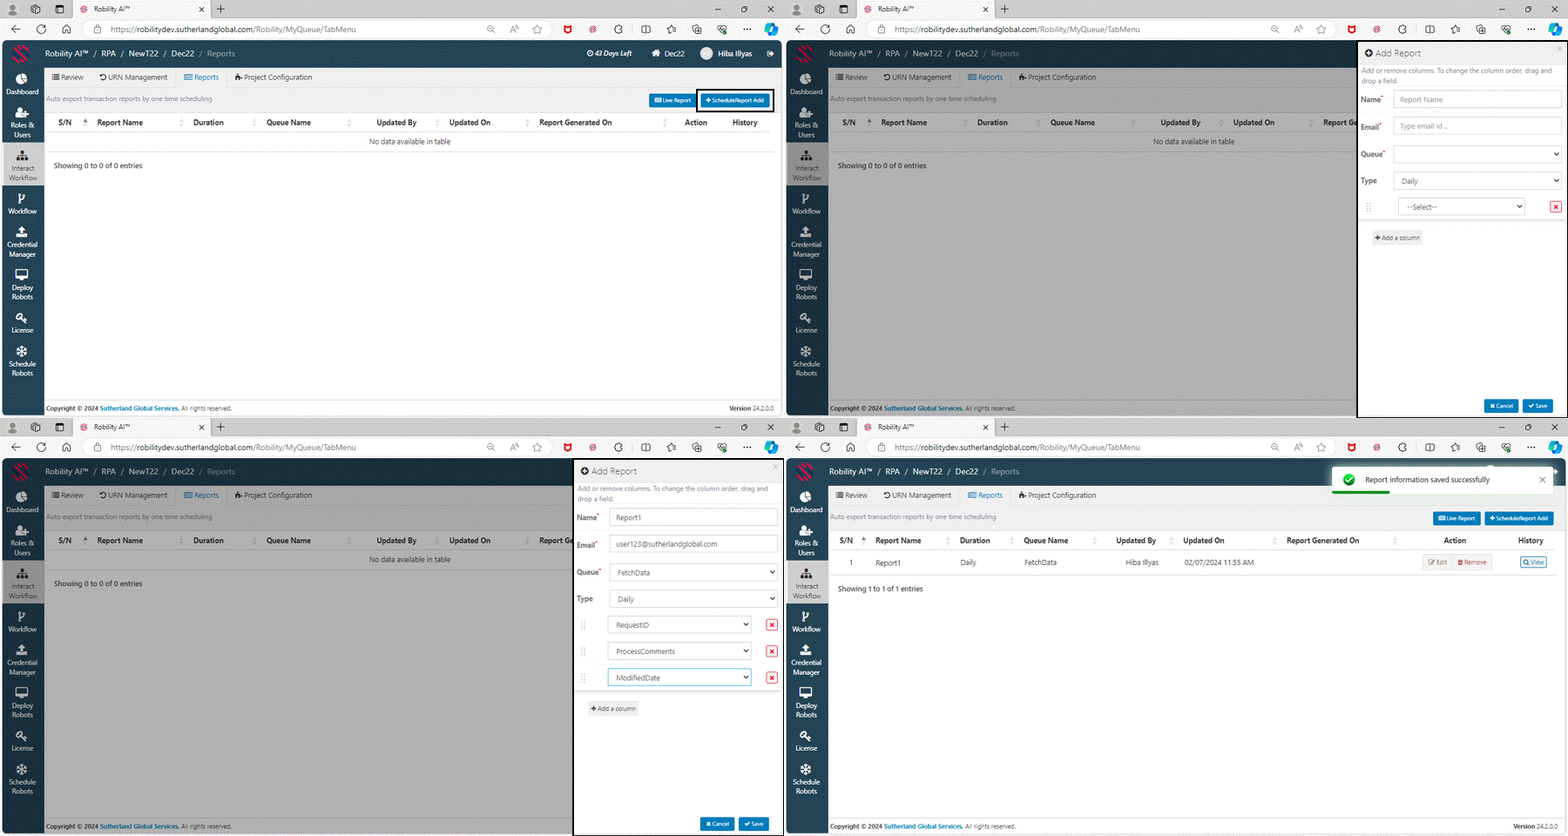
3. On the top- right corner, click on the “Add” button.
4. The Report creation slide appears on the screen.
a. Customize your report name accordingly.
b. Choose the “TO Mail id” user from the drop-down and click on “Enter” button.
c. Select the “Queue” against which the report needs to be pulled.
d. Also, you can choose the type of days variation on which the report needs to
be pulled.
e. Now, you can also choose the required fields to be added to the report.
i. To add more columns, click on the “Add column” button.
f. Once configured, click on “Save” button.
5. Your report will be available to download and view, once it has been generated.
How to modify the report?
To change any field, or to add a new field into the existing report, follow the
below steps.
1. Login to the Robility Manager and navigate to the respective project where
Interact is configured.
2. Click on “Report” page.
a. Only the users who have access to the “Report” page can modify or create
the reports.
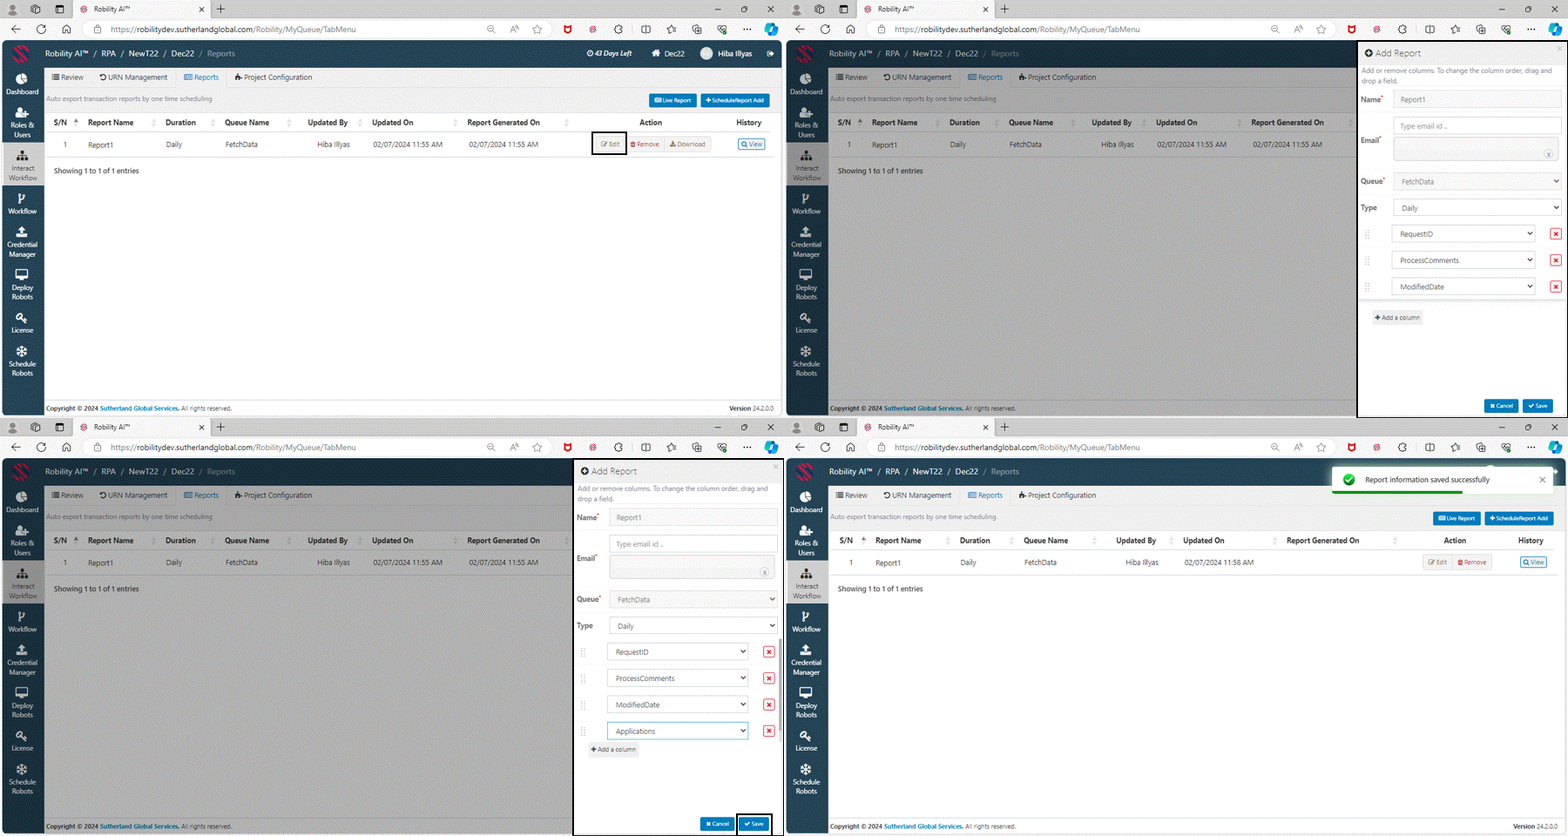
3. Click on the “Edit” option against the report you wish to modify.
4. From the “Report” window, now you can add or remove any fields and save the
report.
a. The user can also add or remove any user mail id.
5. The new report will be ready to download once it has been generated.

Removal of Reports
This page also allows the users to remove any unused report from being
generated. Follow the below steps.
1. Login to the Robility Manager and navigate to the respective project where
Interact is configured.
2. Click on “Report” page.
a. Only the users who have access to the “Report” page can modify or create
the reports.
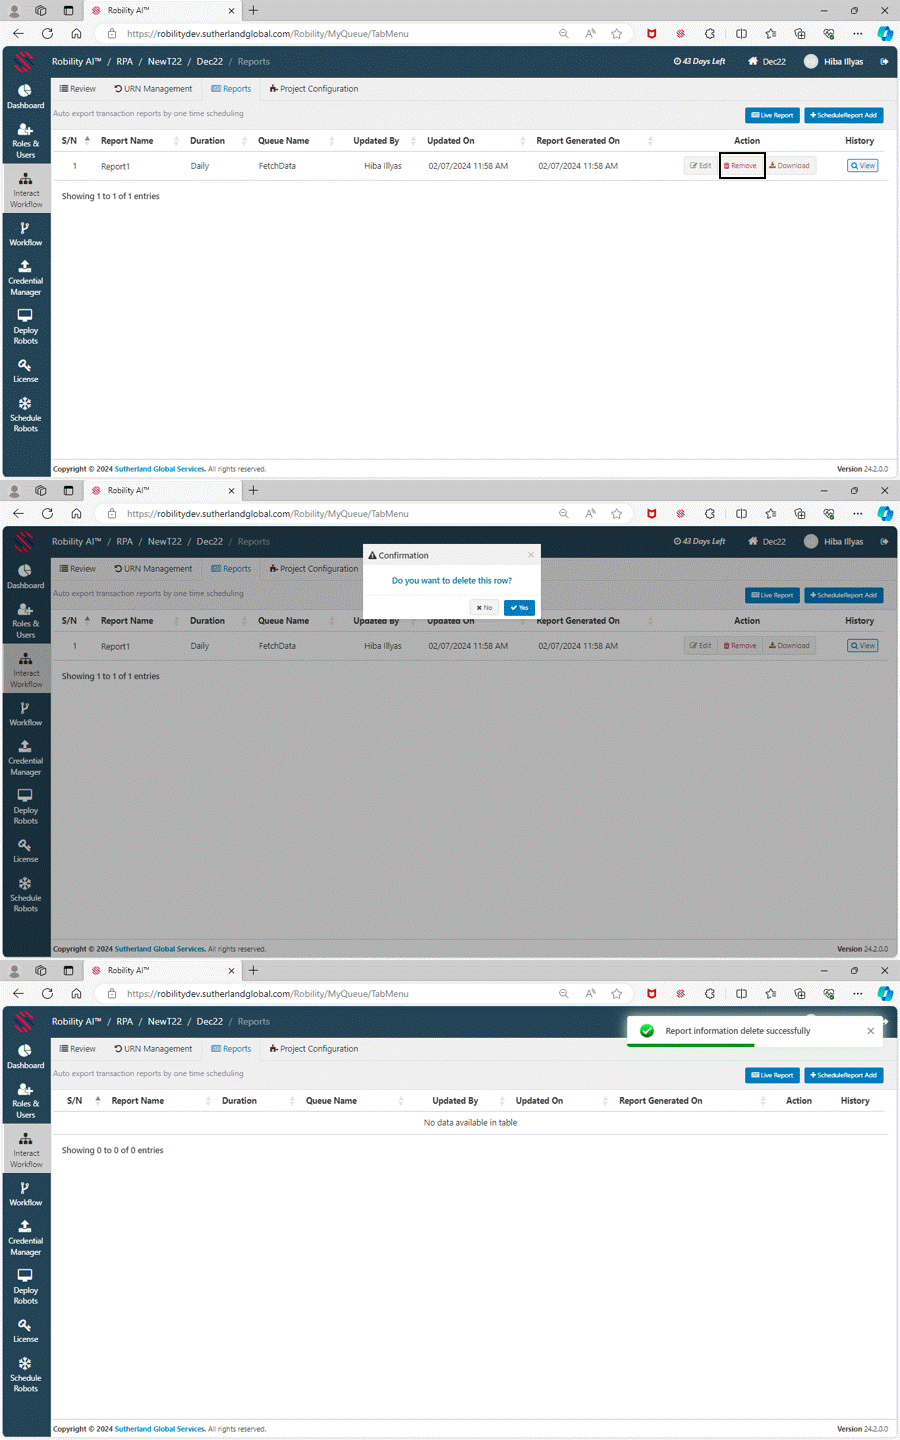
3. Click on the “Remove” option against the report you wish to delete.
4. The report will be removed successfully.

How to generate Live Report?
Now, the users can generate Live report of their transactions instantly. This real-time
reporting functionality provides users with immediate access to a dynamic overview
of their transactions, enabling them to stay informed and make timely decisions.
Follow the below steps.
1. Login to the Robility Manager and navigate to the respective project where
Interact is configured.
2. Click on “Report” page.
a. Only the users who have access to the “Report” page can modify or create
the reports.
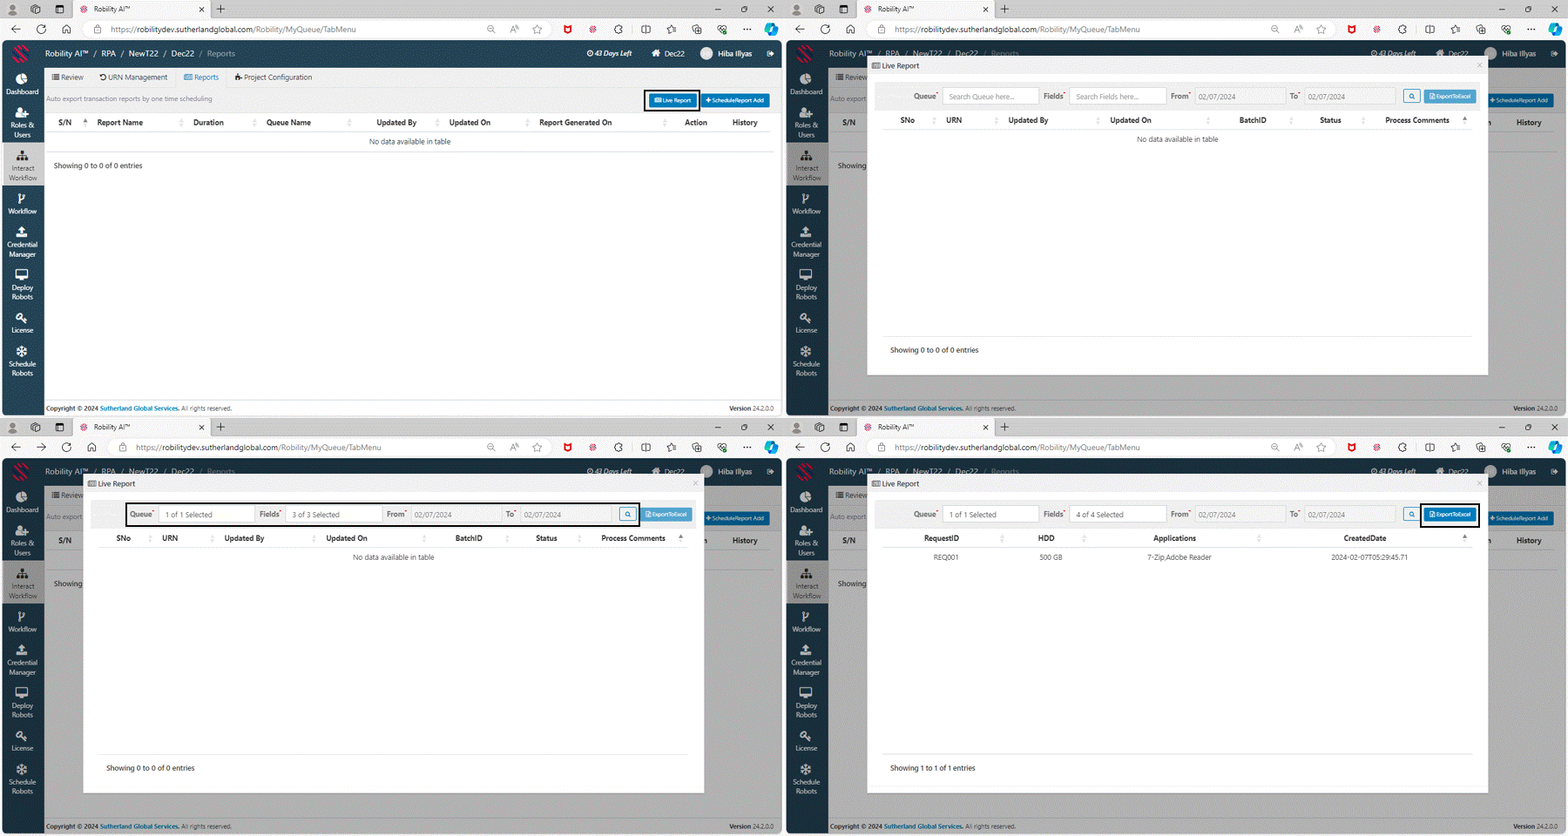
3. Click on the “LiveReport” option.
a. A new pop-up window will appear on the screen to customize and generate the report.
b. Choose the source "Queue" name, respective fields, and specified date range.
c. Now, click on the "Search" button, it will generate and display the list of transactions.
4. To export them, click on the "ExportToExcel" on the top-right corner.
5. The report will be downloaded in your local system.


