
The solution serves as a workspace for constructing and automating bots efficiently. It aids
in developing automation solutions for repetitive tasks and furnishes an intuitive interface
enabling users to swiftly configure and oversee their automation solutions.
How to create a solution
1. Once the “Designer” has been installed, double click on the application
name to launch it.
2. It will set up the interface and initializes the “DESIGNER”.
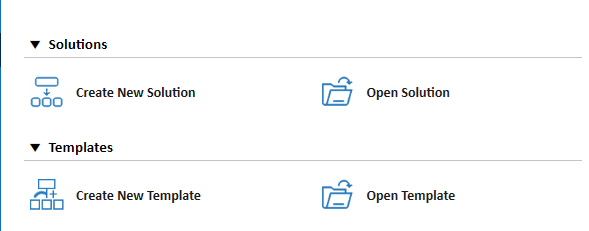
3. From the landing page, i.e., “Home” menu, the option will be “Create a
New solution”.
4. Click on the option and fill in the details to create your first automation
solution.
Creation of New solution
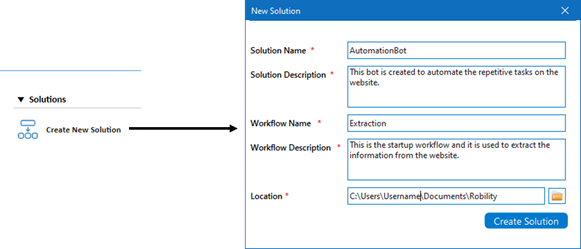
The creation of a solution is the initial and pivotal step. The user can create a new
solution either by pressing “CTRL + N” or clicking the “Create New Solution” button.
This action triggers a pop-up window labeled “New Solution,” prompting the user
to enter details such as “Solution Name, Solution Description, Workflow Name,
Workflow Description, and the location path” for saving.
Let’s walk through the properties in detail.
1. Solution Name: Enter the “Name” of the solution you intend to automate. The
solution name must commence with an 'Alphabet' character, and special
characters (including space between each character) are not permissible.
2. Solution Description: Provide the “Description” of the solution to elucidate
the purpose of the automation for subsequent validations.
3. Workflow Name: Assign a name to the workflow, which will be designated as
the “Startup” workflow. The workflow panel is utilized to drag and drop activities,
constructing the automation. Learn more about Workflow by clicking here.
4. Workflow Description: Provide a description for the workflow, outlining
the purpose behind each automation workflow.
5. Location: Specify the location for saving solutions locally. By default, the
location path is “C:\Users\Username\Documents\Robility.” You can modify
this location by selecting the “File” option or manually entering the location
path. This location is used to store “Json” and “Xaml” files and folders
pertaining to the solution.

Opening an existing solution
When we need to navigate to another solution or to continue the development
in the solution, the “Open an existing solution” menu can be utilized. The solutions
can be opened or launched in three ways,
a. To open an existing solution, the user can either select “CTRL + O” or click on
the “Open Solution” button from the Designer landing page.
i. The user will be presented with a dialog window to select the solution
they wish to open.
ii. After selecting the solution, the user can click "OK" to open the solution.
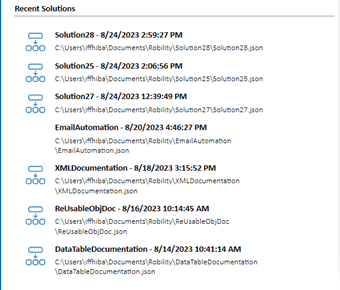
b. The existing solutions can be opened through “Recent Solution” panel from the
designer landing page.
i. The existing solutions or recently developed solutions will be available
in the “Recent Solution” panel.
ii. Click on the “Solution” name from the “Recent” panel and the solution
will be opened.
c. The existing solution can be opened when another solution is opened on the designer
through the “Open” menu from the “Home” at the designer workspace area.
