
This activity can be used to join two tables with similar data columns from the input
tables.
Technical Reference
|
|
INPUT |
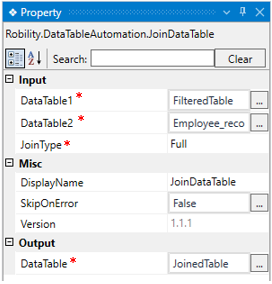
DataTable1: Specify the “datatable" variable where the input data is stored.
This parameter helps you to provide the first “datatable” to join the values.
This field accepts only “Datatable” datatype. |
|
DataTable2: E Specify the “datatable" variable where the input data is stored.
This parameter helps you to provide the second “datatable” to join the values.
This field accepts only “Datatable” datatype. |
||
|
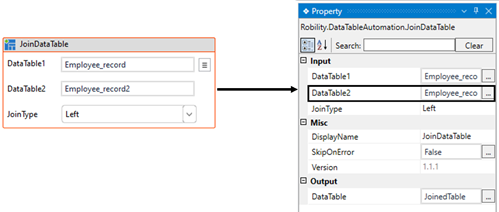
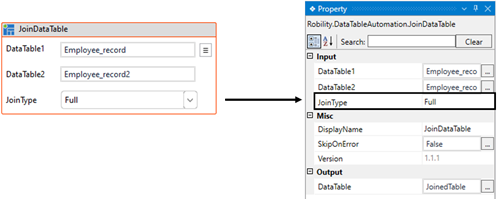
JoinType: Choose options from the dropdown to select the join type. Full: Joins all rows from two tables regardless of whether the specified condition is met. Null values are added if data is not available in the datatable. Left: Joins values meeting the condition from the second datatable. Null values are added to "Datatable1" if no values match the rows from "Datatable2". Inner: Joins all values from both tables and removes rows that don't meet the condition. (For more details, refer to the document below.) |
||
|
MISC |
DisplayName: Displays the name of the activity. The activity name can also be customized to help in troubleshooting. |
|
|
SkipOnError: It specifies whether to continue executing the workflow even if it throws an error. This supports only Boolean value “True or False”. By default, it is set to “False.” True: Continues the workflow to the next step None: If the option is specified as blank, by default the activity will perform as “False” action. |
||
|
Version: It specifies the version of the Datatable automation feature in use |
||
|
OUTPUT |
DataTable: It helps to view the output of the activity after joining the rows in a “Datatable” datatype. (Refer the steps below to create a variable). |
* Represents mandatory fields to execute the workflow.
Utilization of Join Table Wizard
1. Double click on the activity and provide the input datatable for “Datatable1”.
2. Specify the input datatable for “Datatable2”.
3. Click on the three lines adjacent to the “DataTable1” and choose the “Edit wizard”
option.
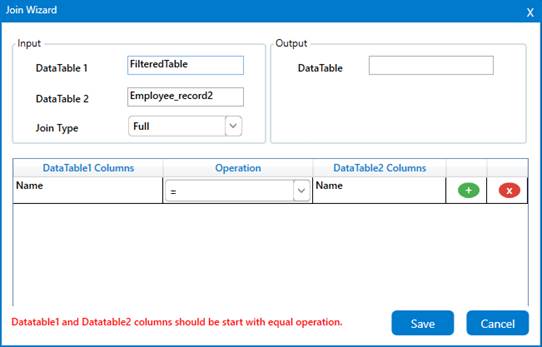
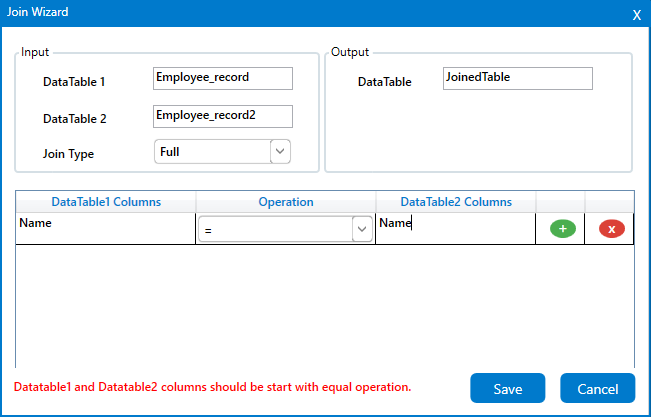
4. The wizard contains three sections-
i. To provide “Input” datatables and choose the “Join Type”.
ii. To provide the “Output” datatable to view the joined table.
iii. To specify the “Condition” that needs to be met while joining the tables.
5. In the condition section, you need to start “=” operation as default.
i. The following are the conditions that are available,
ii. < : It validates to check whether the provided “ColumnName” is lesser than the
specified “ColumnName” in the DataTable2.
iii. >: It validates to check whether the provided “ColumnName” is greater than the
specified “ColumnName” in the DataTable2.
iv. <= : It validates to check whether the provided “ColumnName” is lesser than or
equal to the specified “ColumnName” in the DataTable2.
v. >= : It validates to check whether the provided “ColumnName” is greater than or
equal to the specified “ColumnName” in the DataTable2.
vi. = : It validates to check whether the provided “ColumnName” is equal to the
specified “ColumnName” in the DataTable2.
6. Specify the “Output datatable” variable and click on “Save”.
Here's an example of how the JoinDataTable activity works –
In the following example, I am using the input values from the “Excel Sheet” utilized to
demonstrate in the Use case. To get a better understanding, click here.
(Refer the attached sample excel sheet in the use case).
1. Drag and drop the " JoinDataTable " activity onto the designer pane.
a. This activity can only be utilized after the other “Datatable” activities.
b. It helps to join two tables with similar data columns from the input tables.
c. Here I am extracting the output as “Datatable” from the “Excel sheet” using the
“ReadRanges” activity from the “Excel Automation.” (Refer the Use case to get
detailed information).
i. “Employee_record” is the output for the “datatable” from the first “Excel Sheet”
which is declared here.
ii. “Employee_record2” is the output for the “datatable” from the second “Excel Sheet”
which is declared here.
d. Double click on the activity and to provide the input datatables.
i. Here I am specifying the “DataTable1” as “Employee_record” which is the input to
join the values for the first datatable.
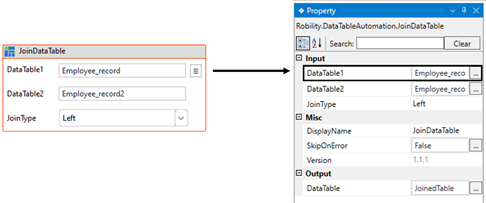
ii. And “DataTable2” as “Employee_record2” which is the input to join the values from
the second datatable.
iii. Navigating to the “Join Type” and choosing the type as “Full” to join the values
from both tables.
e. Then selecting the three lines adjacent to the “DataTable1” and choosing the
“Edit wizard” option.
f. It helps to provide the condition to join the tables.
i. By default, the first condition needs to be started with “=” expression. Here I am
using the “Name” column which is similar in both tables.
ii. In this case, I am providing the “Datatable1 columns” as “Name” and choosing
the “Operation” as “=”.
iii. Then specifying the “Datatable2 columns” as “Name” as both tables contains
the same column name with similar values in it.
iv. To save the changes, clicking on the “Save” button.
g. Navigating to the “Datatable” in the properties of “JoinTable” activity to
declare a variable to view the output.
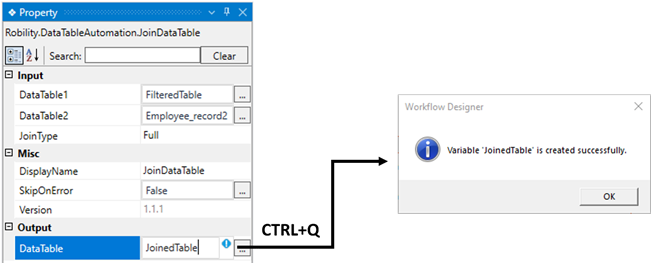
h. There are two ways to create a variable-
i. Method 1 – Click on the "DataTable" property within the "JoinDataTable" activity
and enter the variable name. In this case, we are using " JoinedTable."
Then, press "Ctrl+Q," which is a shortcut key to create a variable.
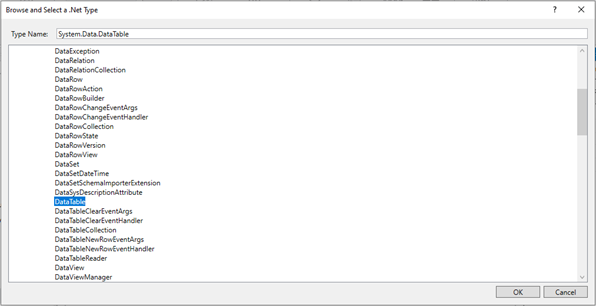
i. Method 2 - Click on the Variables pane and enter the name "JoinedTable" Then,
in the "Variable Types" column, select "Browse for Types" from the dropdown menu.
ii. The .Net window for data types will appear on the screen, enter the type
name as “System.Data.Datatable” and then click on “OK” button.
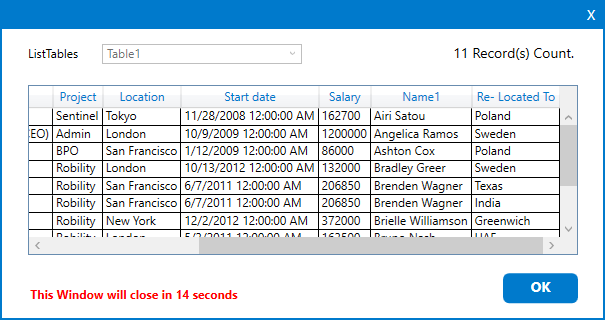
i. You can add the “Tableviewer” activity to view the output of the “JoinedTable”
datatable.
j. It will join both tables with all the columns and the column “Name” from
the second table will be added as “Name1”.
Click here to know how the activity is used in the workflow.