This activity is used to improve the quality of an image that is used for processing.
Technical Reference
|
|
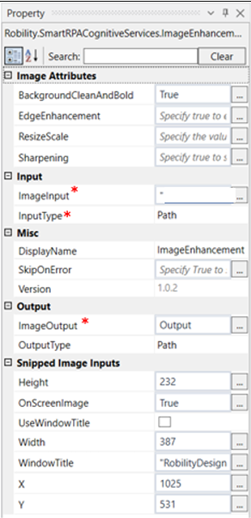
IMAGE ATTRIBUTES |
BackgroundCleanAndBold: Specify True to clean the background and bold the characters. |
|
EdgeEnhancement: Specify true to enhance the edge of the characters. |
||
|
ResizeScale: Specify the resize image value. |
||
|
Sharpening: Specify true to sharpen the image/characters |
||
|
INPUT |
ImageInput: Specify the path of the image file to be processed. |
|
|
InputType: Select from the drop down if the input given is in path or bytes. |
||
|
MISC |
Display Name: Displays the name of the activity. You can also customize the activity name to help troubleshoot issues faster. This name will be used for logging purposes. |
|
|
SkipOnError: It specifies whether to continue executing the workflow even if it throws an error. This supports only Boolean value “True or False.” True: Continues to execute the workflow irrespective of any error thrown. False: Stops the workflow if it throws any error |
||
|
Version: It specifies the version of the smart RPA cognitive feature in use. |
||
|
OUTPUT |
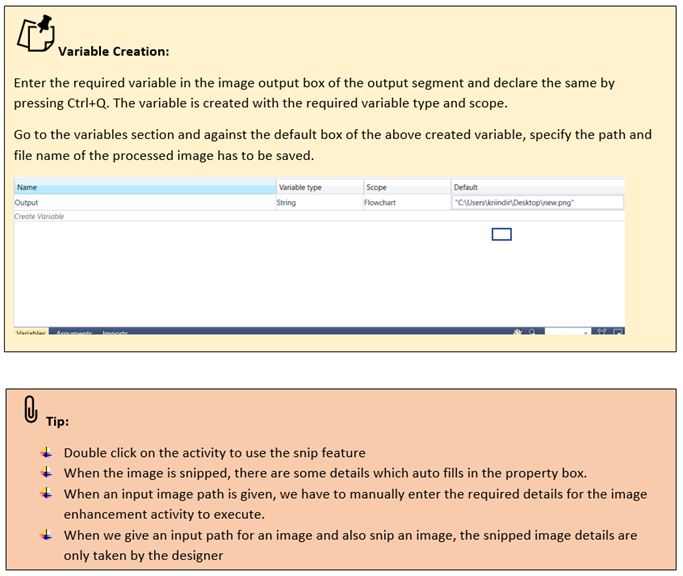
ImageOutput: Declare a variable here to save the output file. |
|
|
OutputType: Specify if the output type is in path or bytes. |
||
|
SNIPPED IMAGE INPUTS |
Height: Height gets auto filled once the image is snipped |
|
|
OnScreen: Specify true if the on-screen area has to be enhanced |
||
|
UseWindowTitle: Check this box to use the window title. |
||
|
Width: Width gets auto filled once the image is snipped. |
||
|
WindowTitle: The window title gets recorded once the image is snipped. |
||
|
X: Gets auto filled once the image is snipped |
||
|
Y: Gets auto filled once the image is snipped. |
* Mandatory fields to execute the workflow.
Use case
The following example illustrates how we are going to use the image enhancement
activity to enhance the given image.
Steps to execute the bot
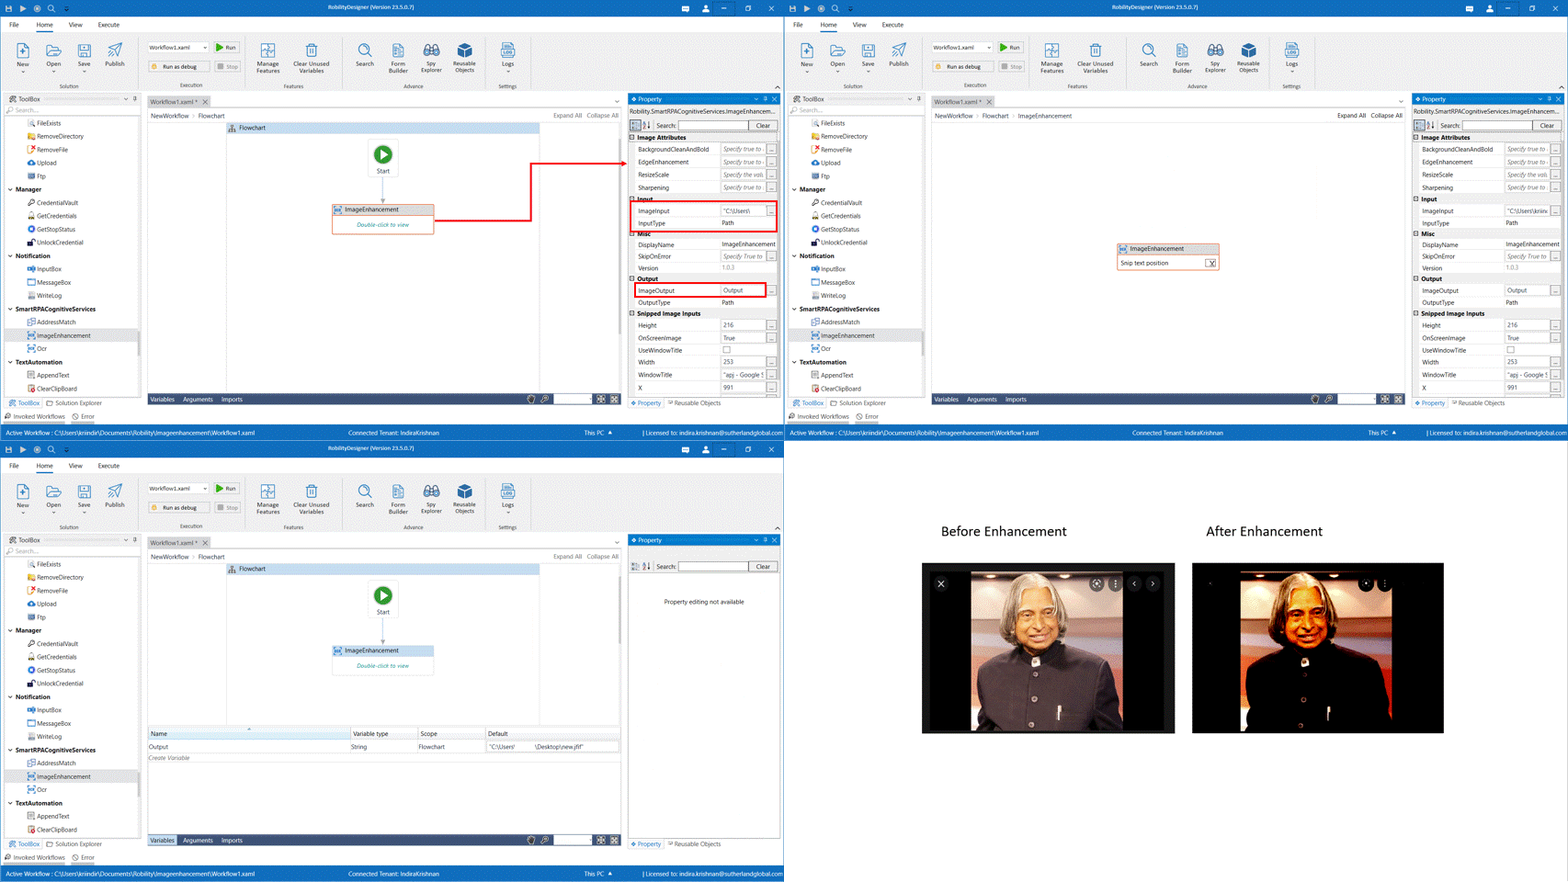
1. Drag and drop an image enhancement activity into the workflow.
2. Double click on the activity.
3. Click on snip to snip an image that has to be processed. Here we are entering the
path of the image in the Imageinput box and choose the input type as path.
4. Specify the variable as Output in the Image Output box of the Output segment. This
is the variable which was earlier created in the variables segment,with the path to be
saved for the enhanced image.
5. Execute the workflow.
The bot executes the activity and enhances the image with the given inputs.


