This activity enables you to reuse predefined templates within your automation
solutions, expediting the development process and ensuring consistency in design
and function.
Technical Reference
|
|
INPUT |
LinkTemplate: Gets auto filled once the “Template” has been invoked into the solution. This parameter specifies the “Name” of the template that has been invoked. |
|
TemplateType: This parameter specifies the “Type” of the template chosen. Private: Indicates the templates that has been published as private within the “Project”. Public: Indicates the templates that has been published across the “Project”. |
||
|
TemplateVersion: It specifies the version of the template that has been invoked. |
||
|
WorkflowName: Gets auto filled once the “Template” has been invoked into the solution. This parameter specifies the “Name” of the workflow invoked. |
||
|
MISC |
DisplayName: Displays the name of the activity. The activity name can be customized, which aids in troubleshooting. |
|
|
Version: It specifies the version of the feature that is in use. |

In the 'Invoke Template' activity, there is an option that allows the user to reset the
activity if they want to revert to a previous version.
Why do we need to reset the templates?
· Resetting a template can be useful when you want to start with a clean slate.
If you've made changes or modifications to a template during a previous use, resetting
it ensures that you begin with the original, unaltered version.
· It allows you to undo any unintended changes made to the template during the
current session. This can be helpful if you've accidentally modified the template and
want to return it to its initial form.
How to reset the activity?
1. Open an existing solution where the invoke template activity has been used.
2. Double click on the activity and choose the “Three lines” adjacent to the
“Template type” option.
3. Choose the “Reset” option from the context menu.
4. Now, the activity will be reset, and you can add another template.

How to edit the arguments?
The “InvokeTemplate” activity allows the user to edit the provided arguments
whenever there is a need to change the variables or the input values.
Steps to edit the arguments:
1. Open an existing solution where the invoke template activity has been used.
2. Double click on the activity and choose the “Three lines” adjacent to the
“Template type” option.
3. Choose the “Edit Arguments” option from the context menu.
4. Now, the arguments panel will appear on the screen, here you can change
or provide the input values.
5. Then, click on “Ok” button.
Here’s an example of how the “InvokeTemplate” activity is used in the workflow –
In the following example, I am utilizing the same steps followed in the use case
of “EmailAutomation” in “Save” activity. This automation helps to read the mail
and reply back to the customers. To get detailed information, click here.
Here I have created a template using the same steps from the use case and
published as “Private” into my project in the “RobilityManager”. Click here to know
how to publish the templates as private.
Steps to execute a bot
1. Create a solution named “EmailAnalysis” or open an existing solution.
2. All the Microsoft activities will be installed in the “Designer” by default.
3. Drag and drop the “InvokeTemplate” activity to the workflow and set it
as start node.
a. It helps to invoke the templates into the solution. Here I am invoking the
template published as private in the Manager.
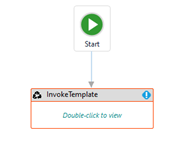
b. Double click on the activity.
c. First, we need to choose the template type from the drop-down. In this
case, I am choosing the “Private” option.

d. The templates available in your project will be loaded here.
e. Next, moving to the “Link Template” option, it will load the templates
available. Here I am choosing the template as “EmailAuto”
i. The number of versions against the “TemplateName” will load when
the template is chosen.
ii. The list of versions will be available when there are multiple versions
published against the template name. You can select the version
s from the drop-down.
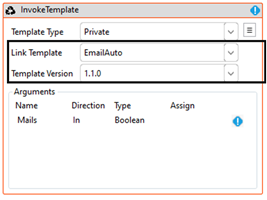
f. Once we choose the template version, the “Arguments” panel will appear
on the screen to provide the input values to the template.
i. It defines the arguments created in the invoked template.
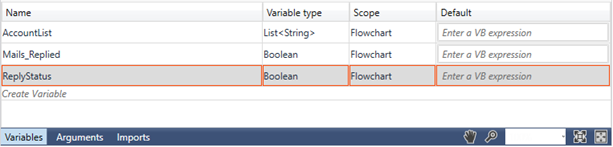
ii. In this case, I am going to declare a variable to get the output of the template.
iii. Here I am using the variable name as “ReplyStatus”.
iv. Navigate to the “Variables” panel,
v. Specifying the name as “ReplyStatus” and choosing the “Datatype” as
“boolean” as the “Output” will be either as “True” or “False”.
(Refer the use case).
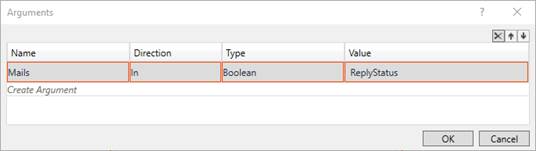
g. Now, moving to the “Arguments” panel,
i. In this case, we could see the “Mails_Replied” argument defined in the
Invoked workflow.
ii. Enter the value as “ReplyStatus” against it to view the output of the method
in the Main workflow.
4. Next, place a “WriteLine” activity to view the output from the “InvokeTemplate”
activity.
i. Enter the text as “ReplyStatus.ToString”.
ii. The “.ToString” extension is advised to use along with any other data
types other than string format. It converts any data type into string.
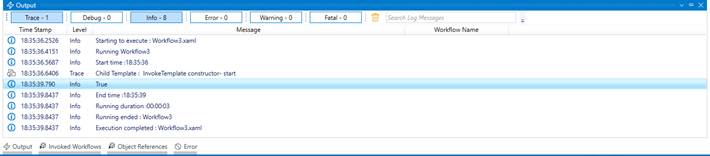
5. Now, execute the workflow.
The bot will execute the invoke template process and returns the output in the
declared variable. Below is a sample of the activity.