This activity assists the user in executing a defined set of activities, considering
the number of retry attempts and a specific interval, until either the specified
condition is met, or an error occurs.
Technical Reference
|
|
INPUT |
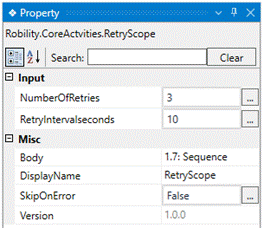
NumberOfRetries: It indicates to provide the number of retries if the activities inside the “Body” has thrown exception or condition not satisfied.
You can also either hardcode the path in a “Integer” datatype variable or manually enter the value in “Integer” type.
This field accepts values in “Integer” datatype. |
|
RetryIntervalseconds: It assists the user in adding a delay after each number of retry specified in starting the execution of the activities.
You can also either hardcode the path in a “Integer” datatype variable or manually enter the value in “Integer” type.
This field accepts values in “Integer” datatype. |
||
|
MISC |
Body: Gets auto filled once the "Activity" is dropped into the body. |
|
|
DisplayName: Displays the name of the activity. The activity name can be customized, which aids in troubleshooting. |
||
|
SkipOnError: Specify the "Boolean" value as "True" or "False."
True: Continue executing the workflow regardless of any errors thrown. False: Halt the workflow if it encounters any errors. None: If the option is left blank, the activity will, by default, behave as if "False" were chosen. |
||
|
Version: It indicates the version of the feature being used. |
Here's an example of how the “ReTryScope” activity works in the workflow –
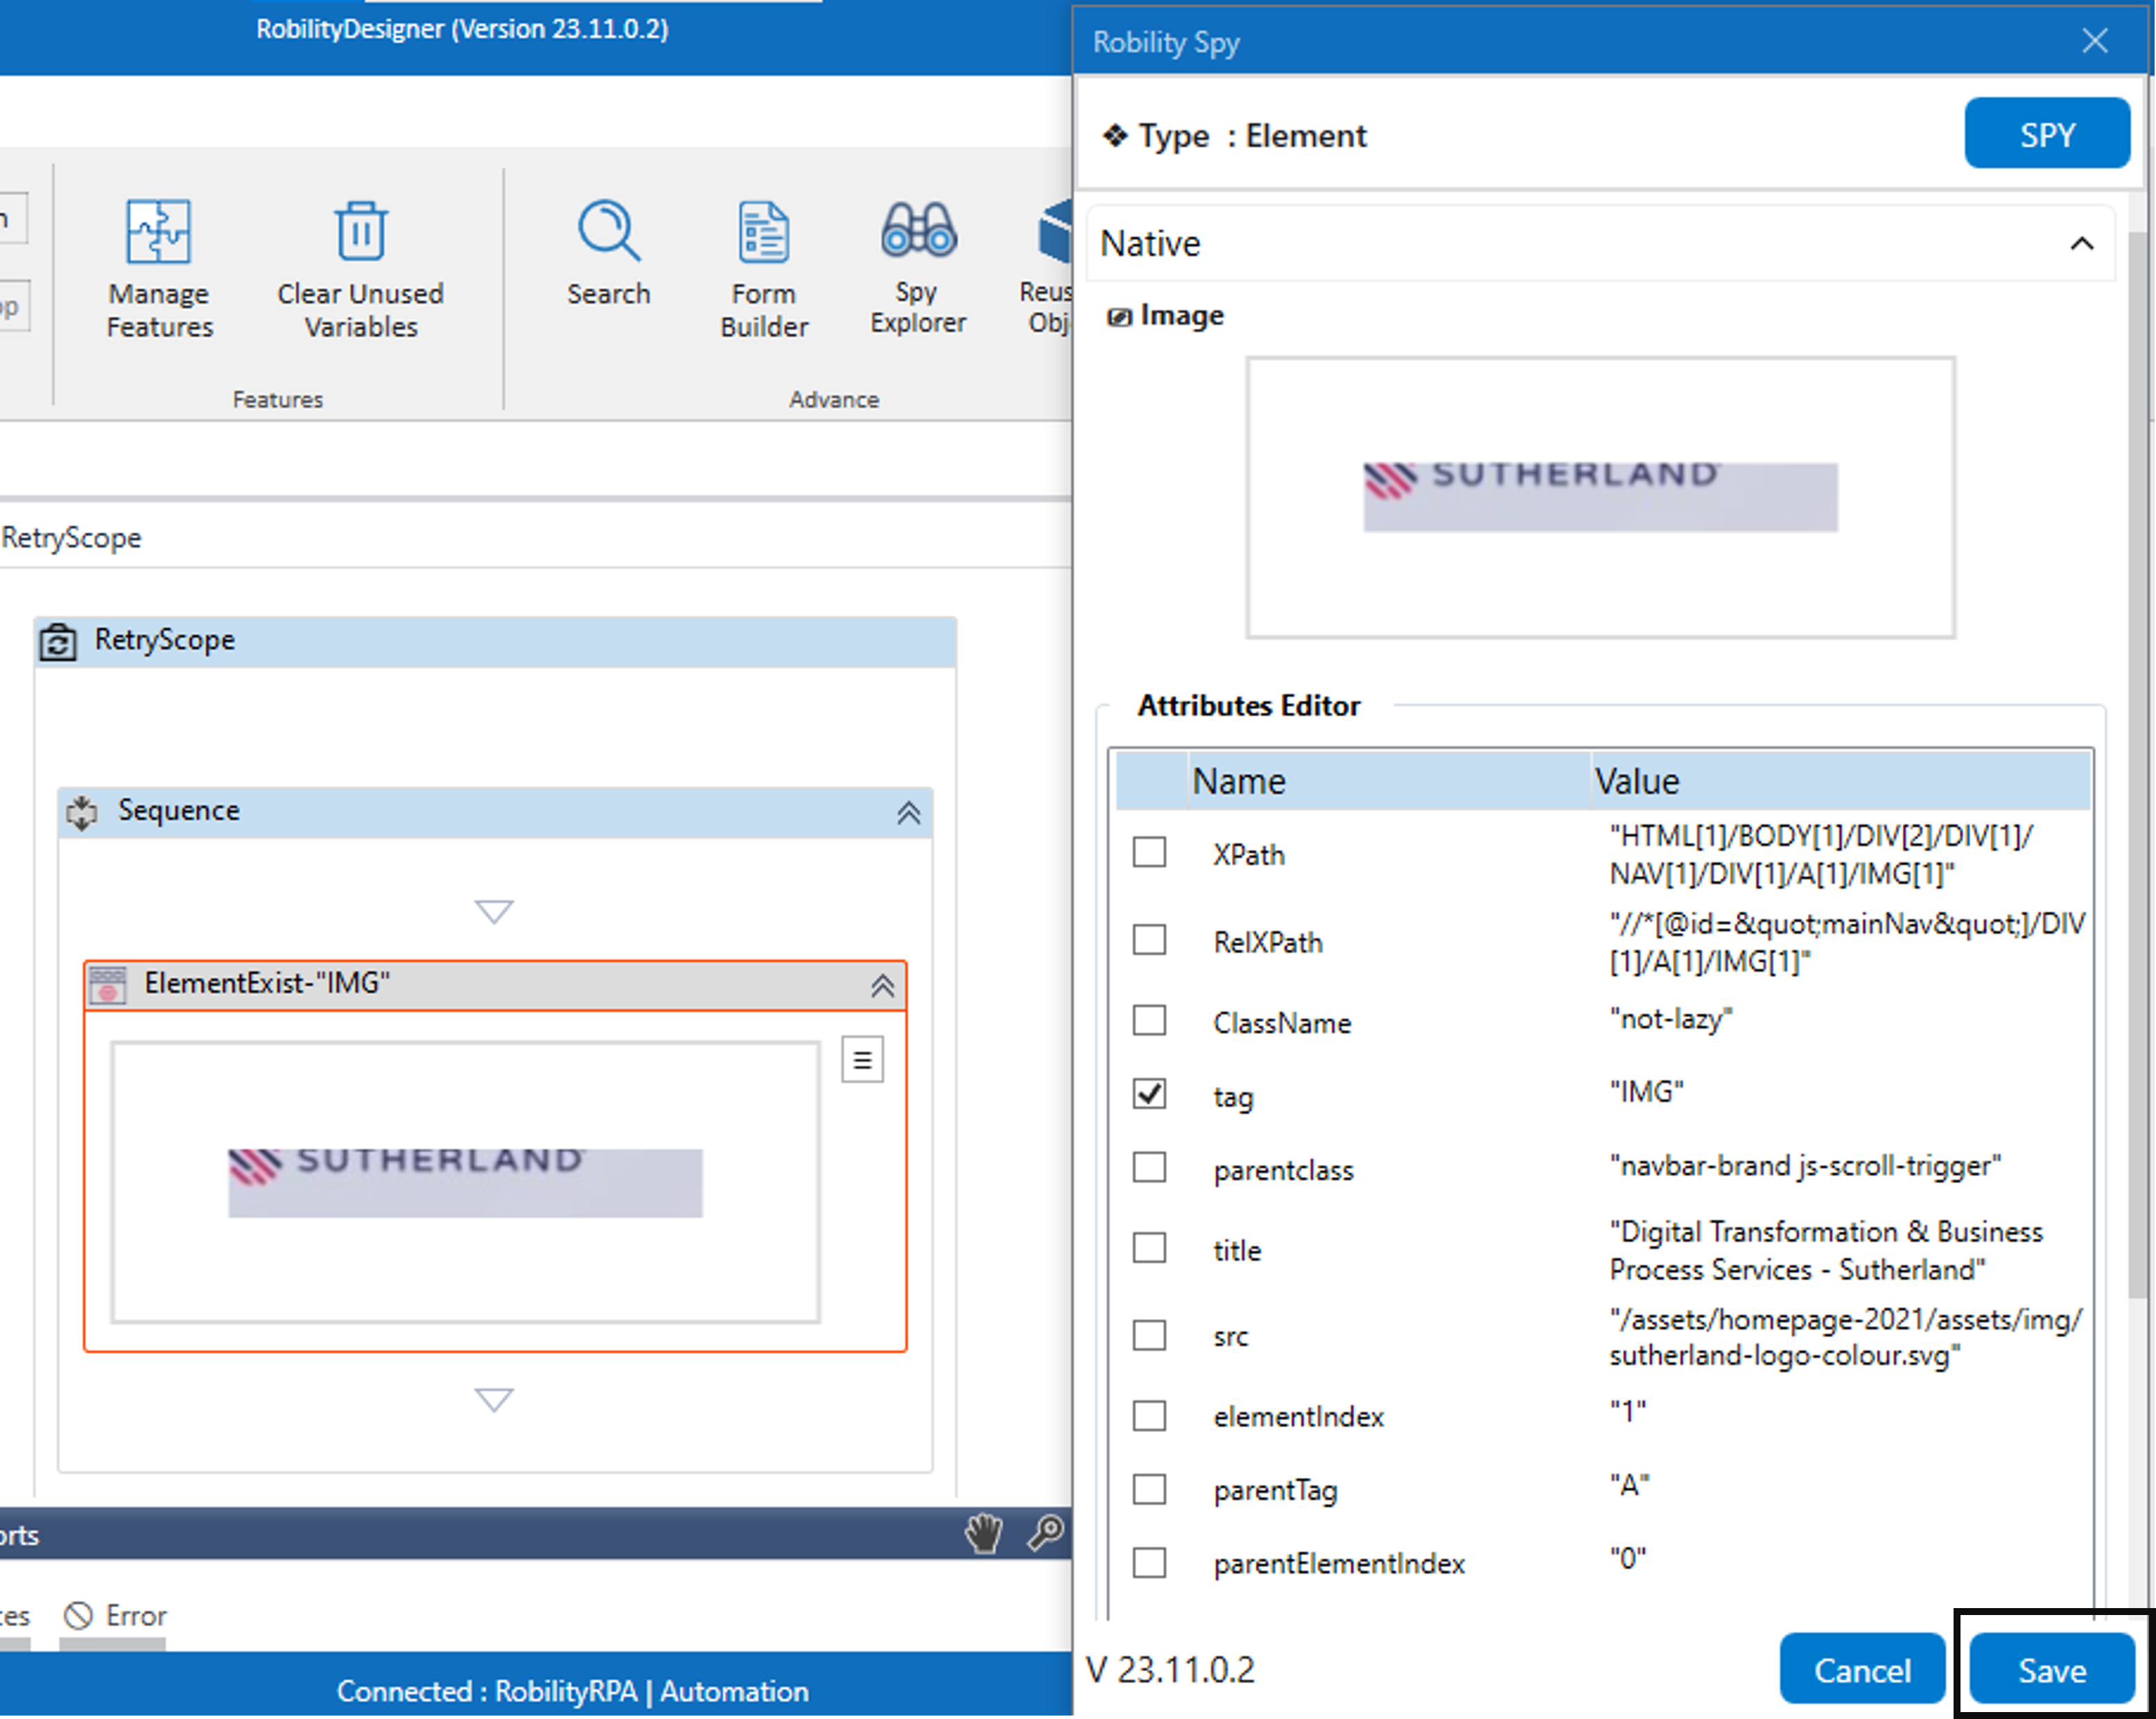
In the following, I have built a simple execution process to check if the specified
element exists on the https://www.sutherlandglobal.com/ webpage and retries if the
element is not found.
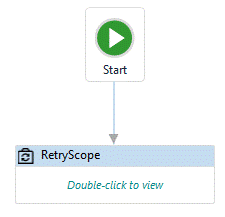
1. Create a solution for building a workflow.
2. Drag and drop the " ReTryScope " activity onto the designer pane and set
it as the “Start Node.”
3. Navigating to the properties to provide the details.
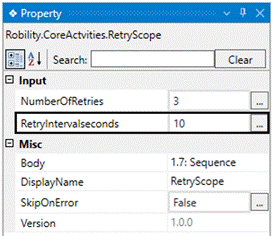
a. Here in the “NumberOfRetries” property, I have provided the value as “3”
so that the set of activities will be executed three times if the element
does not exist.
b. Moving to the “RetryIntervalSeconds” property, providing the value as “10” to
add a delay between each set of retry.
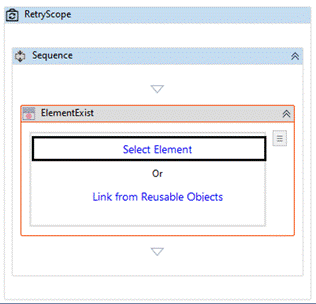
4. Now, placing the “ElementExist” activity from the “WebAutomation” feature.
a. Double-click the activity.
b. Here I am choosing the "Select Element" option.
c. Navigate to the webpage which I have already launched on my desktop.
d. Once you have chosen the "Element," the attributes will be stored in the
"Spy" window, along with an "image" of the element.
e. If you wish to add or remove any attributes, you can edit the "Attributes
Editor." In this case, we are not making any changes in the “Editor.”
f. Once you click on the "Save" button, the elements will be stored in the
activity window.
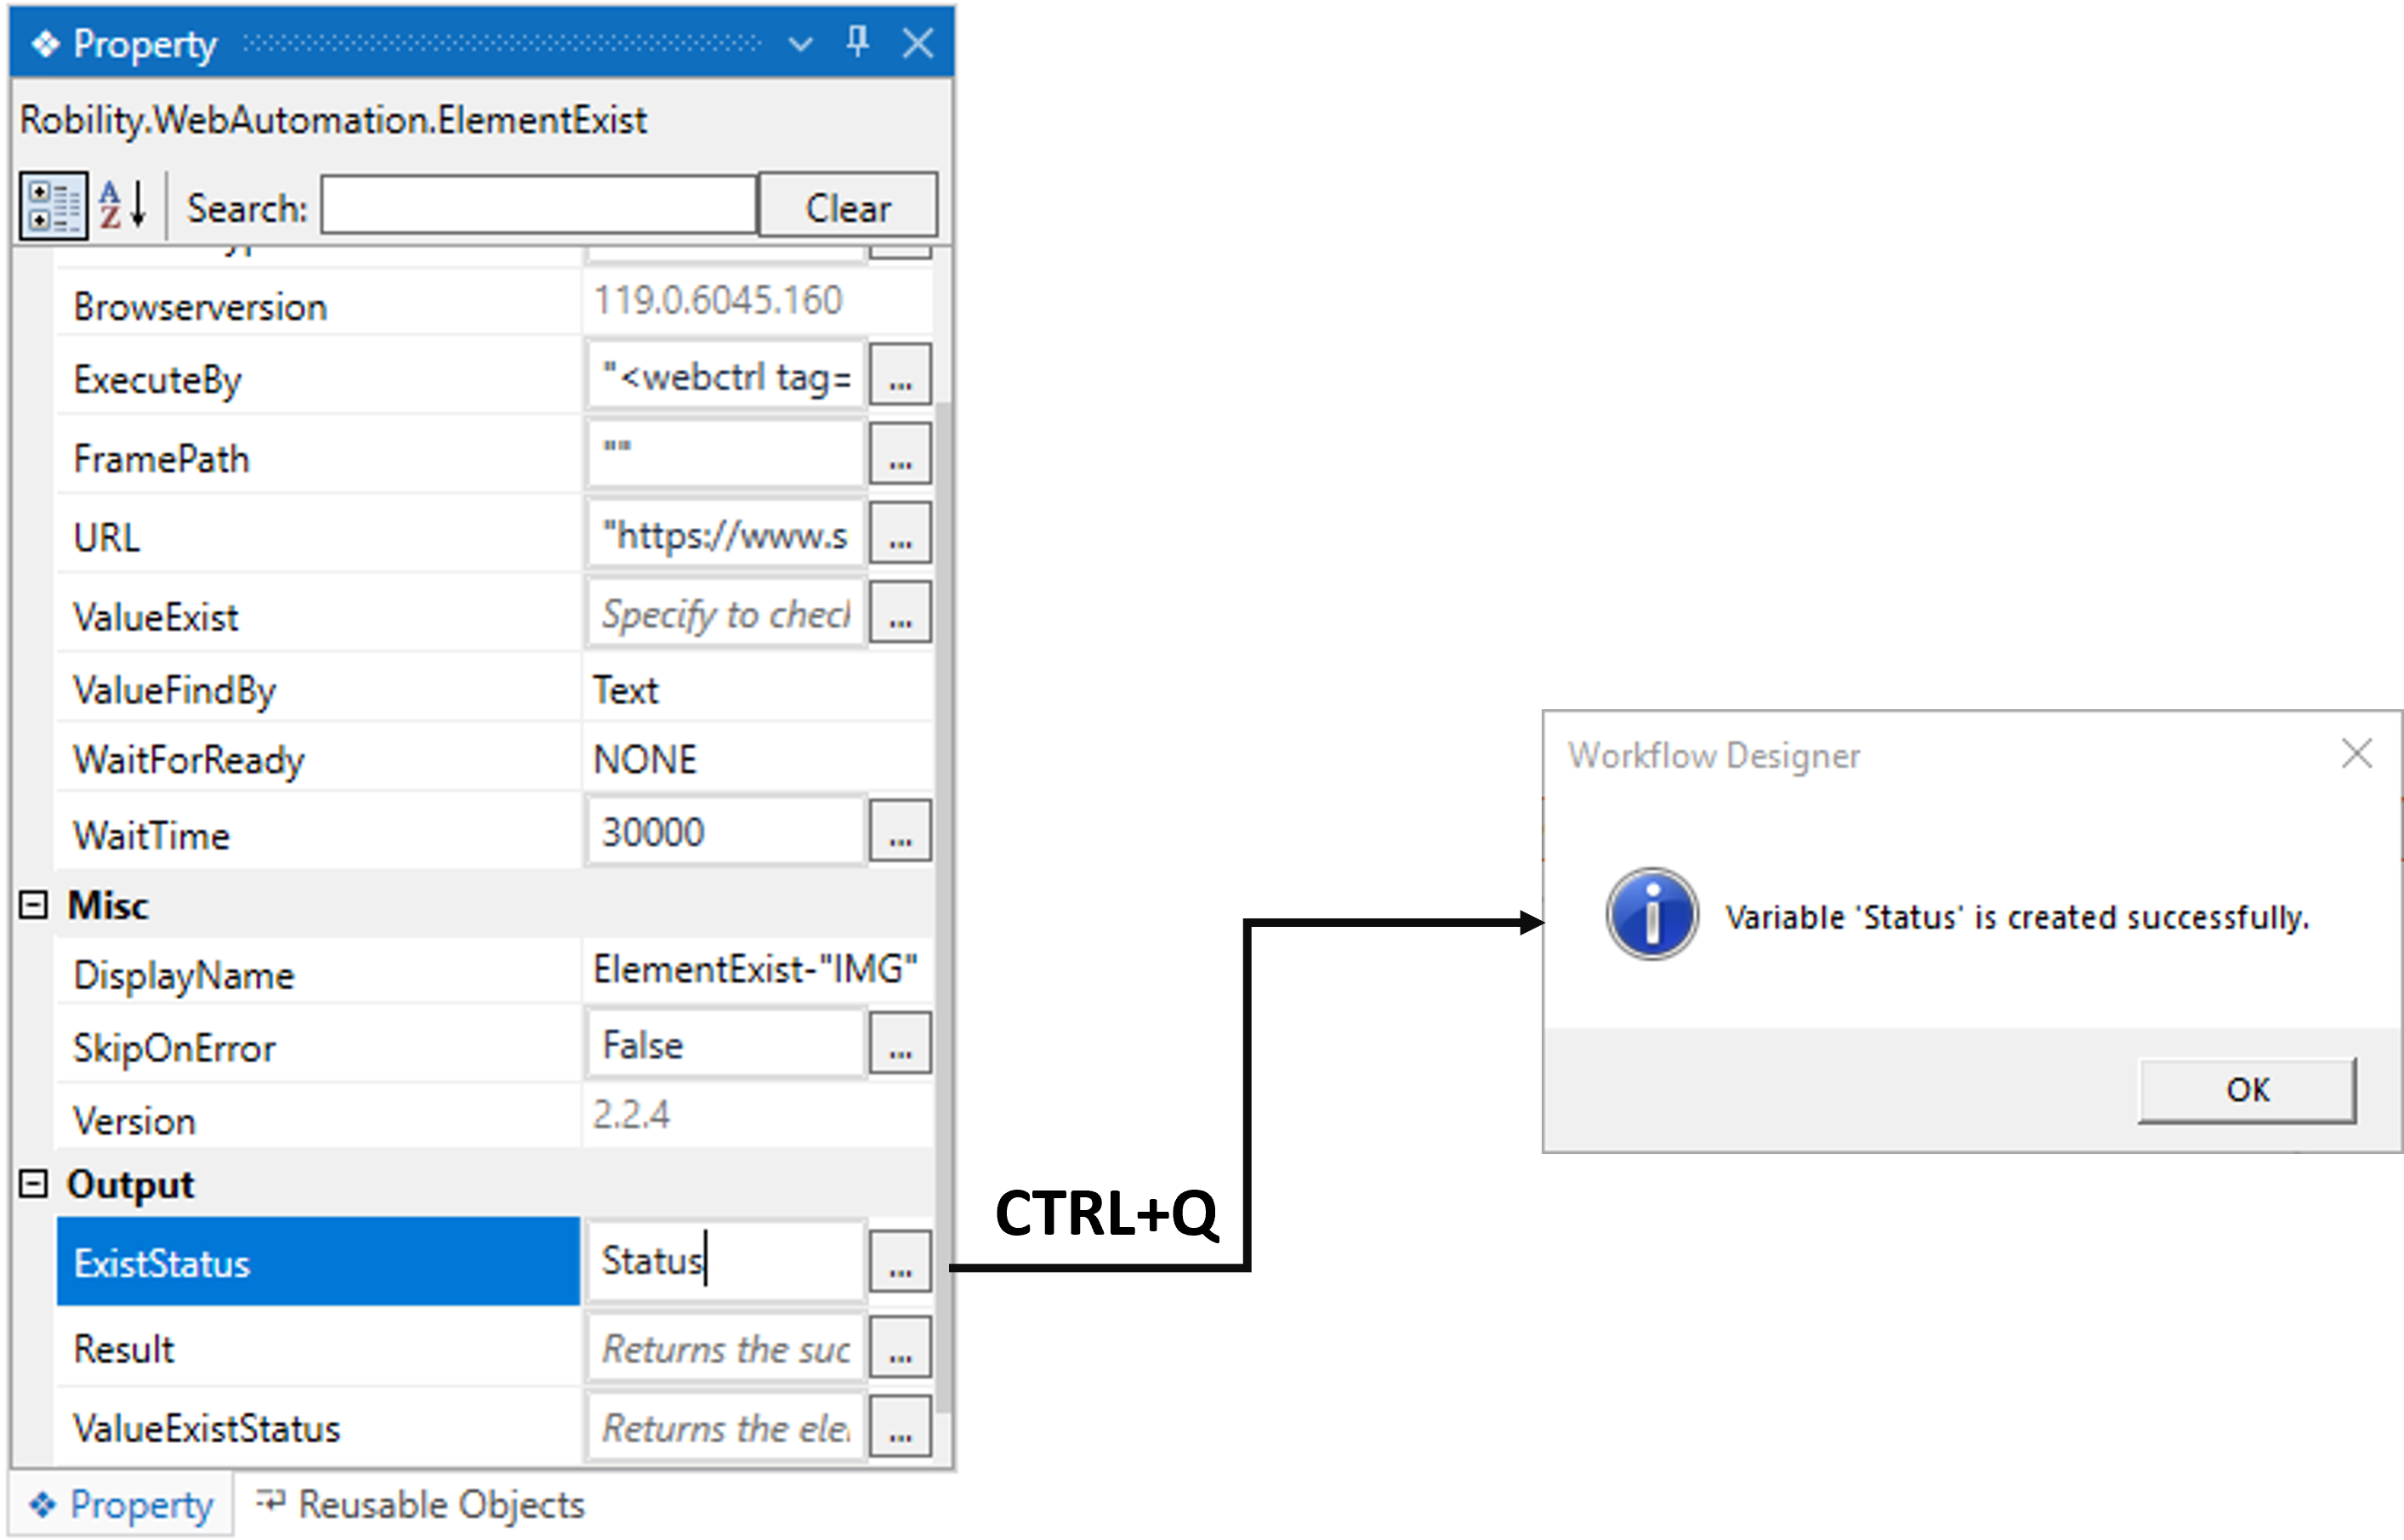
5. Moving to the “ExistStatus” property in the output section to declare a
variable to check if the element exists.
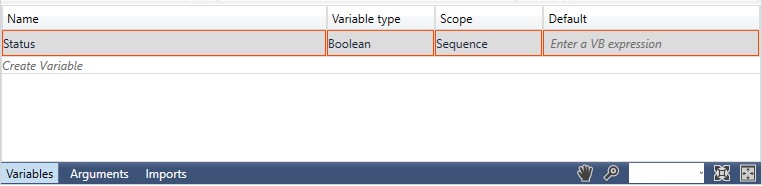
a. There are two methods to store the status in the variable.
b. Method 1: Double-click on the variable parameter in the “Output” section
and enter a name that helps you easily identify it in the flow. Here, I'm using
the name "Status" and using the shortcut key "Ctrl+Q" to create the variable.
c. Method 2: Click on the variable pane, enter your preferred name
(here, I'm using "Status"), and choose the data type as "Boolean" since the
output value accepts the boolean data type.
6. You can add a write log activity next to the “ReTryScope” activity to view
the output.
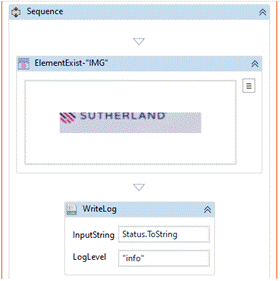
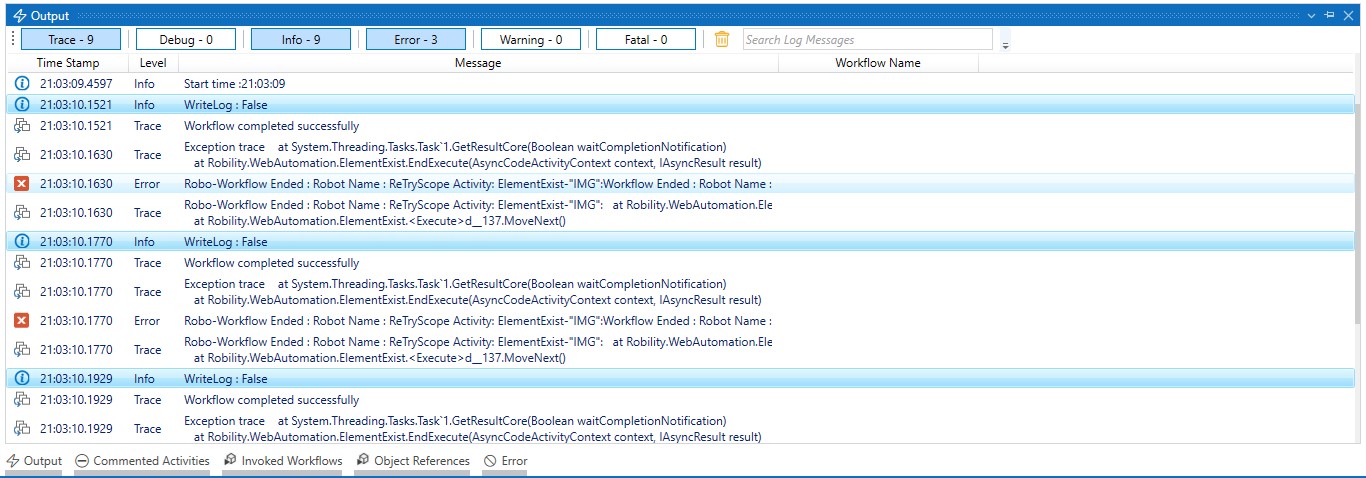
7. Now, execute the workflow to view the results.
Below is a sample of the output of the activity. The bot will try the execution
of activities three times and then ends the process.