The tenants can be used to create separate workspaces for individual projects and teams.
This helps organizations manage their data in a secure and organized way. Additionally,
the tenant admins can switch between tenants with ease.
Multiple Tenants
If the Tenant Admin has signed up with the Premium or Enterprise license version,
they can create multiple tenants against the organization name. The Tenant Admin
can switch between each tenant using the same login credentials and without
affecting the data and settings and manage administrative tasks on the platform.
This allows for a more efficient use of resources and enables the users to access
multiple tenants from a single point of access.
Once signed into the platform, a tenant will be created with the provided name
during signup. To add more tenants against the organization. Follow the below
steps,
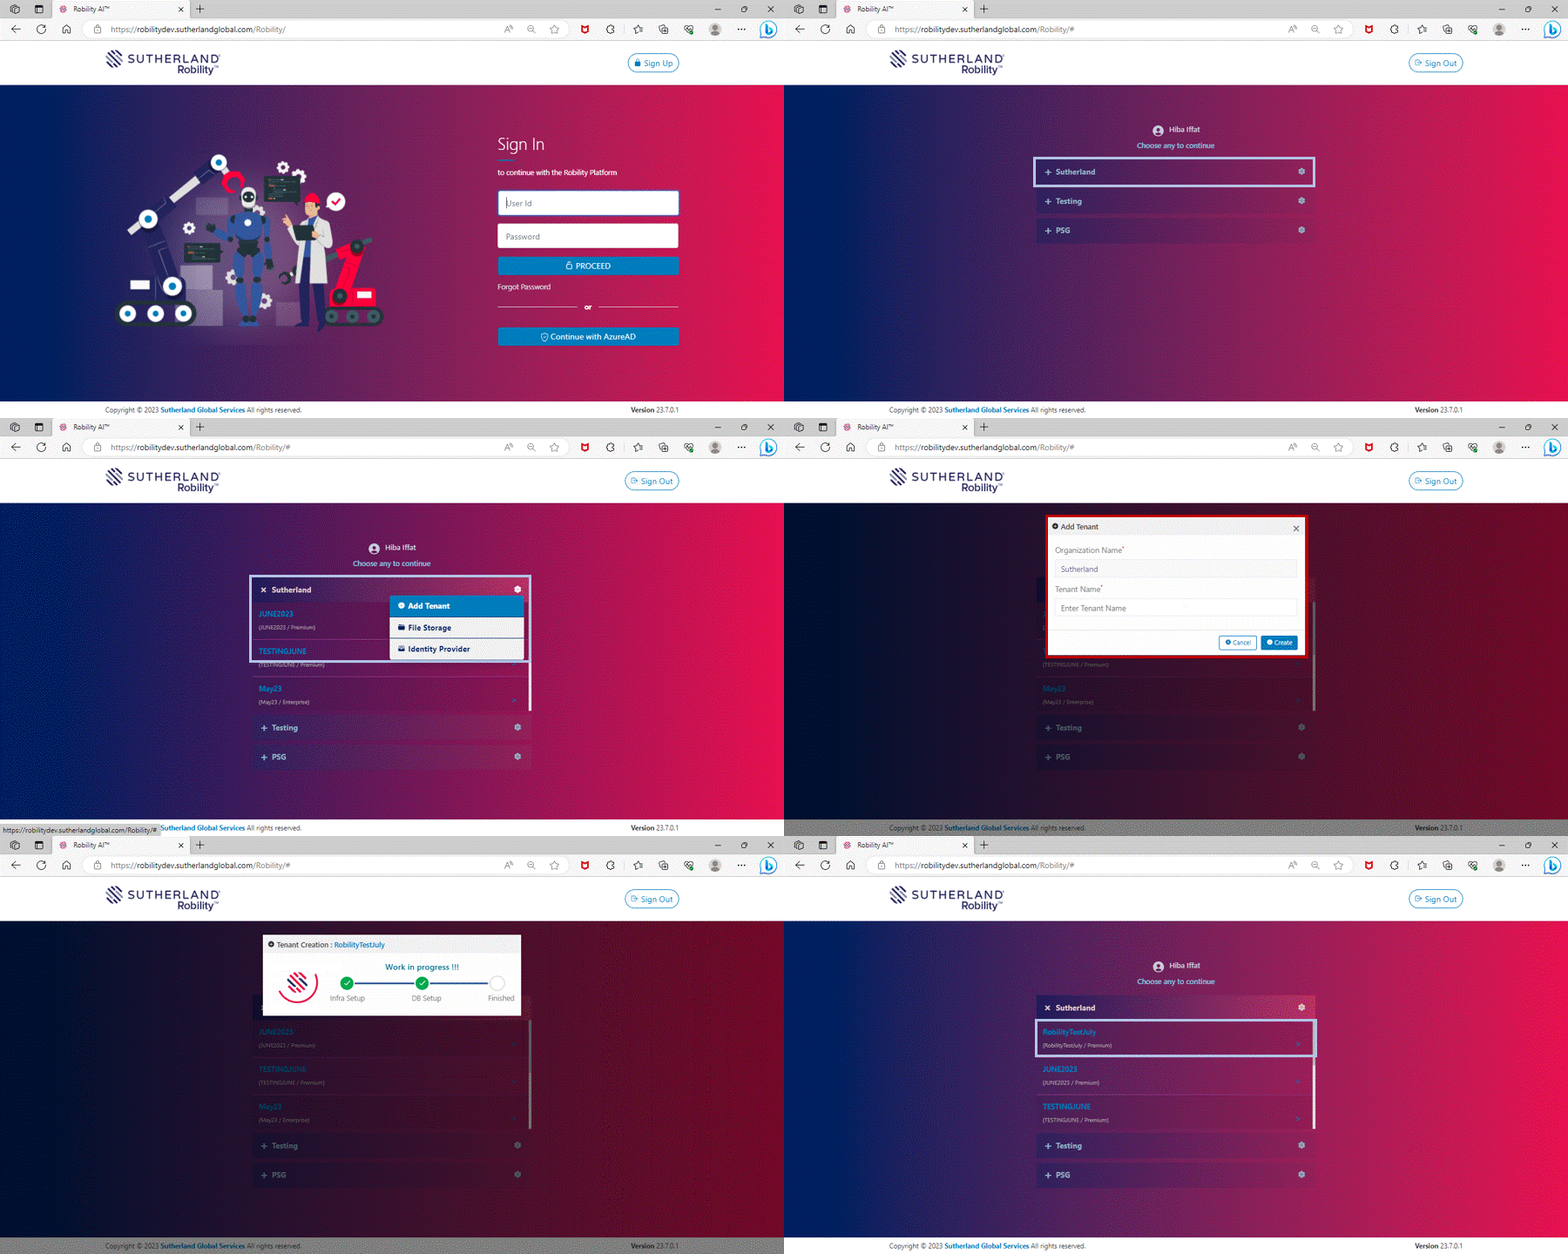
1. Login to the platform.
2. Once you logged into the platform, the user will be displayed the list of
organizations created against the business mail ID.
3. Upon clicking on the organization’s name, the list of tenants or the tenant
created against it will be displayed.
4. Click on the setting icon parallel to the organization name.
5. Choose “Add Tenant” option.
6. The Add tenant pop up appears on the screen. Enter the Tenant name in the
box. Note that the tenant will be created against the organization displayed
on the tenant creation screen.
7. Click on the create button.
8. A new database will be setting up for the created tenant. This might take
a few minutes to complete. Once the setup has been, the tenant’s name
will appear on the list.
Switching up between tenants
Users and tenant admins can easily now navigate to their other tenants. This
enables them to easily access and manage data. Follow the below steps.
· Sign out from the current tenant which you are working on.
· Login onto the platform again and switch to the other tenant account.
Tenant Status
All the active and expired tenants will appear on the list of tenants under the
organization name. The active tenants will appear with a hyperlink to navigate
to the platform. Whereas the expired tenants will appear, but the user will not
be able to access it.
How to publish the solutions when there are
multiple tenants?
To publish the solutions to the cloud, the user needs to follow the below steps.
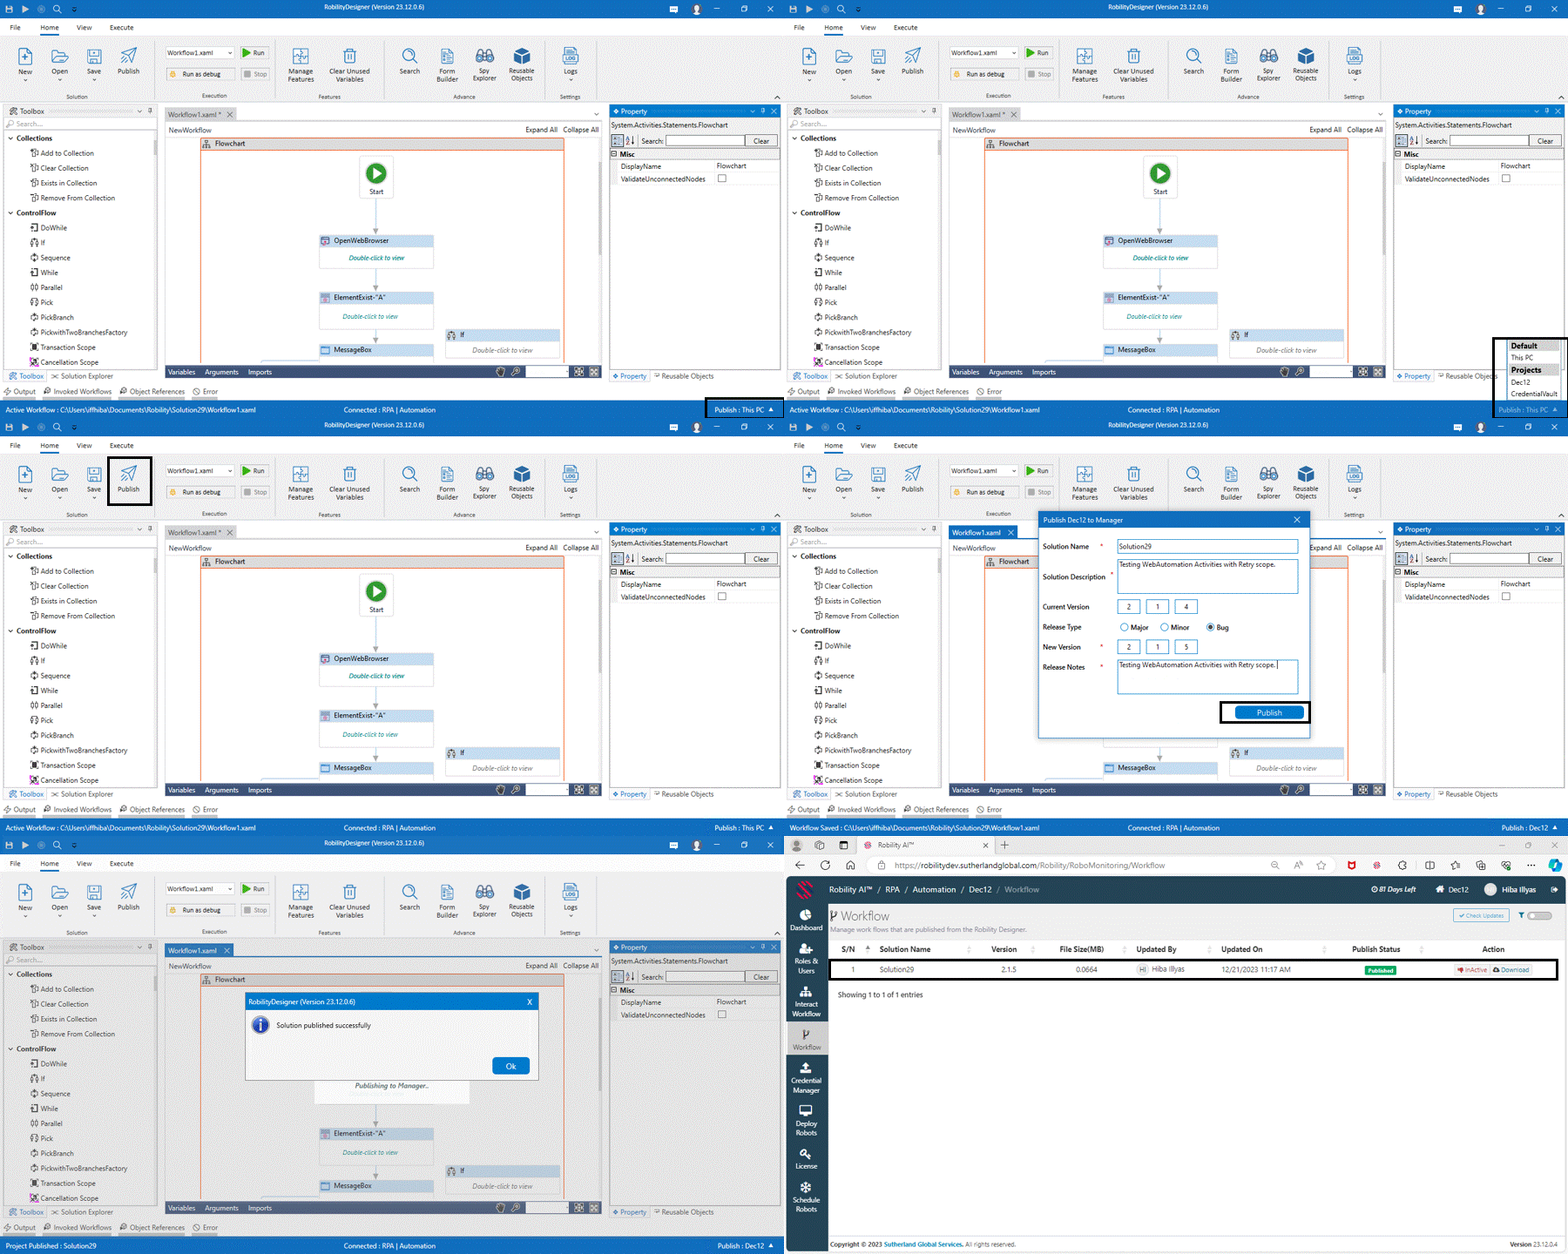
1. Save the solution.
2. Navigate to the bottom of the Designer and click on the Publish option.
3. Choose the tenant against which the user needs to publish.
4. Now, under the home menu, go to the Publish option.
5. Mention the solution description and choose the release type either as Major,
Minor or Bug.
6. Enter the release notes for the solution and click on Publish .
7. A success message will appear on the screen displaying that your template has
been published.
When the user publishes the templates, it will be viewable and re-usable to all the
users invited to the platform. The solution published can be accessed under
Workflow menu in RobilityManager.


