This activity enables the user to invoke a Python script to perform operations during
execution. It serves as a valuable tool for automating tasks that require Python
scripting, offering flexibility and customization options. Users can leverage this
functionality to interact with external data sources, perform calculations, manipulate
files, or integrate Python libraries seamlessly within their automation workflows.
To utilize this feature effectively, users need to provide the Python script they
wish to execute, along with any necessary input parameters. Once configured,
the 'RunPythonScript' activity executes the script and can capture output data,
making it an essential component for enhancing the functionality and versatility
of automation processes.
Whether it's data transformation, complex calculations, or specialized data
processing tasks, this activity empowers users to harness the full potential of Python
within their automation projects, expanding the range of automation possibilities.
Technical Reference
|
|
INPUT |
FileName: Indicates the “File name” to be chosen to run the python script. Choose the file name from the drop-down. (The files will be listed once it has been imported into designer). Refer the below documentation. |
|
Parameters: This parameter helps you to provide the “inputs” that are required to pass during the execution of the “Python script”. This field accepts collection of argument types. |
||
|
MISC |
DisplayName: Displays the name of the activity. The activity name can be customized, which aids in troubleshooting. |
|
|
SkipOnError: Specify the "Boolean" value as "True" or "False."
True: Continue executing the workflow regardless of any errors thrown. False: Halt the workflow if it encounters any errors. None: If the option is left blank, the activity will, by default, behave as if "False" were chosen. |
||
|
Version: It indicates the version of the feature being used. |
||
|
OUTPUT |
Result: It provides the ability to view the execution status of the activity. It returns values in "Boolean."
True: Indicates that the activity has been executed successfully without any errors. False: Indicates that the activity has been unsuccessful due to an unexpected error being thrown. |
|
|
Text:It helps to view the output of the activity as “values” returned as output from the script. It returns the values in “String” datatype. |
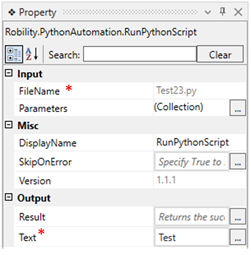
* Represents mandatory fields to execute the workflow
How to import the python file to the Designer?
To automate with the 'RunPythonScript' activity, we need to import the Python file
into the designer. Robility provides an easy way to build and execute these steps,
making it time efficient. Follow the steps below to import the file,
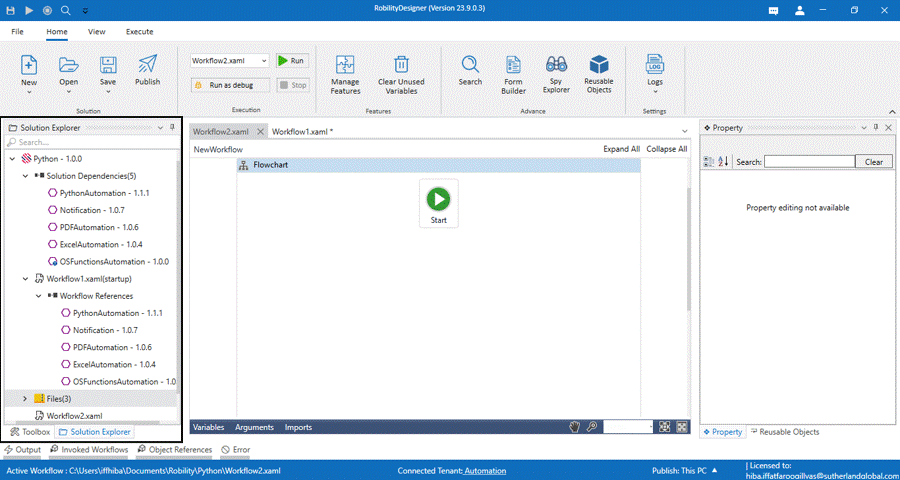
1. Launch the Designer and create a new solution named “Python”.
2. Navigate to the “SolutionExplorer” from the left-hand side of the Designer.
3. Right click on the Solution Name “Python” to open the context menu.
4. Now, choose the “ImportFiles” option from the menu.
5. The “FileExplorer” dialog box will appear on the screen, now choose the
python file and click on “Ok” button.
a. If the same file is being imported, the Designer will prompt a message
regarding a confirmation to replace the existing file that is with the similar name.
6. Once the file has been imported, it will appear under “Files” in the
Solution Explorer. (Refer the below GIF).
Use Case
This use case demonstrates how the “Python script” can be integrated into the
automation process.
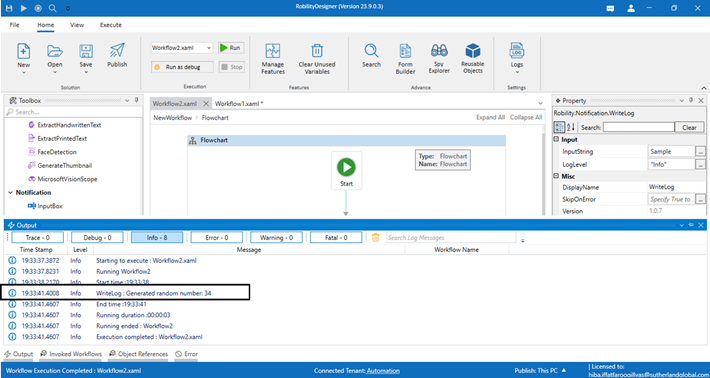
The invoked script uses the "Run Python activity" to generate a random number
between 0 to 100. It then documents this generated random number in a log file.
Refer the attached python script.
Steps to execute the bot
1. Launch the Designer and create a new solution named “Python”.
2. Install the latest “Python” and “Notification” feature from the “Manage
Features”.
3. Before building the process, click here to know how to import the “Python files”
into the designer.
4. Drag and drop the “Run Python Script” activity to the workflow and set it as
start node.
a. It helps to invoke the python script and execute it in the automation workflow.
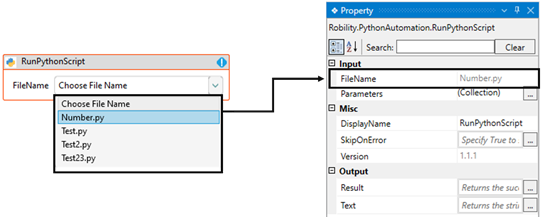
b. Double click on the activity to choose the python file.
i. In the property “FileName”, the imported files available in the Designer which are
in (.py) format will be listed in the drop-down.
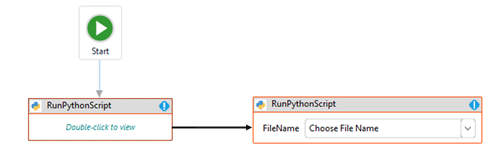
ii. Here we are choosing the python script file name as “Number.py”.
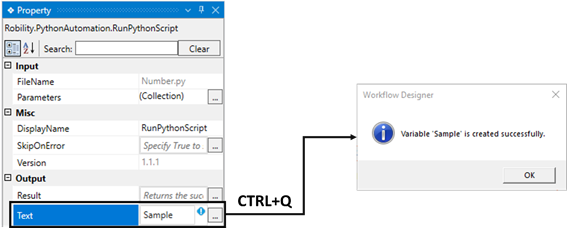
c. Navigating to the “Text” property in the output section to declare a variable.
i. There are two ways of declaring a variable –
ii. Method 1 – Click on the "Text" property within the "RunPythonScript" activity and
enter the variable name. In this case, we are using " Sample." Then, press
"Ctrl+Q," which is a shortcut key to create a variable.
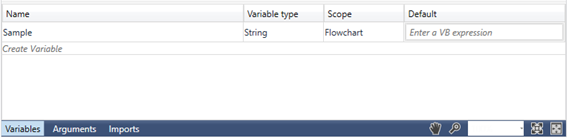
iii. Method 2 - Click on the Variables pane and enter the name "Sample ". Then,
in the "Variable Types" column, select "String" from the dropdown menu.
5. Next, place the “Writelog” activity next to the “RunPythonScript” activity.
a. Here we are using this activity to print the output returned from the “Python
Script” invoked.
b. Double click on the activity.
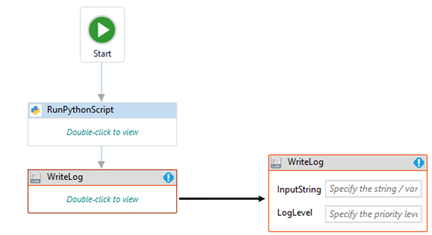
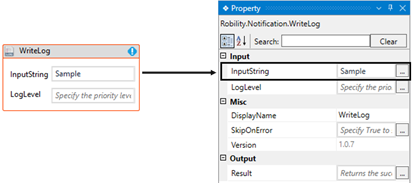
c. Provide the variable as “Sample” in the “InputString” field.
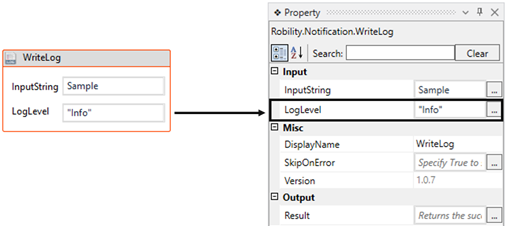
d. Next, moving to the “Log level” property, here I am specifying the log
level as “Info”.
e. To get more details, click here to refer the activity.
6. Now, save and execute the workflow.
7. The bot will generate a random number from (0 to 100) and prints the output
in the log.