
This activity is used to create a node in an existing XML file. This activity works only within
the Get XML object scope activity.
Technical Reference
|
|
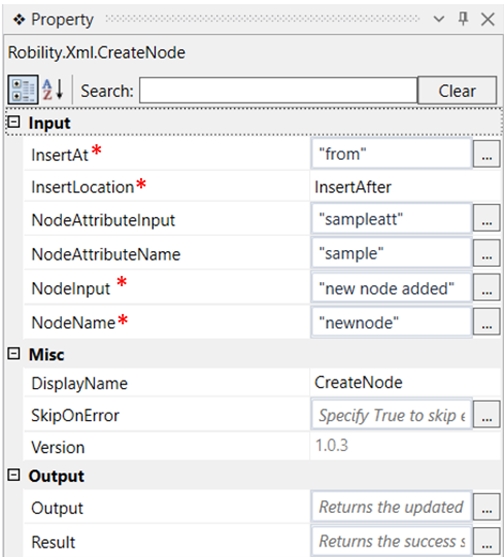
INPUT |
InsertAt: Specify the node name before or after which a node and its attribute must be created. |
|
InsertLocation: Choose from the drop down if the created node must be inserted before or after the specified node name. |
||
|
NodeAttributeInput: Specify the attribute value to be added. |
||
|
NodeAttributeName: Specify the attribute name for the value specified. |
||
|
NodeInput: Specify the value for the node to be created. |
||
|
NodeName: Specify the name of the node to be created. |
||
|
MISC |
DisplayName: Displays the name of the activity. You can also customize the activity name to help troubleshoot issues faster. This name will be used for logging purposes. |
|
|
SkipOnError: It specifies whether to continue executing the workflow even if it throws an error. This supports only Boolean value “True or False”. By default, it is set to “False.” True: Continues the workflow to the next step False: Stops the workflow and throws an error. |
||
|
Version: It specifies the version of the XML automation feature in use |
||
|
OUTPUT |
Output: Declare a variable here to see the values of the updated node. |
|
|
Result: Returns the success state of the activity. |
*Mandatory fields to execute the workflow
Use Case
The following example illustrates on how we can use this activity to create a new
node with the node name “New node” after the node value “from” with a value
“New node added” and also add an attribute named “sample” with an attribute
value “ sampleatt” to it.
Steps to execute the bot
1. Drag and drop a Get XML object activity to the workflow.
2. Specify the path of the file in which a node has to be created.
3. Drag and drop a create node activity within the scope.
4. Specify the node name before or after which a node has to be created. Here it is
“from”.
5. Choose from the drop down if the created node has to be inserted before or after
the specified node. Here it is “Insert After”.
6. Specify the attribute value to be added to the attribute within the created node.
Here it is “sampleatt”.
7. Specify the attribute name to be added to this newly created node. Here it is
“sample.”
8. Specify the value of the node. Here it is “new node added”.
9. Specify the name of the node to be added. Here it is “New node.”
10. Drag and drop a save XML activity to this workflow.
11. Specify the same file path mentioned in the get xml object activity to the path here.
12. Execute the workflow and open the file again to see the newly created node and
its values.
The bot executes the workflow and creates a new node with the given values.