
Projects are those that are created based on the requirement of the client
and the process. We can assign robots to each project based on which the
automation process is executed in the specified system.
How to navigate to the Robot Menu?
1. Login to https://robilitydev.sutherlandglobal.com/Robility
2. Click on projects from the menu tab.
3. From the projects screen, click on Go against the project into which the robot must
be added.
How to add a Robot?
1. In the robot screen, click on add from the right-hand side top corner.
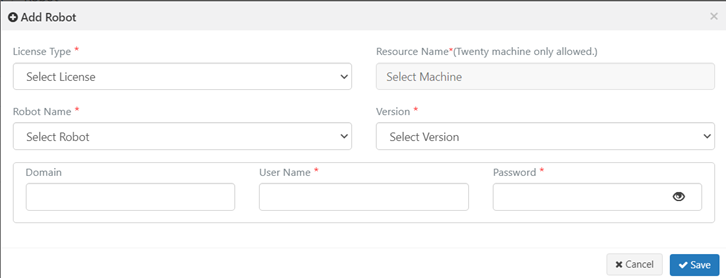
2. The add robot screen pops up.
|
|
License Type: Select the license type from the drop-down list. The license type in the drop down is seen based on the type of license chosen when we add the machine. |
|
Resource Machine: Based on the license type chosen, the machines are listed, and we can choose from the list. These machines are the ones that are added in the machines screen, and it is seen based on the license type chosen. |
|
|
Robot Name: Based on the machine chosen, the robot’s name is listed (this is the workflow deployed from the designer), and we can choose the robot to be assigned for the machine. Once we choose the robot, the release note, published by and Published date displayed. |
|
|
Version: Select the version of the robot to be deployed to the machine. |
|
|
Domain: Mention the domain name. |
|
|
User Name: Specify the system username. |
|
|
Password: Specify the system password. |
3. Fill in all the mandatory details and click on add.
4. The robot is added to the project screen.
5. Once the robot is added, we can initiate the run from this robot screen.
What does each of the tag in the Robot screen
mean?
![]()
1. Serial number- Shows the count of the number of machines added.
2. MachineName – The name of the machine to which the robot is assigned is seen
here.
3. Robot - The name of the robot assigned to the machine is seen here. (This is the
name of the workflow deployed from the designer)
4. Version – The version number of the assigned robot is seen here.
5. Domain User – The domain and the username for the system is seen here.
6. Status – The robot has different status based on its execution in runner.
Idle – When the robot's execution in the runner is complete or the run has not yet
been started from the manager, this status may be observed. When the bot is in
this state, we may click the run button to start the runner execution.
Run Initiated – This status can be seen when we click on run against the robot and
the run is initiated. Once the run has been initiated, we will not be able to edit or
remove the bot until the execution is completed in the runner.
To Check - When a robot's execution is interrupted by an error and the runner is
unable to properly continue the execution, this status is shown. In these circumstances,
we can examine the log file from the runner to identify the issue.
Stop Initiated – This status can be seen when the stop button is clicked during the
execution of an activity. To restart the bot, we have to use the getstopstatus activity.
7. Key – Copy the license key for the specific machine and enter this as the activation
code for the runner.
8. Action – There are four different actions that we can use from the runner which are run,
stop, edit and remove.
Run- This can be used to initiate the bot in the runner.
Stop – This can be used to stop the workflow during execution. This requires a stop
activity to be used in the workflow.
Edit – This can be used to edit the bot assigned to the machine.
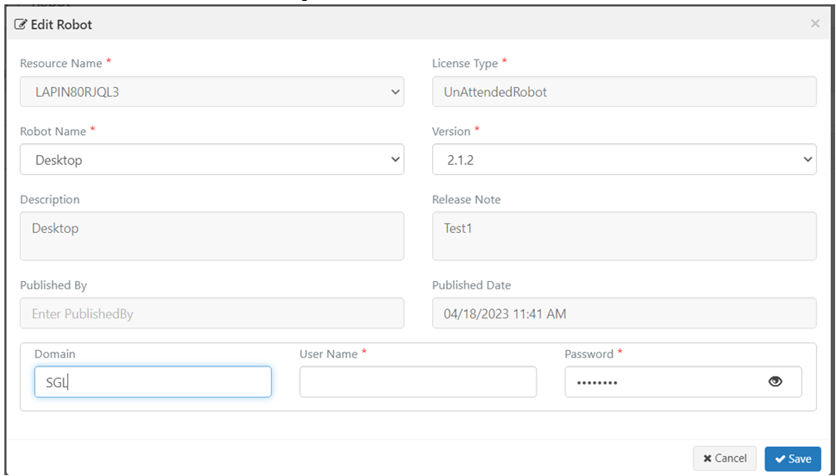
As seen in the above image, we can edit only the robot’s name, version, domain, username and
password.