
Robility Manager allows the Tenant Admin/Organization Admin to invite users to the platform.
The invitation process for each user is secure and automated. The invited users can
access the platform with their own credentials. The platform also allows the user to monitor
and manage the users' access to the platform. The user can be assigned different access
roles for different workspaces.
Before assigning a user duties and responsibilities inside a project, we must first invite
the user using one of the basic roles accessible in the platform, such as Developer, Robility
Admin, Robility AI admin, Robility AI User, Project Admin, or Tenant admin. Different
responsibilities can be allocated to users within the project depending on the role that was
assigned to them.
There are two different levels in Manager. The tenant level admin and the project level admin.
Tenant level admin - An administrator at the tenant level has full access to the platform.
Project level admin - An administrator at the project level has access to everything within the
project.

Inviting Users
Add user
When inviting a user, we need to define the first name, last name, Email address and
select the role suitable for the user.
1. Login to the Robility Manager as tenant admin.
2. Once we click on invite, the screen to manage users and manage roles opens.
3. In the top right of the manage users screen, click on add and the screen to add
user opens.Here we need to add the first name, last name , Email address and
select the role to be assigned to the user.
4. To add more users, click on add member with required details, and click on invite.
An invite is sent to the concerned member and once accepted the user is added.
The invitation is valid for 48 hours and the user must accept the invite within that
time.
5. Once the user accepts the invite, the name of the user is seen on the screen
with the role assigned to them.

Activating and inactivating the Users
To activate and inactivate a tenant we can use the thumbs up or thumbs down icon
against the respective tenant.
![]()
![]()
![]()
![]()
1. Click on the thumbs down icon to inactivate a user.
2. Click on thumbs up icon to activate the user.


Editing user details
1. Any changes to be made to the user profile can be done only by the tenant admin.
2. We can change only the roles assigned to a specific user.
3. We will not be able to change the name of the user once added.
4. Click on the edit icon to make any changes to the role of the user.
5. Select the role and click on save.
All the above actions are done on the manage users screen.
What does manage roles do?
The information about the default roles is available on the manage roles page in the
invite menu. Each position includes a user link next to it that displays the person's data
for that particular role.It does not display any data if there is no user assigned to a certain
role.
Roles and Users in a project
Once we add the users into manager, we can then navigate to the project in which we are
working and assign roles and access rights to the specified user for that project.
Roles are a collection of permissions given to users. It shows the access granted to each
user for the specified project. Roles can be assigned to groups of users or to individuals
based on the demand of the project.
|
Manage Users |
Manage Roles |
|
Allows you to manage permissions at the level of an individual user. This enables you to select exactly what an individual user can see and edit. |
Allows you to manage permissions at the role level. For example, if you have a reviewer role, you can see everything but edit nothing.
|


![]()
How to navigate to the roles and users screen?
1. Login to Robility Manager.
2. Click on projects from the main menu.
3. In the project screen, click on Go against the project in which the roles and users must be
edited.
4. Click on Roles and users from the left-hand menu.
Map Users
Once we move to the roles and users screen, we can map the users with the required
access.

1. Click on the map user icon.
2. A screen pops up with the name of the users and the roles.
3. Select the users and choose the role to be assigned.
Manage roles
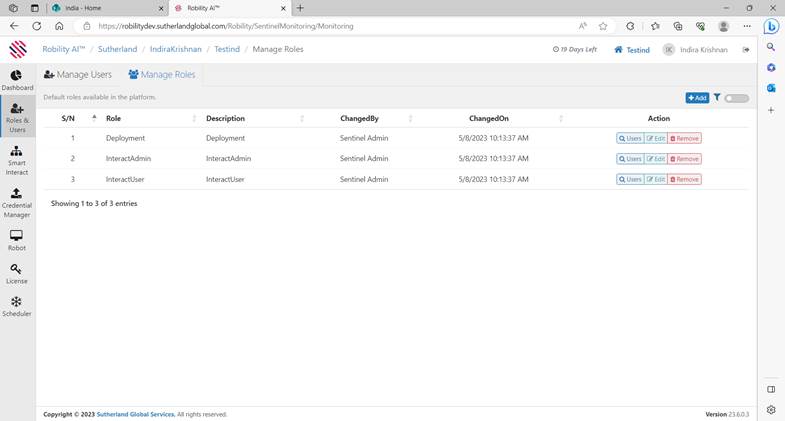
The manage roles screen has the different roles available for a user in a project.
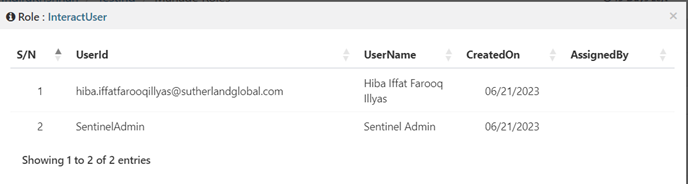
This screen allows us to view the users who are mapped against each role. Clicking on users,
helps us to view the users who are assigned for the particular role. In the below image, we can
view the users assigned for the Interact user role.
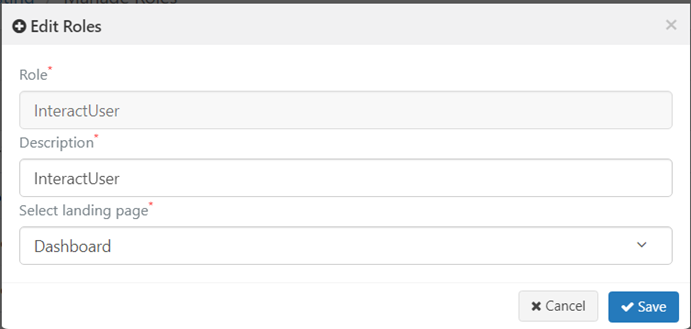
It also allows the user to edit the description for the role and change the landing page for each
role based on the access level. Here the name of the role cannot be edited.
How to add a role to a project?

1. Navigate to the manage roles tab in the roles and users screen.
2. Click on add from the top of this screen.
3. The add roles page opens.
4. Mention the role that you wish to create. Here we add Business analyst.
5. Mention the description for the given role. Here we mention Business analyst
6. By default, the dashboard is selected as the landing page. We can change the landing page
as needed. Here we change it to credential manager.
7. Click on save.
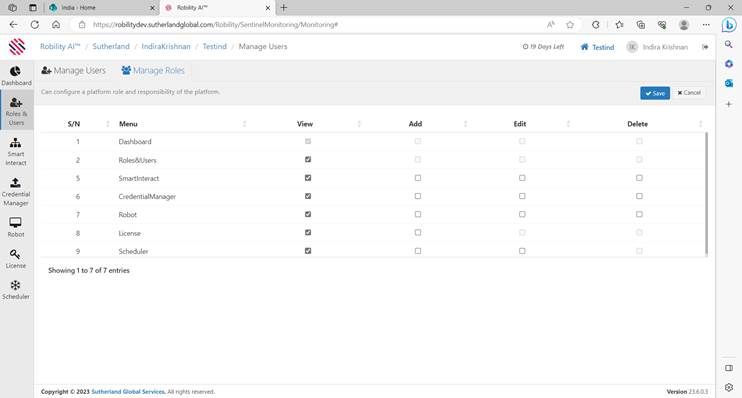
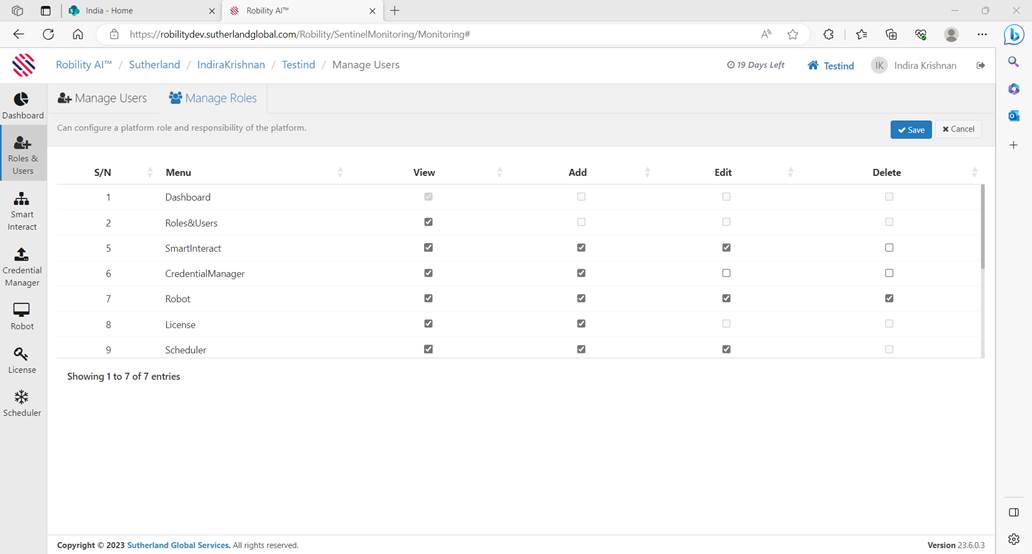
Once we click on save, the screen to grant access for the specific role pops up. We can configure
access for the created role by clicking on the check boxes on this screen. As per the image below
the business analyst will have access to everything that has a check in the box.
Once done click on save to add the role to the project. The newly created role can be seen on the
screen. To remove a specific role from a project, just click on remove and ok on the confirmation
message to remove the role from the project.
