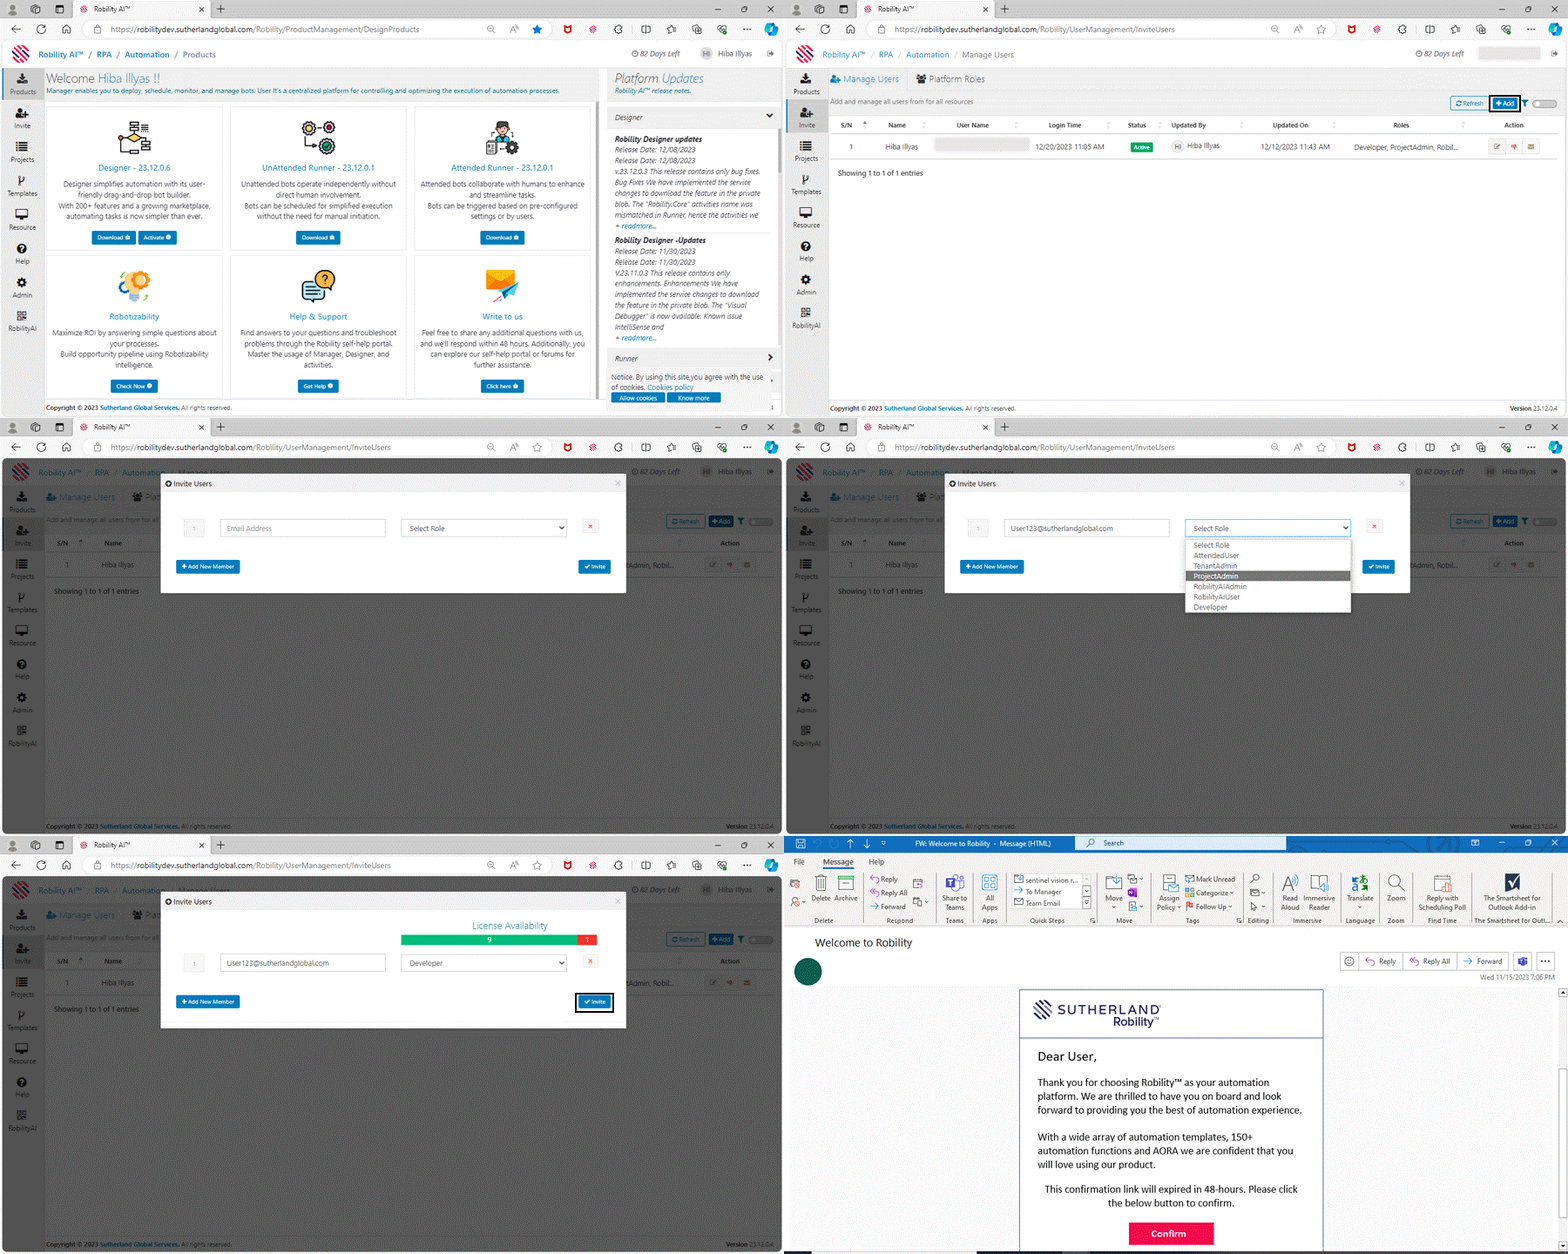
Robility Manager allows the Tenant Admin/Organization Admin to invite users
to the platform. The invitation process for each user is secure and automated.
The user can be assigned different access roles for different workspaces.
The different access role defines such as Attended user, Developer , Robility
AI admin, Robility AI User, Project Admin, or Tenant admin. Different responsibilities
can be allocated to users within the project depending on the role that was
assigned to them.
Steps to invite the user
When inviting a user, we need to define the first name, last name, Email
address and the suitable role for the user.
Note: The following process can be done only by Tenant Admin.
1. Login to the Robility Manager and select your respective Tenant.
2. On the left-hand side, select the “Invite” option, and you will be navigated
to user and role management screen.
3. In the top right of the “Manage users” screen, click on “Add” and the
screen to add user pop ups.
a. Here we need to add the first name, last name , Email address and select the
role to be assigned to the user.
4. An invite will be sent to the concerned member and once accepted, they
will be added to access the platform.
5. Note: The invitation is valid for 48 hours and the user must accept the invite
within that time.
6. This is the default invitation process for the users. If your tenant is accessed
through “Azure AD” authentication, click here.

