This activity helps the user to execute a “Macro” method which has already been
created in the provided input excel workbook. This activity works within the Excel
scope activity.
Technical Reference
|
|
INPUT |
MethodName: This parameter helps to provide the “Macro” method name which has been created in the provided input excel sheet. This parameter accepts values in the “String” datatype. |
|
MISC |
DisplayName: Displays the name of the activity. The activity name can be customized, which aids in troubleshooting. |
|
|
SkipOnError: Specify the "Boolean" value as "True" or "False."
True: Continue executing the workflow regardless of any errors thrown. False: Halt the workflow if it encounters any errors. None: If the option is left blank, the activity will, by default, behave as if "False" were chosen. |
||
|
Version: It indicates the version of the feature being used. |
||
|
OUTPUT |
Result: It provides the ability to view the execution status of the activity. It returns values in "Boolean."
True: Indicates that the activity has been executed successfully without any errors. False: Indicates that the activity has been unsuccessful due to an unexpected error being thrown. |
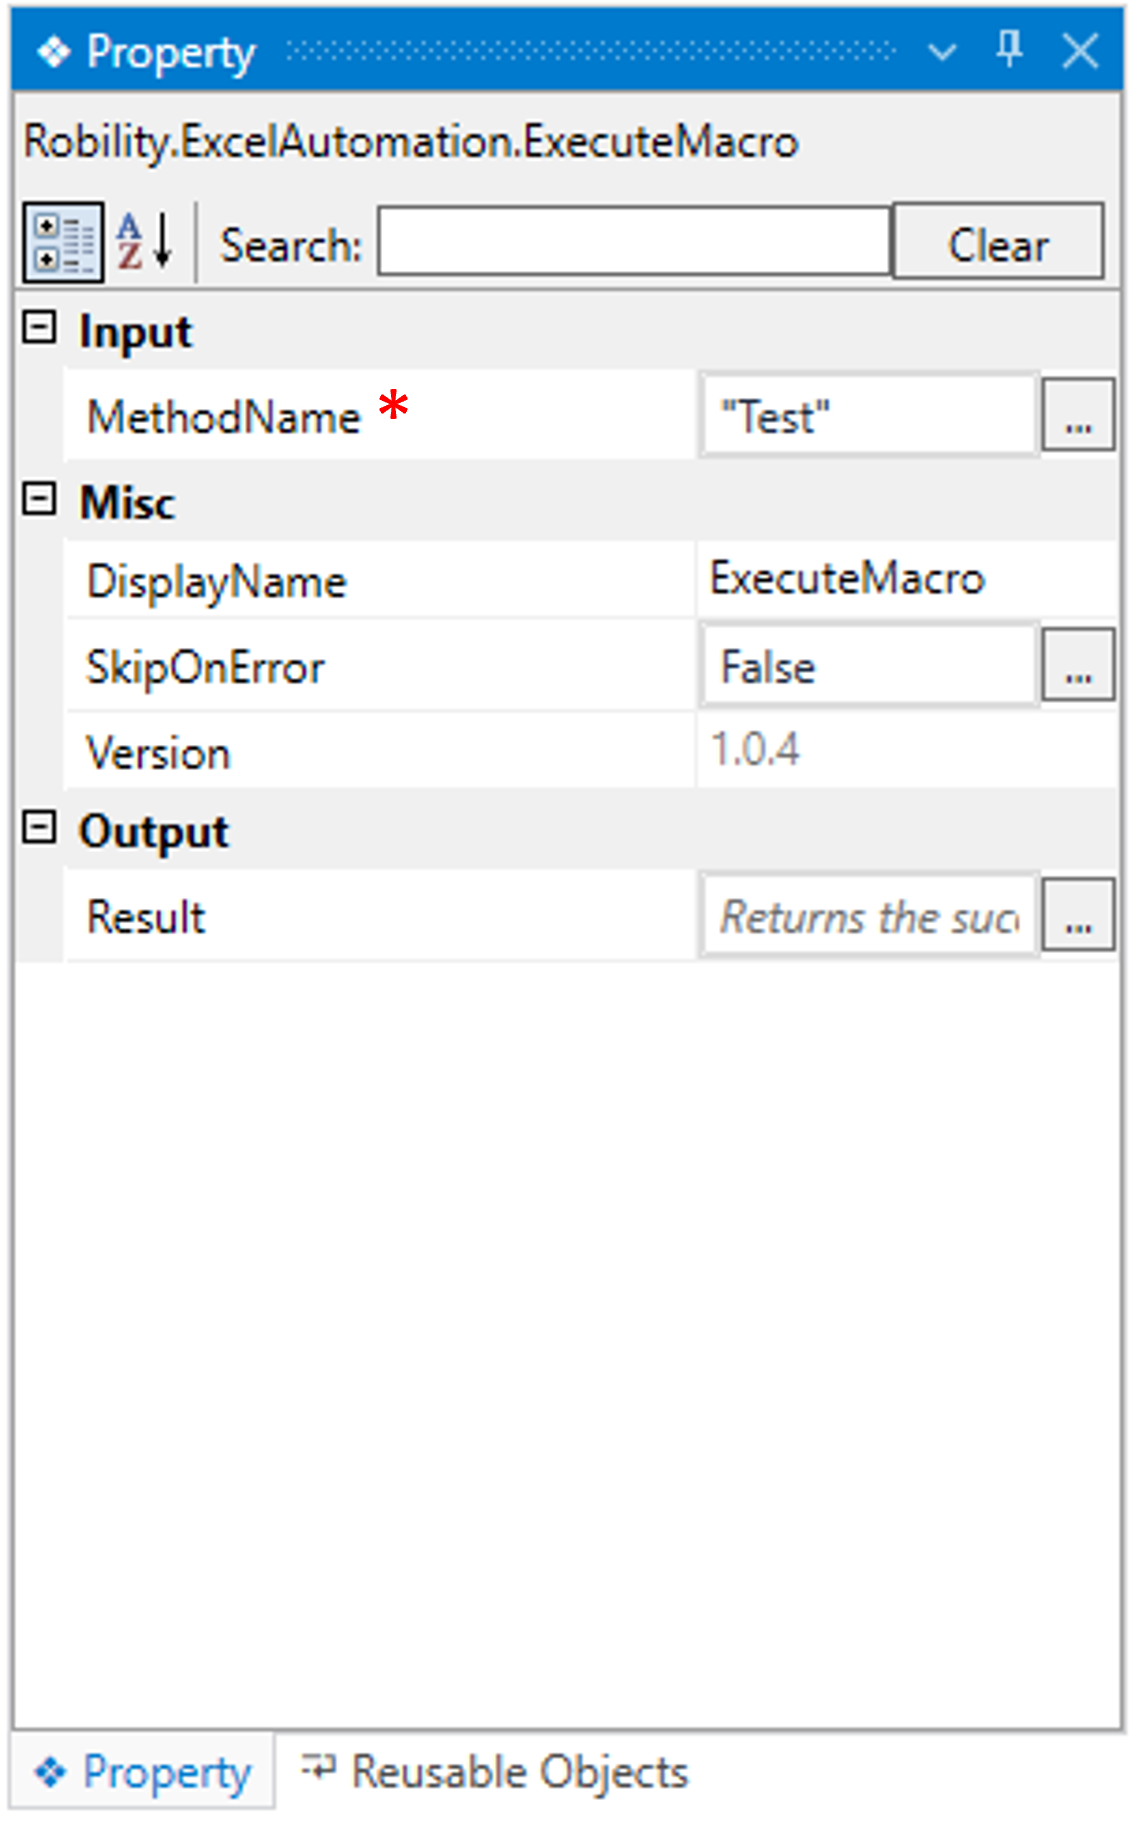
* Represents mandatory fields to execute the workflow
What is “Macro” method and why is it needed?
In Excel, the term "macro" refers to a recorded sequence of actions or a set of Visual
Basic for Applications (VBA) code that automates tasks.
Benefits:
1. Macros can automate repetitive tasks in Excel, such as data formatting,
calculations, or data import/export. This can save a significant amount of time
and reduce the risk of errors.
2. It is useful for performing complex calculations or data manipulations that may
be impractical or error-prone to do manually.
3. This method allows you to customize Excel to suit your specific needs. You
can create custom functions, add-ins, or user-defined forms using VBA.
4. For tasks involving a large amount of data, macros can be used to filter, sort,
and analyze data more efficiently.
5. It can create user interfaces (forms or dialog boxes) to interact with Excel users,
making it easier for non-technical users to perform specific tasks.
6. They help to ensure consistency in data processing, as it will follow the same
set of instructions each time they run.
7. It can also be used to automate the generation of reports and charts, saving
time in preparing documents.
How to create “Macro” in Excel sheet?
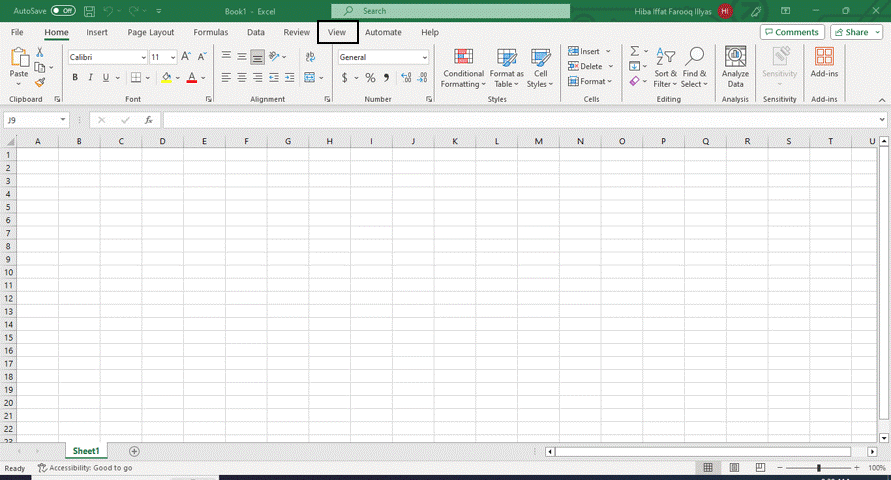
1. Open or create a blank excel sheet.
2. Now, select the “View” menu on the top of the sheet.
a. Here , you will find the “Macro’s” as the last option on the Menu.
3. Select the “Macro’s” drop-down menu, it will display a context menu.
a. Here we are going to choose the “View Macros” from the drop-down.
b. You can also record the steps that needs to be automated using the “Record
Macro” option and provide the name in the “ExecuteMacro” activity.
4. Once you click on the “View Macros” option, a dialog box will appear on the
screen.
a. Here, provide a name for the “Macro” in the box as “Welcome Message”.
b. Now, the “Create” option will be enabled, click on it to write the code.
c. The VBA code window appears on the screen.
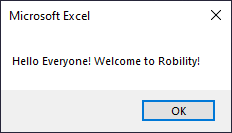
d. Here I am providing a sample VBA code as
“MsgBox "Hello Everyone ! Welcome to Robility !"”.
e. Now, save “Excel with macro enabled workbook extension” and close it.
5. That’s it, a simple Macro code has been created. Refer the below GIF.
Here’s an example of how “ExecuteMacro” activity works –
In the following example, I am using a blank “Excel sheet” in which I have
already created the “Macro” steps to automate. Refer the steps to create Macro.
1. Open or create an existing solution.
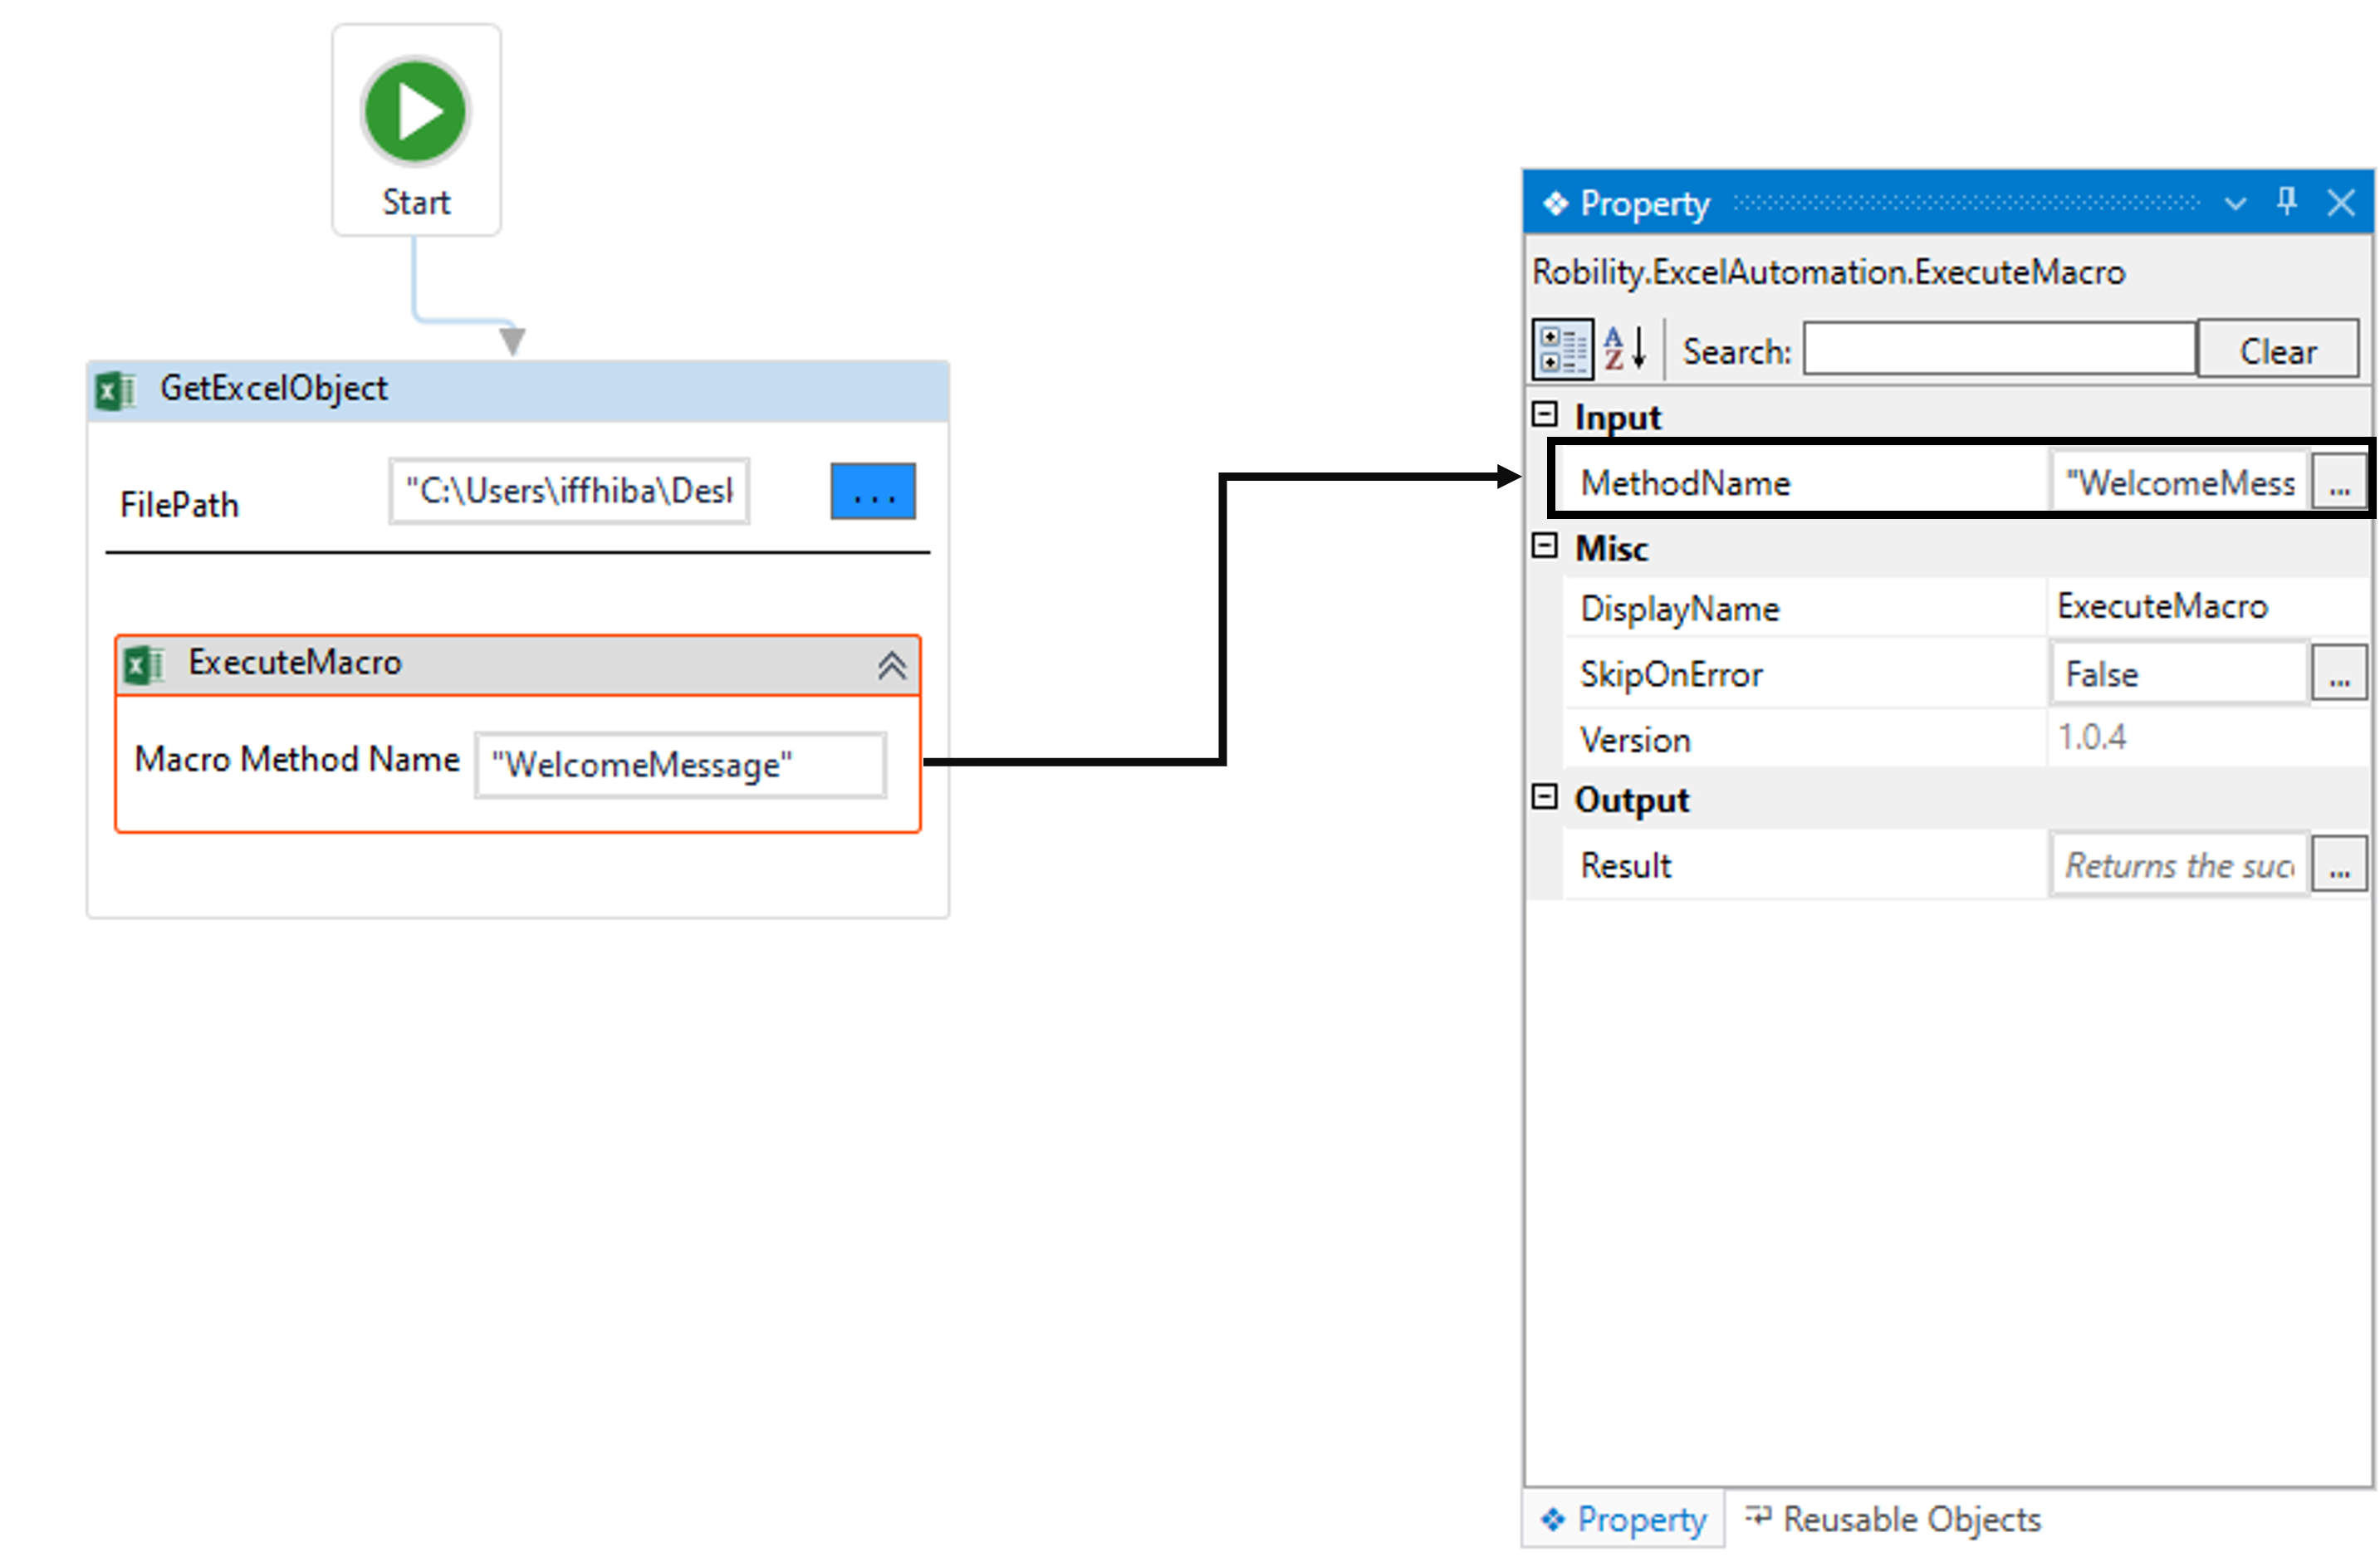
2. Place the “GetExcelObject” activity to the workflow and set it as start node.
a. Enter the “filepath” of the excel file or select the “Three dots” and choose the
“Excel File” from the system. (Attached the sample excel file).
b. Here I am choosing the file as “Macro.xlsm” that contains the “Macro” method
with it.

3. Now, placing the " ExecuteMacro " activity within the scope activity.
a. In this case, I have already created the “Macro” method as “WelcomeMessage”
in Excel and executing it using this activity. Refer the steps to create Macro.
b. Double click on the activity to provide the method name.
i. Here I am providing the “MacroMethodName” name as “WelcomeMessage”.
4. Now, save and execute the workflow.
The bot will execute the workflow and shows the message in “Excel sheet”.
Below is a sample of the output of the activity.